• Lifestyle
    • Blog
  • Twins
    • Twin Pregnancy
  • Recipes
    • Smoothies
    • Lunch
    • Dinner
    • Dessert
    • Snack
  • Guides
  • About
  • Free 3-Day Detox PDF

Love. Lean. Life.

Hello, Simple Living

Best High Chair Roundup

Lifestyle, Parenting, Raising Twins, Twins · May 2, 2020

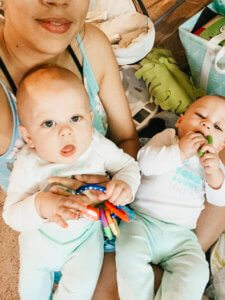
When choosing high chairs for your baby, there are so many options that it can be overwhelming. It’s even more so when you have twins and need to consider storage and space for two high chairs.

Below are all the high chairs we considered as well as the main pros and cons from reviews left by customers. This really helped us make our decision. There were many considerations but most of it came down to space, how easy it was to break down, and if it was eco-friendly. Depending on your needs you can see which of these options would be the best for you. 


Summer Infant Pop and Sit Portable High Chair 

BEST FOR: Traveling

Features:

  • 3-point safety harness 
  • Removable, machine-washable fabric
  • Collapsible

Pros:

  • Price < $50 
  • Portable, weight of chair (5 lbs), maximum weight 40 pounds 
  • Can easily take on trips – comes with a bag for easy transport 
  • Sturdy

Cons:

  • Leg holes determine how long child can use (customers report cutting or altering leg holes) 
  • Small tray


Ingenuity Trio 3-in-1 High Chair 

BEST FOR: Growing With Your Child

Features:

  • Convertible (becomes booster and toddler seat) 
  • 3-point and 5-point harness, accommodates toddlers up to 50 pounds 
  • Removable, machine-washable fabric 
  • Removable dishwasher-safe tray

Pros:

  • Price < $75 
  • 3-chairs-in-1 (can be used as a high chair, toddler chair, or booster seat)

Cons:

  • Crevice where crotch strap is anchored allows food and liquid to get in and 10 screws must be taken out to access this space to clean it (reviews have reported mold, maggots BUT people report using tape or other items to seal the hole)
  • Chair weight 20 pounds
  • Tray can be difficult to adjust
  • Not collapsible
  • Wheels can have issues rolling


Evenflo Symmetry Flat Fold High Chair 

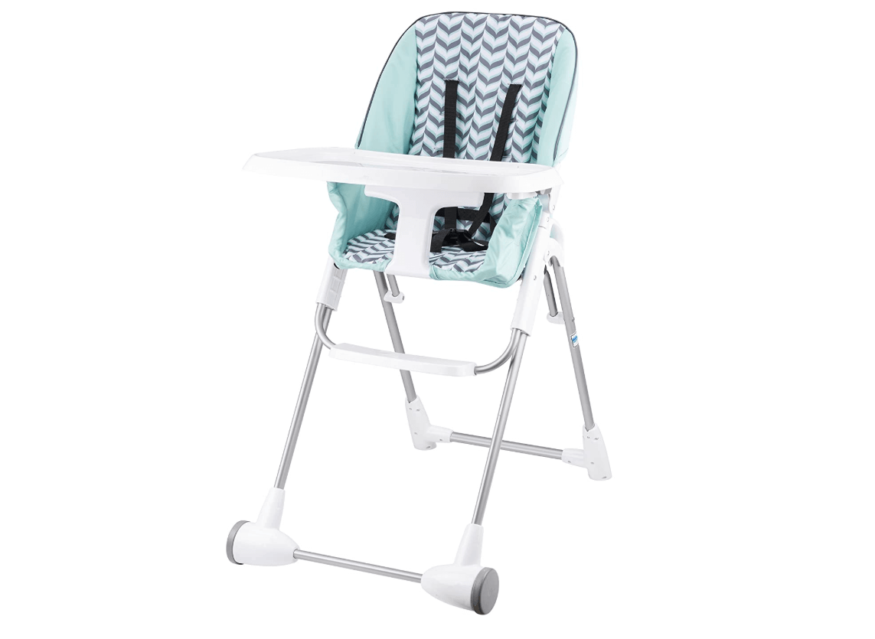
BEST FOR: Folding for Storage

Features:

  • Folds flat 
  • Machine-washable seat pad 
  • Dishwasher-safe tray liner
  • 3 tray positions
  • 3- or 5-point harness
  • Supports up to 40 pounds

Pros:

  • Large tray 
  • Folds easily 
  • Easy assembly 
  • Storage pocket in back 
  • Price $65

Cons:

  • Two hands required to remove tray
  • Difficult to maneuver baby’s legs in and out of seat due to T-bar
  • Tray slightly tilted so items roll toward the baby


Abiie Beyond Wooden High Chair With Tray 

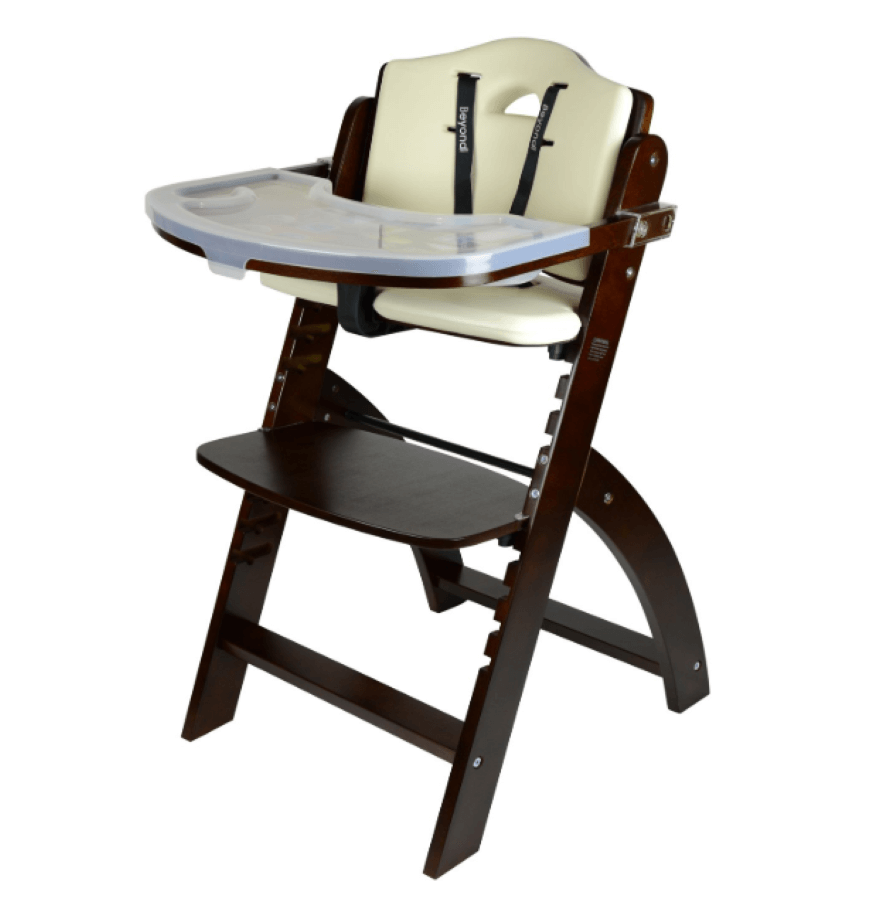
BEST FOR: Eco-Conscious Households

Features:

  • Suitable for age 6 months to 250 pounds 
  • 3- or 5-point harness
  • Anti-Microbial Heat Sterilization – the wood went through a state-of-the art pressure-assisted high-temperature sterilization process which ensures a hygienic environment
  • One-hand removable tray cover is dishwasher safe 
  • Waterproof cushion

Pros:

  • Wood harvested using sustainable forestry practices
  • Chair is recyclable and biodegradable
  • Blends with furniture 
  • Smaller footprint
  • Recommended by occupational therapists and speech therapists for children with disabilities

Cons:

  • Higher price tag $195
  • Smaller tray size does not accommodate most silicone baby plates


4moms High Chair 

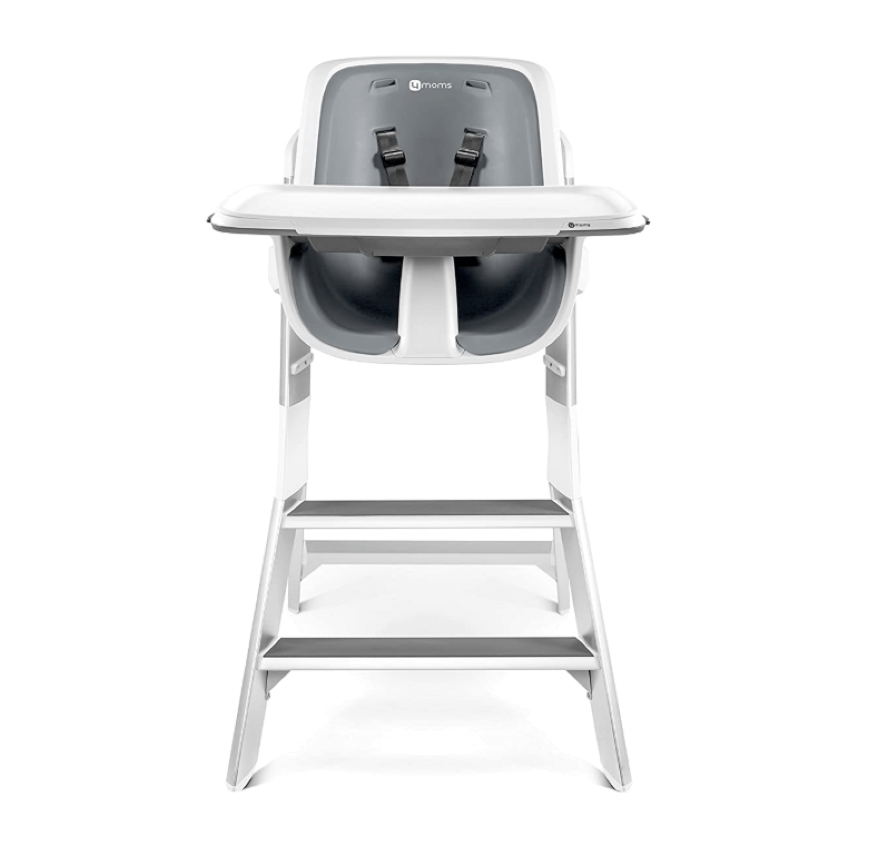
BEST FOR: One-Hand Breakdown

Features:

  • One-handed magnetic tray attachment
  • 3 height positions
  • 2 tray positions
  • Dishwasher safe tray liner
  • Max weight 60 pounds

Pros:

  • No fabric to clean 
  • Smaller footprint
  • Sleek design 
  • Magnetic feeding accessories available

Cons:

  • Price $300
  • Kiddos can accidentally or intentionally kick the tray off 
  • Crotch strap is not adjustable making it unusable for bigger kids


JOOVY Nook High Chair  

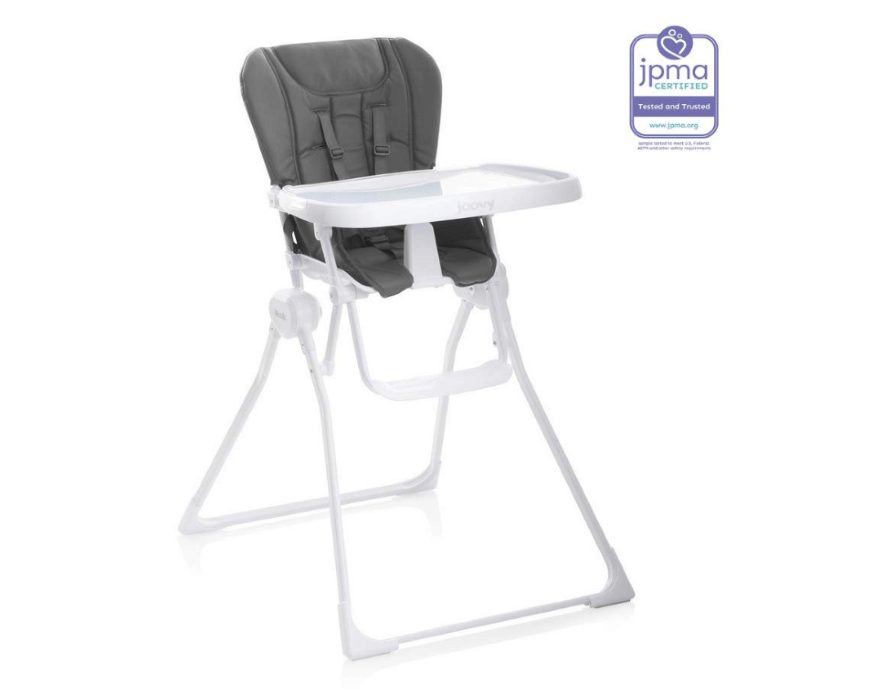
BEST FOR: Pediatrician Recommended

Features:

  • Folds just like a beach chair
  • Removable and adjustable swing open tray
  • Max weight 50 pounds
  • 5-point harness

Pros:

  • Larger tray with dishwasher safe insert
  • Leatherette seat cover wipes clean
  • Chair is 15 pounds

Cons:

  • Larger footprint
  • Straps and crevices difficult to clean
  • Recline is not adjustable and some find that it causes children to slouch
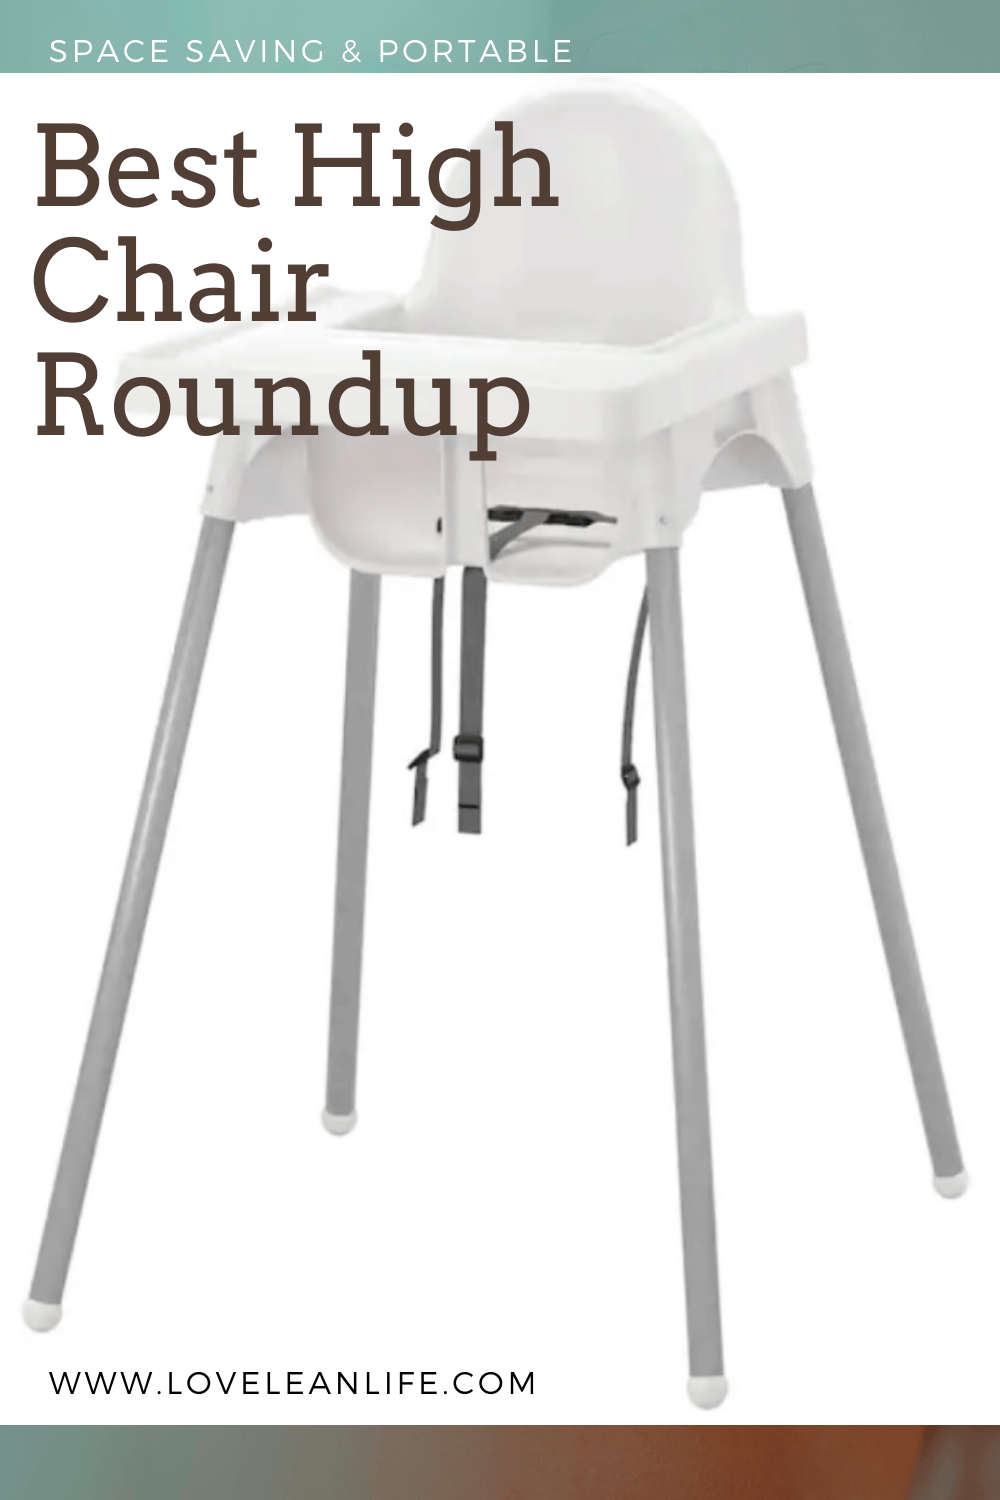
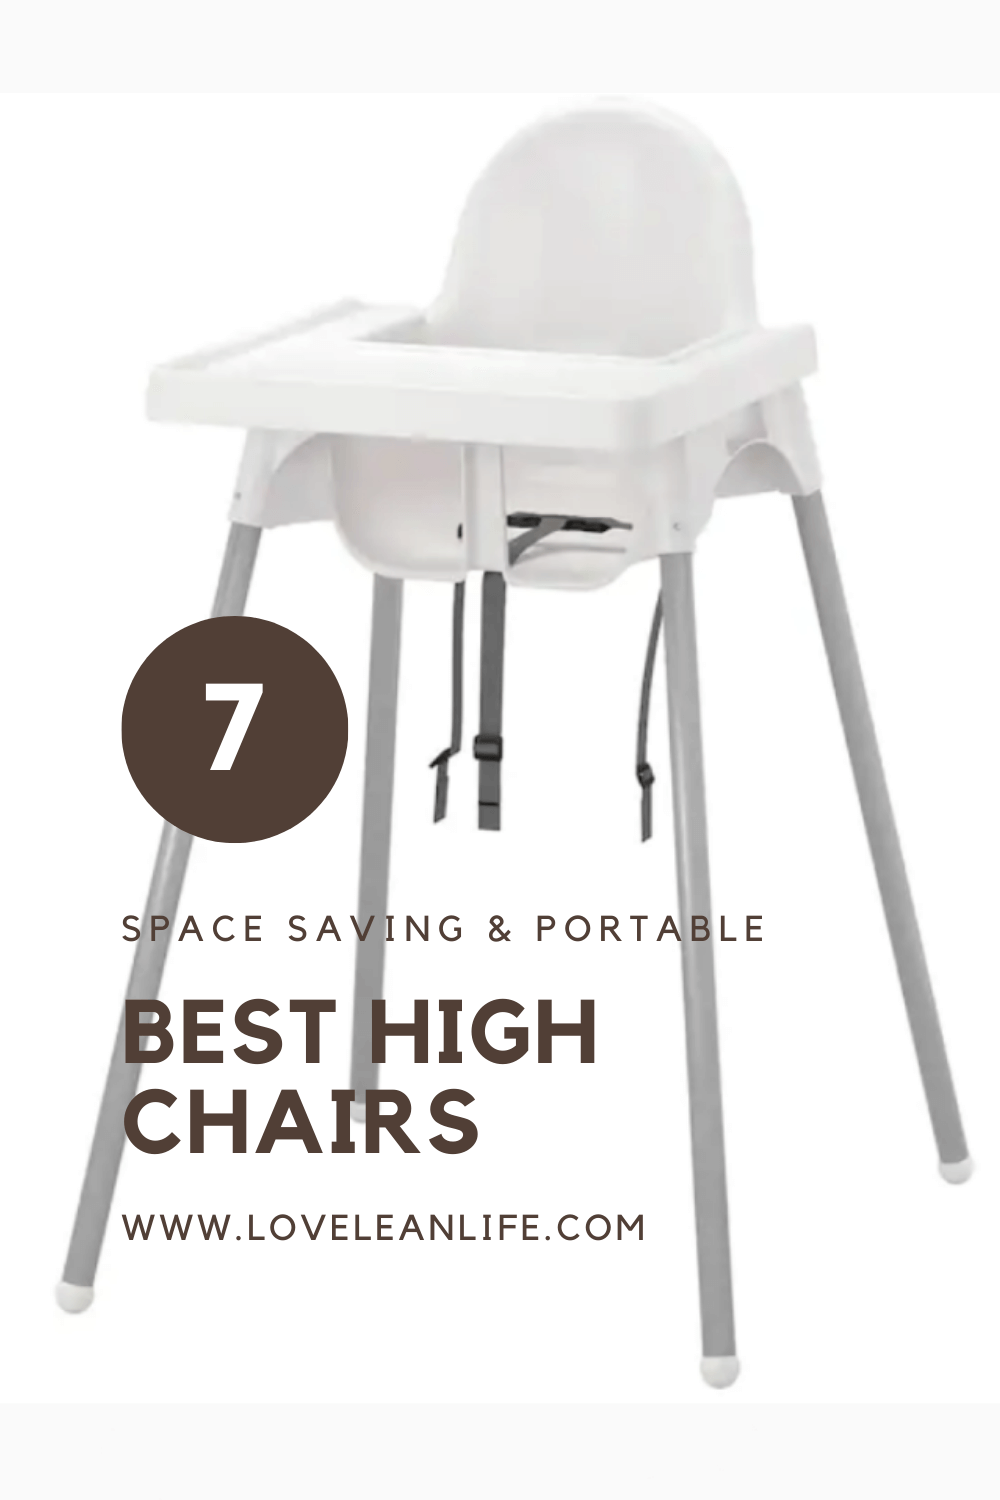
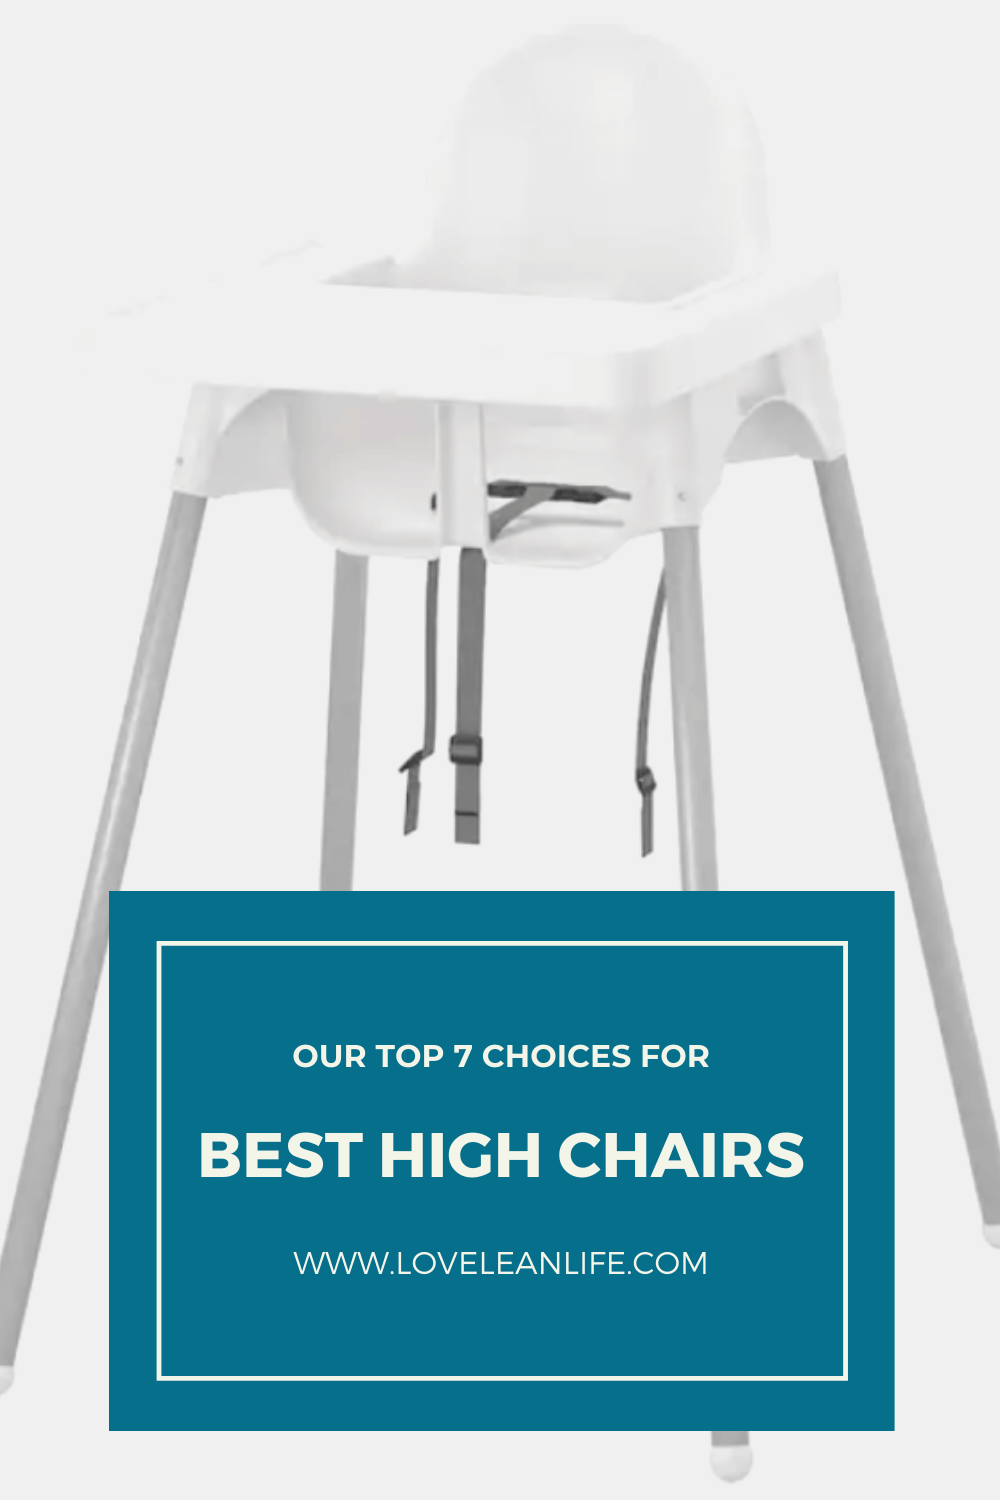
 

IKEA Antilop 

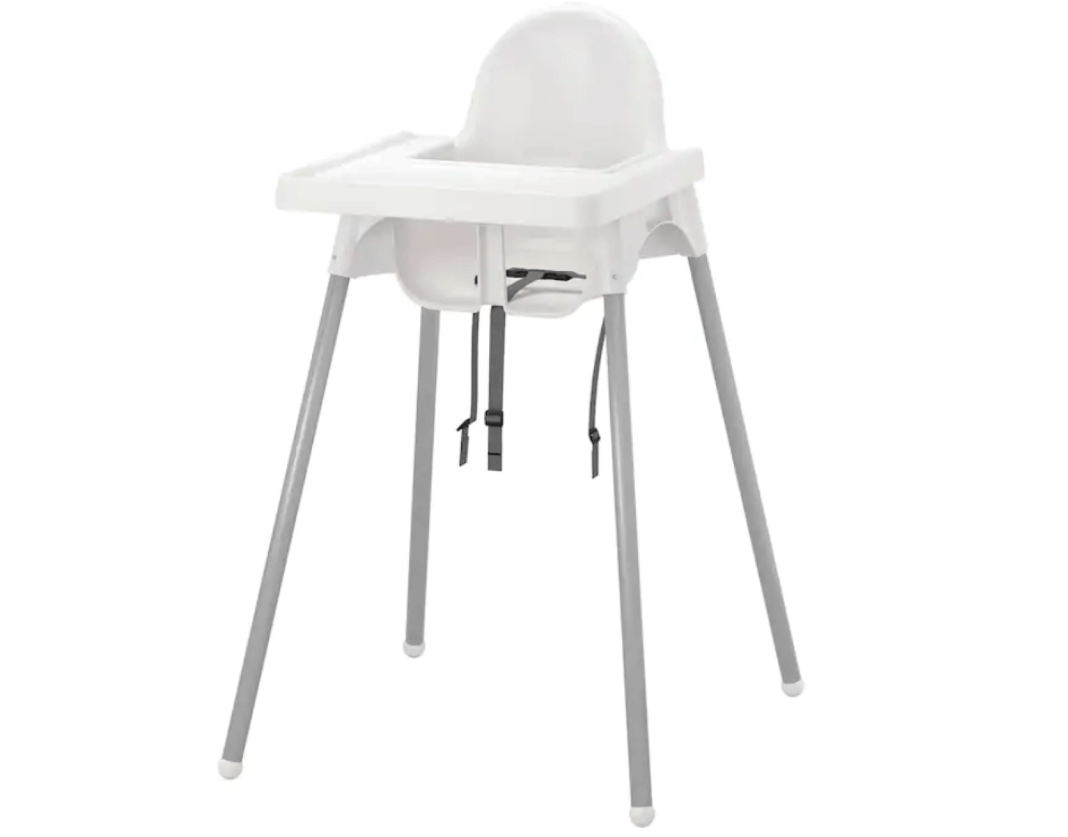
BEST FOR: Best for Twins

Features:

  • Stackable
  • Breaks down completely for portability

Pros:

  • Padding comes out easily 
  • No crevices to clean
  • Price $20  
  • Footrest and other accessories made to fit available on Etsy

Cons:

  • Tray can be harder to get off without knowing the trick of pulling it off on side at a time

Artisan Bread in a Dutch Oven: Vegan and Only 3 Ingredients

Recipes, Sides and Sauces · April 30, 2020

While trying to eat through our pantry stock I came across lots of small bags of flour. I had everything from cassava to almond but the one thing I realized, is that for as much flour I stocked, I have never made bread. 


After doing a little bit of research I came across 2 things. If you have a bread maker, it’s pretty easy and if you have lots of types of non-traditonal flour – don’t start with that. So when I was out at the store I grabbed some unbleached whole wheat and white flour. I also started with the simplest recipe I could. 


Because I don’t have a bread maker I decided that I would need to find an alternative since I don’t have a traditional large loaf pan either. Luckily with a small amount of digging, I quickly discovered that using a cast iron dutch oven can bake up a delicious loaf of bread. 


So I’m now on my 4th loaf of bread and loving it. The whole wheat version I used 1 cup white flour and 2 cups wheat flour. It was very rich in taste and much grainier. 

Artisan Bread in a Dutch Oven: Vegan and Only 3 Ingredients

Ingredients: 

3 cups flour (not gluten-free)

1 ½ tsp Himalayan pink salt 

½ tsp yeast 

1 ½ cup of warm water


Instructions: 

To prep: 

In a large bowl mix together flour, salt, and yeast. 

Add in warm water and mix thoroughly. 


To bake:

Place a towel over the bowl and let sit for 24 hours.

Preheat over to 400 F

Place your empty dutch oven and lid into the oven for 30 minutes.

While the dutch oven is heating up lightly flour on a cutting board and roll the dough into a large ball.

Using oven mitts, remove the dutch oven from the oven, drizzle some olive oil into the bottom and carefully place the bread dough into the bottom. 

Place lid on the dutch oven and bake in the oven for 30 minutes. 

Carefully take off the lid (it will be extremely hot so place on a heat-safe surface) and bake for another 15 minutes uncovered. 

Take out and let cool. Slice, enjoy and refrigerate!

4 Month Twin Update – Seeing a Neurosurgeon: Helmets or Surgery

Lifestyle, Parenting, Raising Twins, Twin Pregnancy, Twins · April 25, 2020

The boys are officially four months old as of a couple days ago and it’s time for an update.  I had an amazing 2 weeks off from work to spend with the boys and my husband and I even got to crochet and blog. 

I’m feeling refreshed and right before the holidays I was feeling down about just how much I had to do. Then I had two weeks off and really got a chance to spend it with the babies and so that was wonderful for me. 

So basically, in the last two months a lot has changed and a lot has not changed. So I’ll break down some milestones and stuff that’s happening.


Twin Sleep

The boys are sleeping anywhere from 2 hour stretches to 2 ½ hours now. Before December they were sleeping 1 to 1 ½ hours. Now it’s 2 between the time they go down and the time they wake up. Occasionally they’d sleep two hours solid before but it was very scattered. 

Now they’re more likely to sleep 2.5 hours and even 3 hour stretches once in a while. It’s not like it’s something that we can plan on every night, but it’s happening more and more and it gives me hope that they’re starting to stretch out their sleep a little bit longer. 


Tummy Time 

They are enjoying tummy time. They’re laughing at us and chatting with us. They like making noises in response to sounds and noises we’re making which is amazing to see. They’re trying to roll over, which is just mind boggling to me. They’re throwing their legs and their butts over and then trying to roll their bodies. They can’t quite get their torsos over yet, so it’s just them throwing their legs over and trying to roll.  

They’re grasping things, they’re picking toys up and putting them in their mouths, and picking up blankets and putting them in their mouths. If I’m holding a blanket on my lap and the babies are on my lap, they’ll just grab it and pull it into their mouths. It’s really cool to see them making all these amazing strides on par with the development month and that always makes me feel better.

I know preemies are often adjusted and so they’re feeding and sleeping schedule is more like a month back but they’re motor skills and communication are right on par with babies who are turning four months.

Twin Weight and Height Update

Our one baby is 14 pounds 10 ounces. Our other baby is 14 pounds 8.5 ounces. So they’re closing the gap in their weight discrepancy. Before it was about five ounces. Now it’s less than two. 

They’re both exactly the same length and my twins are fraternal. I always assumed that they would start really changing in size from each other but they’re actually becoming closer in weight and height. So now they both are exactly 24 ¾  inches. As they start filling out with weight, they are also starting to look even more similar which is kind of cool. 


The Holiday Sniffles 

The boys had a cold and Matt and I got sick over the holidays probably from visiting a lot of friends and family. During this time of year you’re just going to come in contact with a lot of germs. The boys had a little bit of a cold, they were congested and sneezing, but had no fever or anything like that. They just were a little bit congested which made them not feel great and needed a ton more snuggles which we were happy to provide. 

I did take them to the pediatrician because you know I’m a new mom and everything’s scary. And when we went one of the things that the doctor had mentioned was that babies’ heads may need helmets. 


Baby Helmets 

I want to make a side note that we knew this might be something we would come across because it’s very common with twins to have babies in helmets. This is because in the womb, they don’t really have all the room they need to stretch out and oftentimes their heads are pressed against places they normally wouldn’t be. They can get into very weird positions that don’t normally happen when there’s just one baby in there. So we knew that that could be a possibility. 

Obviously, that’s not a really scary thing. You can decorate them and most kids are only in them a couple of months if you catch it early, like our doctor did. 

But the one concerning thing that we were told is that one of the twins they believe could have early fusion between two of the plates and so that his skull is not moving correctly. We actually have to go see a neurosurgeon about it. 

And I don’t want to assume that it’s going to be the worst case scenario. I am trying not to read too much into it. I want to just go talk to the doctor and see what they say. But our pediatrician did say that if they found that there had been some fusion, we would be looking at surgery. And so while I understand they just have to tell you all the options and reasons they are sending you, obviously, as a mom, you never want to hear that. 


The Neurosurgeon and the Twins

I’ve been doing my best not to worry about it. We scheduled with the neurosurgeon today and we’ll see what their next appointment is and go get his head looked at. They’re going to scan his head and then they will be able to tell us whether or not they can go right into helmets or if he’ll need surgery before he goes into a helmet. 

I have been deeply considering reaching out to other people who have had cranial surgery, but I feel like I might be getting a little bit too ahead of myself. 

We don’t even know if we’re going to have it. Right now it’s just that the pediatrician said from the looks of it that it might be a possibility. He’s seen it happen before. There were telltale signs like on his head and in his jaw line that a plate could be fused. They’re just kind of telling us everything that could happen. And again, as a new mom or a mom in general, you’re just going to freak out when you hear surgery. At least I do. 

For the first day, I was really upset and then the next day I was like: You know what? I need to stop – I need to not reach out right now. If it happens, then I’ll reach out to people who have the surgery. Until we know for sure, there’s no reason for me to sit here and dwell on it, even though it’s really hard not to. So I’m just keeping our hopes up that these are just simple issues that a  helmet can fix with their head shape. 


Why Do Babies Get Helmets

There are a lot of reasons that babies go into helmets. It can be for cosmetic reasons when your skull is misshapen or serious developmental reasons like the bones of the skull not moving right. That can actually cause developmental problems later on in life. So it’s not just that you have a weird head shape. Your bones are meant to fit together in a very particular way to protect your brain, to protect your spine, to protect your jaw, your nasal cavities and everything around that area. 

It isn’t something to take lightly if he does need it. We would choose to go forward with it to make sure he’s developing correctly.

If he requires surgery, it would be to ensure he has the right bone structure and development for a well protected brain and that his nasal cavities and jaw are aligned correctly. That’s the biggest thing that’s been weighing on my mind. That happened only about a week ago. So like I said, I’m doing my best not to stress.

I will obviously keep you updated on what the neurosurgeon says and then obviously I’ll be recording the boys getting helmets. I’m really glad that I have seen and followed other twin moms that have their boys or girls in helmets because it really makes me realize that it’s very common. It’s also a lot easier than I thought it would be. I have seen moms record themselves putting helmets on their kids and the kids playing in them, so it’s much less intimidating. I thought they’d be heavy for the babies and they would have a hard time holding their heads up. In fact, the helmets are super light and one of the girls that has twins actually decorated her kids helmets and it’s really, really cute with their initials on them. 

So knowing that if we’re going to have to have them, I think that something cute that we can look forward to is decorating the boys’ helmets and I will keep you updated. 

But other than that the boys are obviously growing big and strong. We are getting a little bit more sleep and their development is going great. Now it’s just waiting on the helmet decision and the neurosurgeon. 

I hope that you guys enjoyed the twin update. They are doing amazing. They’re so smiley, so cute. And I just love being able to actually share them on video now that they’re a little more awake. I can’t wait to update you on how all of this goes! 


Do you have a baby in a helmet or have you ever had any of your babies in helmets? Leave me a comment below about your experience!

Our First Easter with the Twins

Lifestyle, Parenting, Twins · April 18, 2020

I wanted to share a peek into our first Easter with our twins. This Easter was different for a lot of reasons. First, we now have two beautiful baby boys to love and enjoy it with. They are officially 7 months old. But it’s also the first Easter that I can remember not going somewhere to celebrate with other family members. With our state under stay at home guidelines in an effort to social distance, we did not go to Matt’s parent’s houses or visit friends. Instead, we enjoyed the babies and Easter at home and it was still wonderful.

I had debated back and forth on getting a traditional Easter ham for dinner but the store I went to for groceries (that week it was Target – much less packed than the regular grocery store) did not have any hams in stock. I also debated on the babies getting special outfits but in the end, I did buy them the outfits and soft blankets as their gifts which is allowed on my spend fast. And if you don’t think a soft blanket is a good gift, ask the boys, they love their snugly blankets.

So what did we do? I packed this soft woven basket with a few gifts my friend and my cousin sent us and a crocheted Easter chick my Aunt crocheted. Then we dressed up the boys and let them explore in the basket. They are getting to that stage where they find it fun to pull stuff out of things. It was a hit. And not so surprising, so was the basket. My basket that used to live in the bathroom cabinet now is in the living room in the boy’s play area cause they just love the soft thick cloth basket.

We also took a lot of pictures and took a walk outside in the sunshine. We also ate leftovers and made baby food for the week. We got to facetime and chat with some of our family too. It was a really memorable and precious first Easter for us with the babies.


Grain-Free Protein Cookies

Dessert, Recipes, Snack · April 18, 2020

Protein cookies are a great way to add some extra cookies to your day. And protein. But I dug this recipe back out and made a few adjustments from the original one I made years ago. My first recipe used whey isolate protein but I have since switched to a vegan protein because it’s easy on my stomach. I also adjusted the peanut butter down to make denser cookies and tried this for the first time with creamy almond butter and it was amazing!

So what made me want to incorporate some protein cookies into my day? Well, we are home on self-quarantine and of course, snacking has been (as it always has) my biggest struggle. I find myself snacking when I’m not even hungry. I have also been craving cookies and almond milk and instead of continuing a very unhealthy love affair with Oreos, I decided to create a healthier cookie I could snack on.


Grain-Free Protein Cookies 

Ingredients:

¾  cup creamy peanut butter

¾ cup coconut sugar

1 egg

2 scoops Detox Organics Vanilla Protein


Instructions:

  1. Preheat oven to 350 degrees F and line a baking sheet with parchment paper.
  2. In a large bowl combine coconut sugar and vanilla protein powder and mix together completely. 
  3. Add egg and peanut butter and mix thoroughly. 
  4. Roll into 9 cookies (or 12 smaller ones) into balls and place them on the cookie sheet. Press gently down on cookies to flatten them in a cross pattern with a fork.
  5. Bake for 10-12 minutes until golden brown.
  6. Let them cool for 15 minutes on the cookie sheet before moving.


Notes for better cookies: 

I originally used 1 cup of peanut butter for bigger cookies but cut it down to make denser cookies when baked. If you like lighter cookies use a full cup of peanut butter.

Creamy almond butter works well in these too. Be sure to use creamy and no stir to make the recipe work. 

When mixing the ingredients all together I like to use clean hands because it really gets all the ingredients combined as best as possible. 

These cookies do not spread almost at all so they will be as flat and large as they are when you put them in. Be sure to size them according to how big you want them. 

Pressing them with a fork helps keep them a good depth for cooking all the way through.

Letting the cookies cool for a full 15 minutes helps keep them together so they don’t break apart when you move them.

Shamrock Shake the Healthy Way

Dessert, Recipes, Smoothies · March 24, 2020

The Shamrock Shake has been a St Patty’s Day staple for years. This was originally made popular by McDonald’s with their seasonal shake that brought milkshake fans out in droves. And when it’s gone, people are disappointed and have to wait a whole year for the shake to make it’s way back on the menu.


But I decided that there had to be a way to make this fun dessert a little healthier. This was made with all the regular ingredients I have in my house. 


Now you may ask why I have mint chlorophyll drops just sitting on top of my refrigerator and I’ll explain so you don’t think I’ve lost my mind. 


Years ago I was introduced to a refreshing drink at a local juice bar. It a large mint green water with fresh lime in it. The ingredients were only water, chlorophyll, and lime juice. I had seen people taking chlorophyll supplements to help with minimizing body odor as they stopped using traditional deodorant as well as a way to support the bodies natural detoxification process overall. The drink was delicious, but it was also over $10 per bottle. 


While I have no problem supporting local business and got one each time I went and enjoyed time in their shop, I knew I couldn’t justify spending that amount of money on a bottle of enhanced water every single day. So after a little research, I found a small supplement company on Amazon who sold chlorophyll in dropper form with a subtle mint extract in it for flavor. 


So when it came in the mail and I mixed it into some freshly squeezed lime water, it tasted exactly the same and was just as energizing and refreshing as the original drink I love. I have kept it stocked in my house ever since so that it’s another way to flavor water and helps me drink more of it throughout the day. 


I also keep a stash of cashew ice cream because regular ice cream does not make me feel well when I eat it. Of all the nondairy choices of ice cream, cashew is my favorite. I have tried almond milk ice cream but it doesn’t have the consistency I like. And to make this recipe even creamier I used my everyday go-to vanilla vegan protein by Detox Organics.  


Feel free to add more of the chlorophyll drops to your recipe if you like a stronger mint taste, the recipe I post below has a light mint flavor. It also has a light green color. If you double the chlorophyll in the recipe the color will be deep green and a strong mint flavor will show through. 

Ingredients:


½ cup vanilla cashew ice cream or ½ frozen banana 

1 scoop Detox Organic Vanilla Protein 

½ cup unsweetened vanilla almond milk 

1 full dropper of mint chlorophyll drops

1 cup ice

Top with enough water to match ice levels


Instructions: 

  1. Add all of these ingredients into a blender and blend on high until a smooth, thick shake consistency. 
  2. Enjoy!


Share this recipe with a friend who loves the shamrock shakes or share how you’ve made your own version in the comments!

How to Get Better Milk Output When You Are Exclusively Pumping

Breastfeeding, Exclusive Pumping, Pumping, Twin Pregnancy, Twins · February 16, 2020

When you’re exclusively pumping, the amount of milk you get each time is dependent on how well you empty the breast. One of the biggest things when trying to get as much milk as possible is that you need to follow a few tips to empty the breast completely and keep your output up.

One of these is pumping more often. When you’re exclusively pumping, you have to pump in a way that mimics the way a baby would be eating. So that’s every two to three hours for very small babies if you’re trying to keep your supply up. 

The other part of it is emptying the breast fully every time that you pump, but it can be hard to do this. When babies nurse, they’re very effective and efficient at emptying the breast. The pump however, is not, so there are some tricks that you can use to get more milk out of the breast every time that you pump.

Destressing

Exclusively pumping can be very stressful, but the number one thing when getting more milk out of the breast is to destress. Be as unstressed as possible when you’re pumping. I know this sounds ridiculous because you probably have a newborn and if you’re exclusively pumping, you’re probably very, very busy, but the less stress that you can bring to a pumping session, the better. 

If that means finding a quiet spot to do it away from crying, screaming, or even the hustle and bustle of your house, do that. If that’s not an option, there are a couple of things that you can do. Studies show that listening to relaxing music and being guided through meditation while pumping actually can double the output versus moms who are not listening to music and guided meditation. There are so many free apps on your phone now that have music and guided meditation.

There are also entire YouTube channels dedicated to relaxation and guided meditation. This would be someone guiding you through a 10 minute meditation, or 15 minutes, however long you plan on pumping, to help you relax and get into a meditative state. If this is possible, throw on a pair of headphones and find a YouTube video or an app that has music and guided meditation. This can often bring down your cortisol levels and let your milk ducts relax enough to really empty out to their full capacity. 

Heat

Another thing you can do to help empty the breast better is to apply heat. Heat opens up milk ducts and helps milk flow more freely. If you have a heating pad, one of the easiest ways to do this is to place it on your chest for about five minutes before you pump.

If you’re not using a pumping bra, you can also use a heating pad during, but I find that it’s harder when you have a pumping bra on and you’re using the hands-free style pump. If you have a smaller heating pad though or a microwaveable heating pad that’s a little bit smaller than a traditional one, then it might be a really good idea to heat them up in the microwave and then put them inside your pumping bra once your pump is going and well adhered to the breast.

Vibration

Another way which requires you to purchase something, but is really effective and compact, is the LaVie Lactation Massager. This small, oval-shaped device not only warms up, but also vibrates. And both of those in combination are known and proven to help empty the breast better and more efficiently.

This massager ranges anywhere from about $50 to $70 depending on where you buy it. But I think it’s really worth it if you’re exclusively pumping and you really need the most efficient emptying of the breast each time. 

Similarly, you can use devices that only use vibration. There are a lot of lactation massagers on the market and these are actually covered by health savings accounts (HSAs) where you can use pre-tax dollars to purchase medical equipment. Because a lactation massager is medically proven to help with clogged milk ducts and better emptying of the breast, these are actually covered by an HSA card. So if you have one, you can use your HSA money for it. If not, these range anywhere from $20 to $40.

Again, you can get one that also warms up so it does double duty or you can get one that just vibrates. If you already have a heating pad and you’re okay with just holding the heating pad on it, these little lactation massagers can go inside of the bra that you’re using or you can manually massage the breast with the lactation massager.

Hand Massage

That leads into the next thing that you can do to get more milk while pumping. That is hand massage. While vibration is a really good and a little bit quicker way to do it, instead of buying a lactation massager, you can just manually massage your breasts to help loosen up the ducts and get the milk flowing. One trick is to do it for about a minute to two minutes before you put on the breast pump and then gently massage around the breast while pumping.

It’s easiest to do this before you put on a pumping bra that holds the pump. But if you’re not wearing a pumping bra while pumping, then you can manually massage your chest while the pump is on you. I do think the best thing to do is to massage your breasts for one to two minutes before you put your bra on, and then you can also use your hand to massage while pumping. But I think just a little bit before helps if you can’t massage your breast while the bra is on. 

These are all really great ways to get the milk to flow better and I think that practicing relaxation is the best, but at the end of the day, what really helps to keep the milk supply up is to make sure the breast is completely empty. So while a lot of these things help empty the breast, the best thing to do at the end of every pumping session is just 30 seconds to a minute of hand expression.

Hand Expression

You can find an excellent video tutorial of hand expressing here, but basically it’s just getting the last couple drops of milk out of the breast. This is done by applying very gentle pressure, and that doesn’t mean hurting yourself. You don’t want to squeeze and make the nipples or the breasts sore. So what you’ll do is cup your hand into a “C” and place it around the areola. Then you’re going to push the breasts back gently so that you’re compressing your breasts to your body and squeeze inward gently once the breast is pushed in towards the body. 

You don’t want to squeeze them hard. You want to apply just enough pressure to get milk from the breast, and this will help get any excess amount of milk that’s leftover from the pump that the pump wasn’t able to get out and it basically empties the breasts.

The breast is constantly making milk. It will never be 100% empty, but when you’re only getting little little tiny drops from it, you know you’ve pretty much gotten the majority out. It won’t be flowing freely if you have emptied the breast efficiently. 

One Last Note

I think that people have this misconception that if the pump that you’re using is turned on higher or a stronger suction, it will get more milk out. But this is just not true. You can actually get just as much milk pumping on a lower setting if you’re more comfortable, because it goes back to the stress thing. Any amount of discomfort or pain or agitation to the breasts while pumping is going to cause the milk ducts not to flow as freely.

I encourage people to pump on the setting that is comfortable for them, not what they think they need to get more milk. Being uncomfortable and having a harder suction might actually backfire and be more stressful on the body and obviously rougher on the breast, and both of those are counter productive when you’re trying to relax and get more milk out of the breast. Instead of using higher suction, try using some of these techniques to empty the breast more efficiently and get more milk per pump.

I hope this helps you on your pumping journey.

Apple Pie Milkshake

Breakfast, Dessert, Recipes, Smoothies, Snack · February 15, 2020

This protein-packed milkshake is a healthy way to satisfy a sweet tooth without sacrificing nutrition. It can serve as a meal, a snack, or a healthy dessert. Plus, the protein will actually help you feel fuller longer.

I am also a big fan of making this in the fall. Come autumn, apple pie is everywhere and we found a way to make it a breakfast food. It’s also a great dessert smoothie to enjoy.

With the protein, feel free to subsitute any of your favorite vanilla protein brands. You’ll want to just make sure you are picking a vanilla flavor and not an unflavored protein becuase it will throw the taste way off without it.

One note on the banana, it’s always best to get the ripest banana beacuse the flavor will be more robust in this recipe!

Ingredients:

2 Scoops Detox Organics Vanilla Protein

1 banana (ripe)

1 cup of ice

1/2 cup applesauce unsweetened

1 tsp ceylon cinnamon

1/2 cup unsweetened vanilla almond milk

1/2 cup of water

Instructions:

Blend all of these ingredients together. Top with a dusting of cinnamon on top once poured into your cup!

Vanilla Protein Valentines Cupcakes

Dessert, Recipes, Snack · February 14, 2020

Sometimes you just want something sweet. That’s usually when I’m reaching for cupcakes and even when I’m enjoying desserts, I’m thinking about how to make it a little healthier. The easiest is to make swaps for pasture-raised eggs and organic ingredients.

One other great swap I’ve found in baking is to add in some high-quality protein in place of some of the flour. It helps add protein to help level out your sugar when you’re eating it. I love that it also helps me feel a little more full when I usually feel hungry right after eating a sugary treat.


Ingredients:

Cupcakes:
½ cup coconut oil
¾ cup organic cane sugar
2 pasture-raised eggs (room temp)
½ cup Detox Organics Vanilla Protein
¾ cup gluten-free baking flour
¼ tsp salt
1 ¾ tsp baking powder
½ cup almond milk
1 tsp organic vanilla extract

Icing:
½ cup butter (room temperature)
1 tsp vanilla extract
3 cups organic powdered sugar
2 tbsp almond milk

Instructions:
1. Preheat oven to 350 degrees F and in a large mixing bowl combine oil, sugar and eggs and beat with a hand mixer on medium speed for 1 minute.
2. Add in Detox Organics Protein, flour, salt, baking powder, almond milk, and vanilla extract.
3. Beat with a hand mixer for 1 more minute on medium speed.
4. Once completely mixed, place in silicone or paper liners into the cupcake baking sheet.
5. Spoon batter into each of the cupcake spots and fill ¾ of the way full.
6. Place in oven and bake for 18-20 minutes until a toothpick comes out clean.
7. Let cool completely
8. While cupcakes cool, in a large mixing bowl slowly combine room temperature butter, vanilla extract, powdered sugar, and almond milk and beat with a mixer until fluffy and fully combined.
9. Using a piping bag or knife ice the cupcakes and top with any red of pink candies for decor!
10. Enjoy!

Elvie Breast Pump Review for Twins

Breastfeeding, Exclusive Pumping, Pumping, Twin Pregnancy, Twins · February 5, 2020

Now that I’m exclusively pumping, I have switched up which breast pumps I’m using. I started with the Medela and I moved to the Spectra breast pump because it was chargeable and I was able to unplug it from the wall and move to a place that I could comfortably pump.

This was super convenient for pumping in the car, pumping at work, and pumping around the house. But as I moved to exclusively pumping, I realized I was still spending four to five hours a day in total setting up the breast pump, taking the breast pump down, washing it, cleaning it, and then finding a place to pump privately. Oftentimes I would have to plan our outings around pumping just to make it more convenient. And so I eventually looked into wearable breast pumps, or breast pumps that are an all-in-one system.

They’re egg shaped, they go into your nursing bra, and they have no cords because the motor of the pump, the breast shield, and the reservoir for the milk are all-in-one. There are several breast pumps on the market. The first one that I ever heard of was the Willow, and then I was introduced to the Elvie breast pump by a quadruplet mom that was using it to help her pump for her quads.

Choosing the Right Hands-Free Pump for Me

I will cover why I got the Elvie, some of the features and then a little bit of the pros and cons, but I want to start with why I chose the Elvie over the Willow. I’m reviewing the Elvie because it’s the one I’ve used for two months and I considered it deeply against the Willow for two to three weeks before purchasing.

Elvie vs. Willow

At the end of the day, the reason I chose the Elvie was because when read and watched reviews on YouTube, the Elvie was quieter and had a reservoir you could empty into your own breast milk bags or directly into a bottle, whereas the Willow only takes a special shaped bag that fits right into the pump, so you can’t combine multiple pumps into one bag. [Update: they now offer a reusable container to pump into as well.]

Once the bag is in the Willow, you have to take it out and use a new bag every time you pump. Because I’m not filling bags with three to four ounces per side, I felt like it would be a huge waste of plastic to pump into a bag for only one to one and a half ounces, maybe two ounces each and every time.

That also meant if I wanted to pump and immediately give the twins the milk, I would have to pump into a bag and then immediately reopen it. And again, it felt like a waste of bags. So I went with the Elvie because of the noise and because of the convenience of being able to store your breast milk any way you please.

Features of the Elvie

Let’s get into the Elvie. The Elvie comes in either one or two pumps. You can buy them as a singular pump or as a set. I bought the set. The singular pump is good for a nursing mama who is nursing on one side and wants to pump on the other side. Because I am exclusively pumping, I went with the double pump so I could do both breasts in the same amount of time.

The Elvie is very small compared to how far out other breast pump shields are. It’s an egg shape that fits onto your breasts, and while the profile is kind of large from the side, from the front, I don’t see the Elvie being super intrusive. You put it into your bra and when you wear a shirt or sweater or something heavy over it, you can’t see it under your clothes.

The main attraction of the Elvie is that it’s hands free. You use a shield that attaches to the motor and that is also hooked to the reservoir and you put it on. There is a power button on each pump, a pause button, and a go button. There’s also a suction up or down button and those are controlled from the pump itself. You can turn them on and then attach it to you or you can attach it to you and then turn them on. I prefer to actually turn it on and then attach it to me, but they actually recommend attaching it to the breast and turning it on from there.

Pumping Modes

Either way, whatever works best for you, it goes into your bra and then you can turn it on or turn it on first. There are two modes. Like other breast pumps, there’s a stimulation phrase and an expression mode. The stimulation phase is a quicker pumping action that helps you get let down. The Elvie has smart pump technology that automatically switches to the expression mode when it sense that there has been a letdown. There are also a lot of settings on the Elvie for the intensity of the suction. When you are in the stimulation phase, there are several settings that you can go up and down with till you get your let down.

You will change it up or down to whatever’s comfortable, then in the expression phase you also can move the pump suction up and down so it can be more intense or less intense depending on your comfort level. If your comfort level changes throughout the pump, you can adjust it as you go.

Elvie App and Controls

The Elvie also has a smartphone feature which is the app and the app is where you can control it via Bluetooth from each pump. You turn your Bluetooth on and connect when both of the pumps are turned on and then you can use your app to turn on one or both of the pumps. You can use the app to adjust the stimulation or expression phase or you can let it go on its own and you can adjust the intensity from the app. It also tracks how much milk you’re letting out and shows you. If it needs to make any software updates, it does it from the app to your pump.

Additionally, the app tells you what the battery life is and how long you’re pumping. There’s an awesome feature with a timer that will send your phone a notification when you’ve hit the timer that you’ve set in the beginning. The app is amazing and it makes pumping very convenient. One of the best things that it does is allow you to put your pumps on and then go do something in public, and you can shut the pump off right from your phone and leave it in your bra until you’re ready to go back to a bathroom or a private place to take them out. I think that it’s great that I don’t have to reach into my shirt to adjust the pump. I can do it right from my phone and it’s more discreet.

Elvie Reusable Pumping Bottles

The other feature that I found appealing about the Elvie is the reservoirs that attach to the bottom of the pump. They hold five ounces, which is 150 milliliters, and they are washable and reusable. The double pump comes with two sets so that you can switch them out if they get full during a pumping session or you can just have extra ones with you, and they come with caps for both of them. So if you don’t want to dump the milk into a bag, you can just put a cap on the reservoir once you detach it from the pump and store it in the reusable bottles. This has been really convenient. The other beautiful thing is that you can buy extra bottle reservoirs online so you can have four of them or you can have eight of them and you could just store them in those instead of buying storage bags if you please.

The plastic for these are BPA free. They’re also dishwasher safe which I really appreciate. The Elvie pumps are each rechargeable and they charge fully in two hours. They also send you two charging cords so you don’t have to switch back and forth.

Breast Sheilds

As for the breast shields, they come in three sizes. Two of them are included in the box and are the most popular sizes. I needed the one that wasn’t included, but I was able to order it and get the breast pump shield that was closest to mine. I was originally using a 19 millimeter shield, but theirs only goes down to 21. I switched to the 21 for the Elvie, and it has been perfectly fine.

That actually is another reason I went with the Elvie over the Willow pump – the Willow only offers a 24 or 27 or a size around there. There was nothing smaller or closer to 19. Therefore, I chose the Elvie because the shield would be better suited to the size I needed.

Areas for Improvement

Now I just want to go over some of the things that I feel could be improved. One of the things is when you turn it on, it automatically goes to the highest suction. That’s one benefit of turning it on before I put it on the breast – I can turn the suction down to be comfortable for me and then put it on instead of letting it turn on and having the highest level of section.

Non-Adjustable Defaults

Many people told me that it doesn’t bother them, that the highest level is not that high, but for me it is. And so even though it’s only a couple seconds of uncomfortable suction, I don’t love it. So I will turn it down and then put the pump on. Then when it switches from the stimulation phase to the expression mode, it also goes to the highest expression mode on default. And so again, I find myself just turning it down a little bit to be comfortable. I thin if they were to improve the app at all, it would be that the pump automatically goes to your preferred intensity level instead of going to the highest by default.

Tracking Accuracy

The other thing that I would love to see improved is to make the tracking more accurate. They do say to use a dark bra over top of the Elvie pump to help it read the milk output. But even in a dark black bra, the reading tends to be about an ounce off sometimes. It’s not terrible, but I always find myself adjusting it afterwards.

When you take the pumps off, you have the ability to adjust what they’ve estimated. I hope that in the future, they get a closer estimation, but it’s really not a problem. I just think that it would be cool for it to be really accurate instead of me having to adjust it every single time. I will say after two months of using it, it actually has become a little more accurate than it was before. I don’t know if it’s reading it and getting smarter or maybe it’s just using an improved algorithm. Since the difference between what I pumped and what it says I pumped has gotten less drastic, maybe eventually it will be more accurate with continued use.

Full Indicator

With that, occasionally if you lean over too far and the milk levels get to the top of the bottle, it will tell you that the bottle is full and that’s just because you’ve tipped the milk up towards the center. Say I dropped something on the floor and instead of squatting down, I just bend right over because I forget. It will tell me the pump is full and then if I don’t want to take the reservoir off and reattach it, I have to just turn the pump off and turn it back on really quick.

This is not a negative, just something to be aware of when you’re wearing it. I wouldn’t bend over to the bottom of the washer or anything. I tend to do things that I’m standing up or sitting upright when I wear the pump, like driving, walking the dog, or doing dishes.

Bright Lights Under Light Clothes

The only other thing I would say that I think about when I am pumping that they could change is that the Elvie when it’s on has these very bright lights on it, which is amazing for pumping in the evening and at night, but not great throughout the day in dark rooms. When in public, that’s why I say you should wear a dark sweater. I even wear a dark colored tank top under everything I wear, then a dark or thick sweater or sweatshirt or top because the lights are very, very bright. If there is a way to turn them off, I have not figured it out yet.

I don’t love that. If I was to be wearing a thin or light-colored shirt that people would be able to see the lights from the breast pumps, it’s very awkward and really gives new meaning to headlights. So Elvie, if you’re reading this, please find a way to turn off the lights on the pump.

Other than that, I really don’t have a lot of negative things to say. None of these things are very negative, more just improvements that I’d like to see or things to get used to.

The Pros Outweigh the (Very Minor) Cons

I would say a huge pro is that the Elvie is competitive to every other hands-free pump on the market pricewise. The fact that they offer an extra shield size as opposed to other companies that do not is amazing. The ability to put your milk in your own bag, the convenience of the app, and that it’s so, so quiet, are all great positives.

The only time I can hear the pump is when I’m sitting in silence by myself in a room. But even the smallest amount of noise will cover the very, very low hum of the breast pump. I’ve been sitting next to people at a table and they did not hear the pump while it was working. The last and obviously the biggest, uh, bonus of the Elvie breast pump is the freedom I’ve gained.

I know that I fought with myself over buying this breast pump because it was expensive, but I kept thinking, what could I do with four hours a day if I wasn’t sequestered, tied to tubing in a room by myself with not much else that I could do. And I thought I could hold the boys on my lap while I pumped, which I couldn’t do when there was tubing because they’re in this beautiful infant phase where they’re grabbing everything and they would yank at the pumping tubes.

Multitasking with the Elvie on

Now I can multitask by holding the boys while I pump, walking the dog while I pump, and so much more. Because I’m multitasking while pumping, I have gained at least three hours back every single day. It obviously doesn’t give me back the time cleaning the pump or anything like that. That’s just basic maintenance that you have to do with any pump.

What it did give me back was the 20 minutes each session that I was doing eight times a day and then having to go to a different room at work. The room I had to walk to was five minutes away, I had to get a key, I had to get set up, and I had to break it all down and bring it back. Now it’s as easy as stopping at the bathroom, popping the pumps in my shirt, going back, doing what I wanted to do, turning the pump off, going back to the bathroom, taking them out, rinsing out everything and packing it back up. I love it.

Time Crunch with Twins

When you have two infants who are busy and need a lot from you, and you have a lot of laundry to do and a lot of people to feed, including you and your husband, as well as more dishes because of bottles and pump parts, then you add that on top of having basically no sleep…Getting three hours a day back is significant.

So when I say you’re paying for a pump and it’s worth it, it is. And when I say you’re paying for convenience and it’s worth it, it is. But when I say you’re paying for freedom, I mean it on the deepest level. I feel emotional sometimes when I’m holding the boys and breast pumping or able to be driving somewhere and not have to worry about what time we’re leaving, how to adjust my pumping schedule all day, and stressing about it because I need to get an extra pump in before we go to someone’s house or to the grocery store or to a doctor’s appointment. I have the freedom to just pop the pumps on in the car or while I’m inside the doctor’s office.

Freedom while Pumping

These are things that once I had that time back, I didn’t realize how much I was even stressing about it all day long. The freedom that the pump has allowed me has been worth every penny and I truly mean this when I say if the pump was five times as much, I would have found a way to save up and pay it off. I really would have because I really believe that has improved my relationship with pumping tremendously. I don’t dread it anymore, it’s enjoyable, it’s easier and it is overall more convenient. So I love this pump. I cannot speak about it highly enough.

If I had ordered online, it would have taken maybe six business days to arrive. I actually ended up going to the store because that was longer than I wanted to wait. I bought it at Target, but they also have it at Buy Buy Baby. The pump costs $500, but I got it when it was on sale for $450. That also helped me afford the extra shields in my size which were about $30 and purchased at Buy Buy Baby.

If you have any questions, please leave them below. I’d love to answer anything that you might be hesitant or might want to know about this pump. I would love to put it below!

[video_page_section type=”youtube” position=”default” image=”https://loveleanlife.com/wp-content/uploads/2020/02/Elvie-Review-Youtube-Thumbnail.png” btn=”light” heading=”” subheading=”” cta=”” video_width=”1080″ hide_related=”false” hide_logo=”false” hide_controls=”false” hide_title=”false” hide_fullscreen=”false”]https://www.youtube.com/watch?v=0oMjuajx6jk[/video_page_section]

  • « Previous Page
  • 1
  • 2
  • 3
  • 4
  • 5
  • 6
  • …
  • 17
  • Next Page »

Explore

  • Breakfast
  • Breastfeeding
  • Dessert
  • Dinner
  • Drinks
  • Education
  • Exclusive Pumping
  • Lifestyle
  • Lunch
  • Money-Saving Tips
  • Parenting
  • Pumping
  • Raising Twins
  • Recipes
  • Restaurant Guide
  • Sides and Sauces
  • Smoothies
  • Snack
  • Twin Pregnancy
  • Twins
  • Uncategorized
Design by SkyandStars.co

Copyright © 2025 · LovePeace Theme by SkyandStars on Genesis Framework · WordPress · Log in