• Lifestyle
    • Blog
  • Twins
    • Twin Pregnancy
  • Recipes
    • Smoothies
    • Lunch
    • Dinner
    • Dessert
    • Snack
  • Guides
  • About
  • Free 3-Day Detox PDF

Love. Lean. Life.

Hello, Simple Living

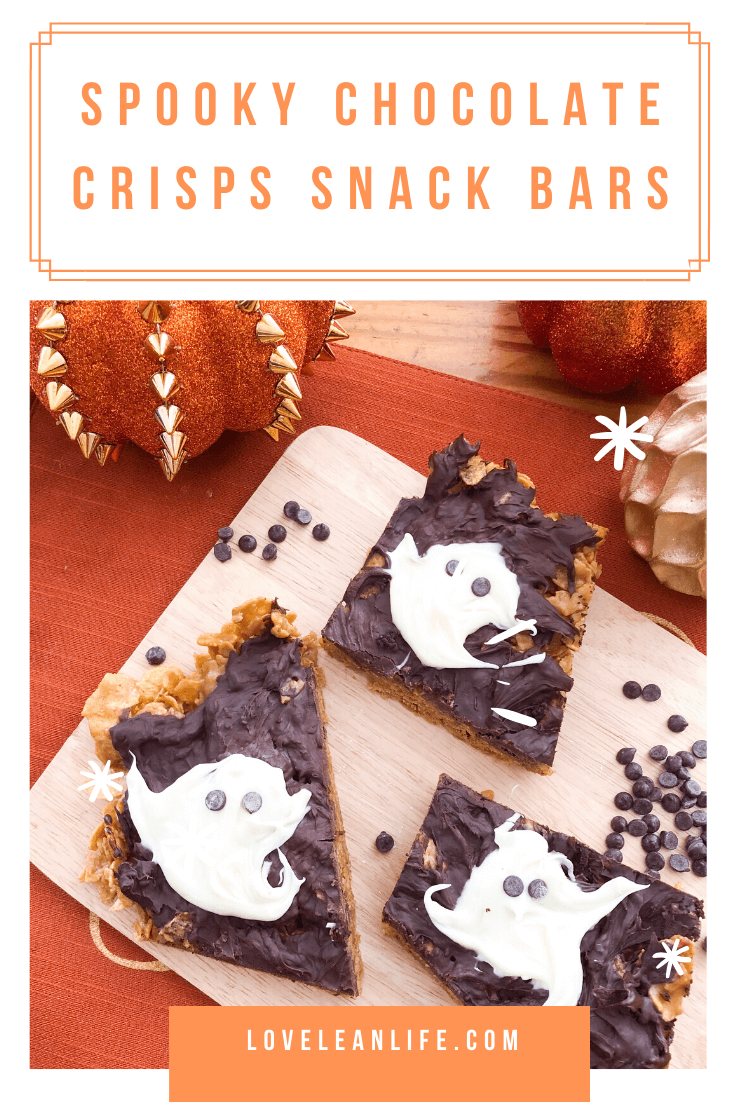
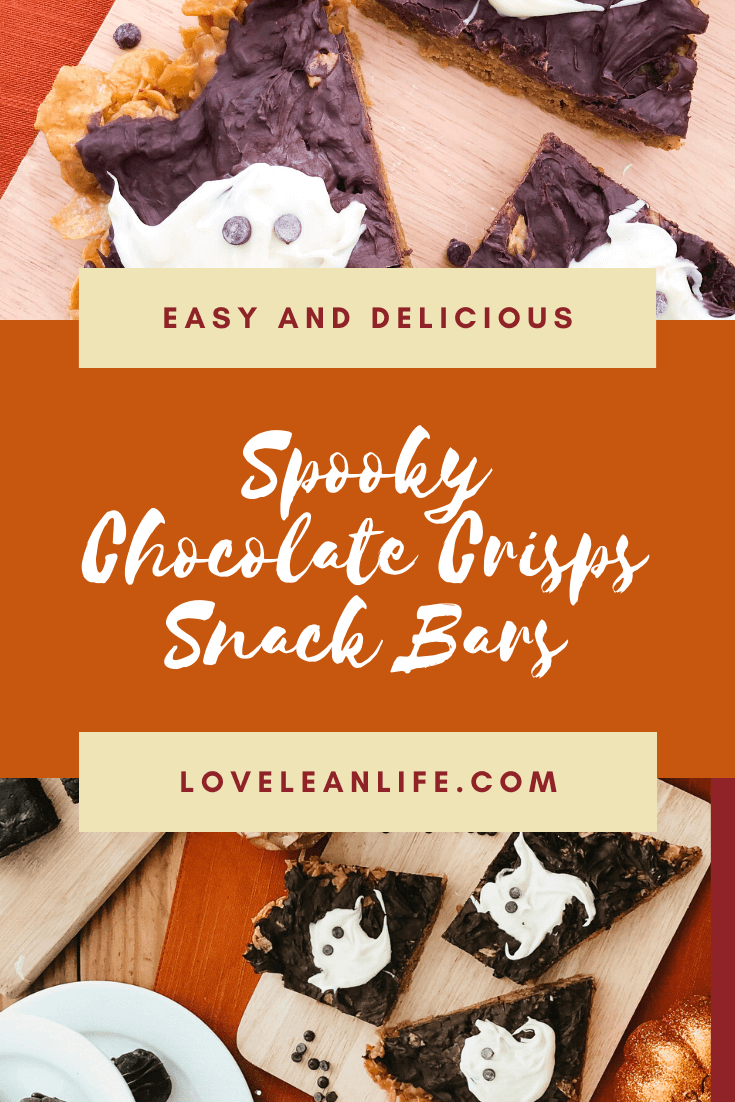
Spooky Chocolate Crisps Snack Bars

Dessert, Recipes, Snack · November 1, 2019

I admitted something to my cousin yesterday that I have never admitted to anyone before.

I don’t love Halloween…

This might be my most dramatic post but with the love that everyone else has (bordering on obsession) for this holiday I have never really been able to bring myself to say – I DON’T LOVE HALLOWEEN!

I feel free. hahaha.  I just don’t like the scary, spooky, creepy, scared crap-less movies, and commercials and events.

I really do like the cutesy side of Halloween though. The pumpkin carving, the candy to pass out, the kids who love dressing up and of course the right to decorate for Christmas once the night is over. And don’t lecture me on “let Thanksgiving have it’s day” cause it’s basically Pre-Christmas to me.

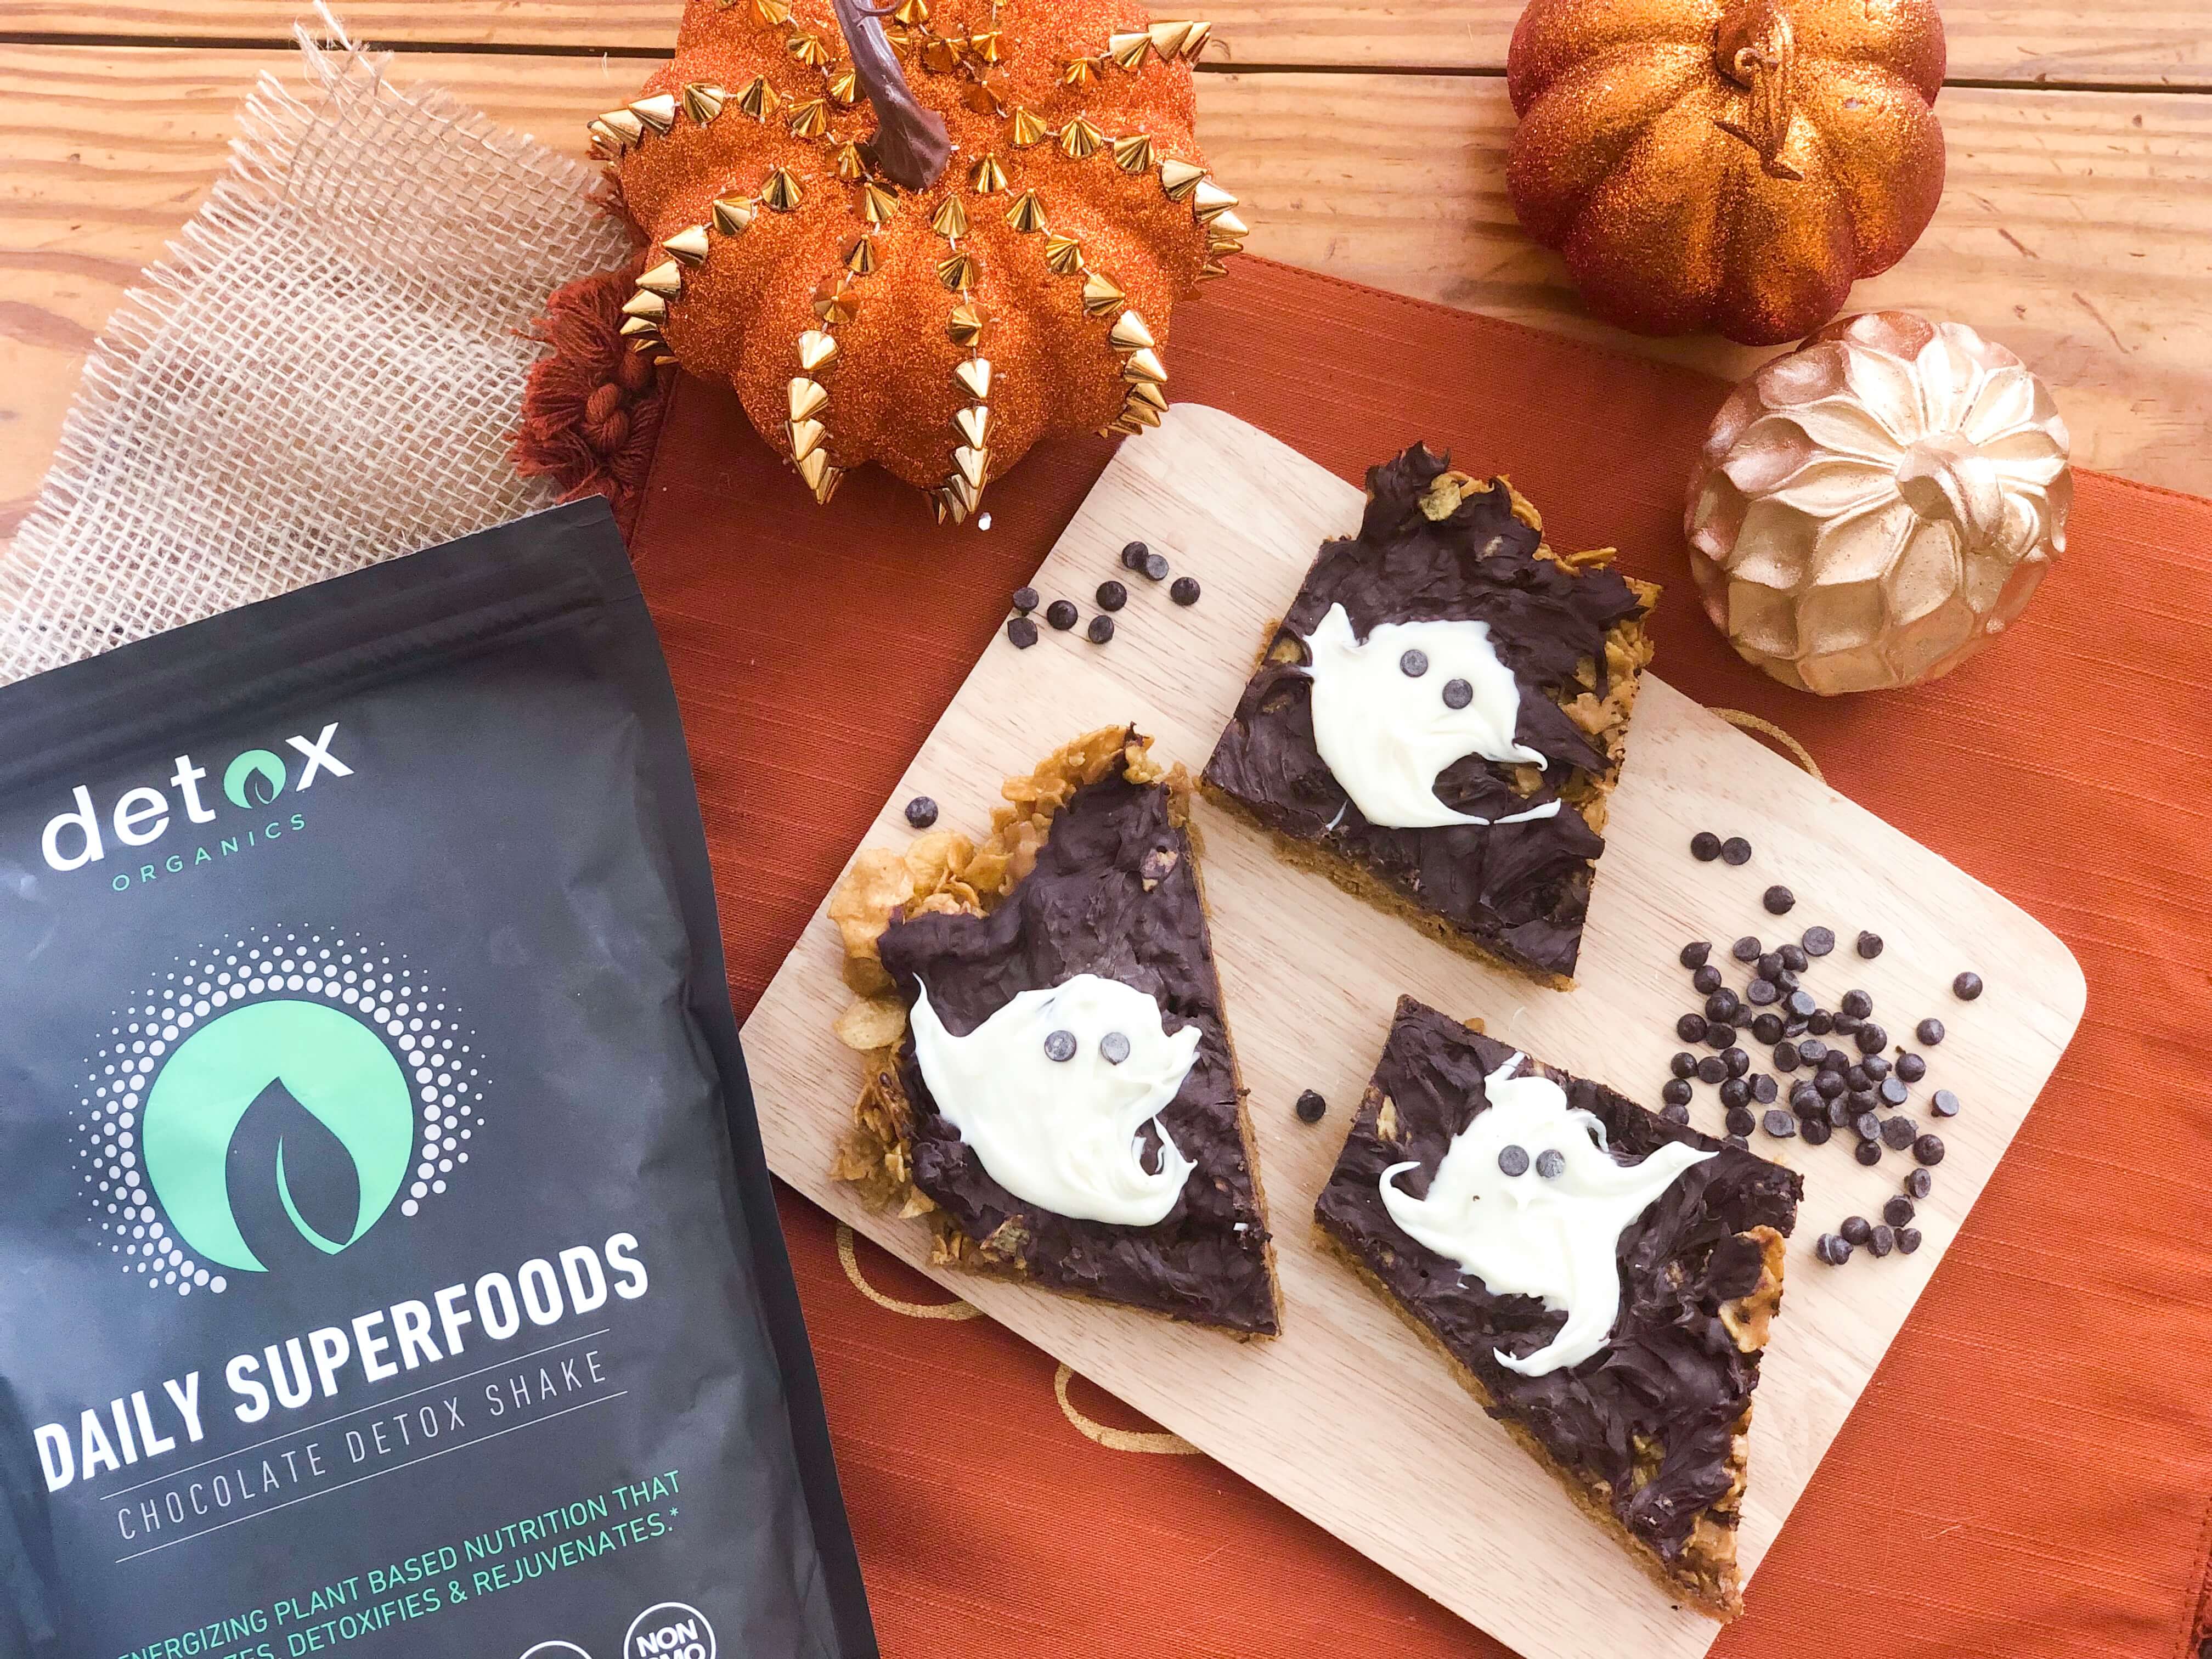
I found this recipe extremely cute and festive for Halloween. This is the type of Halloween I like. The chocolatey cute side.

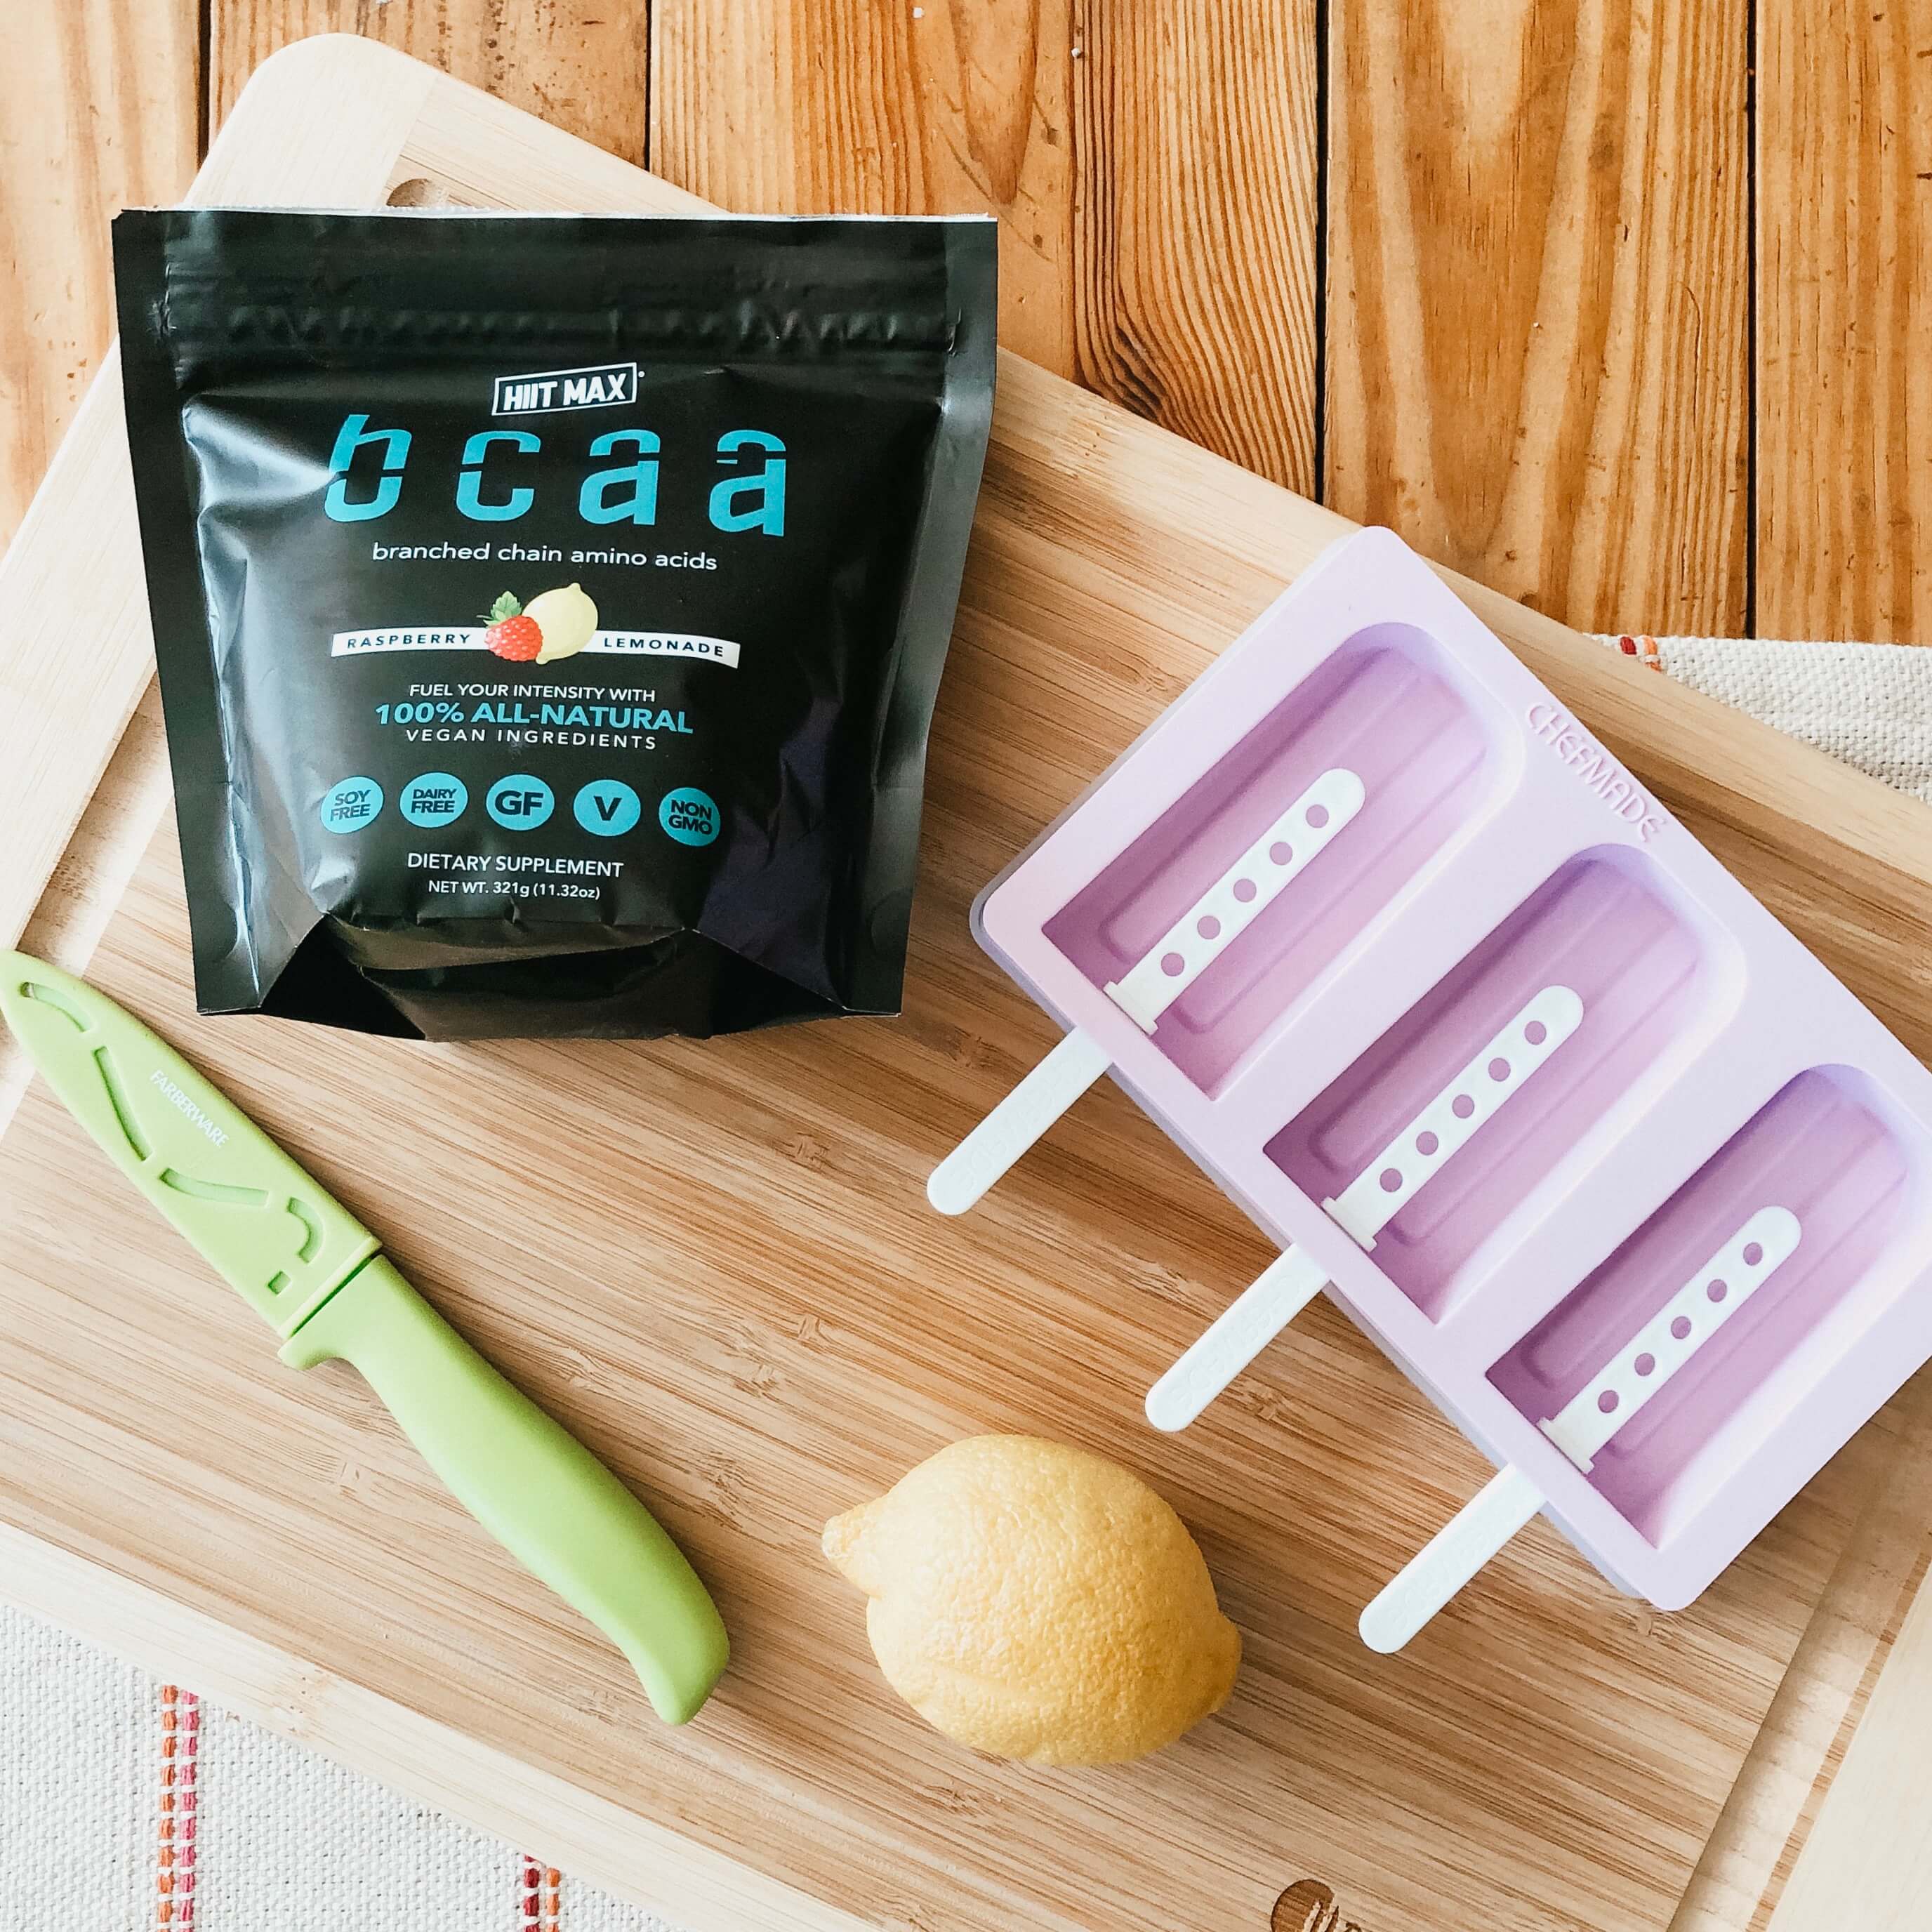
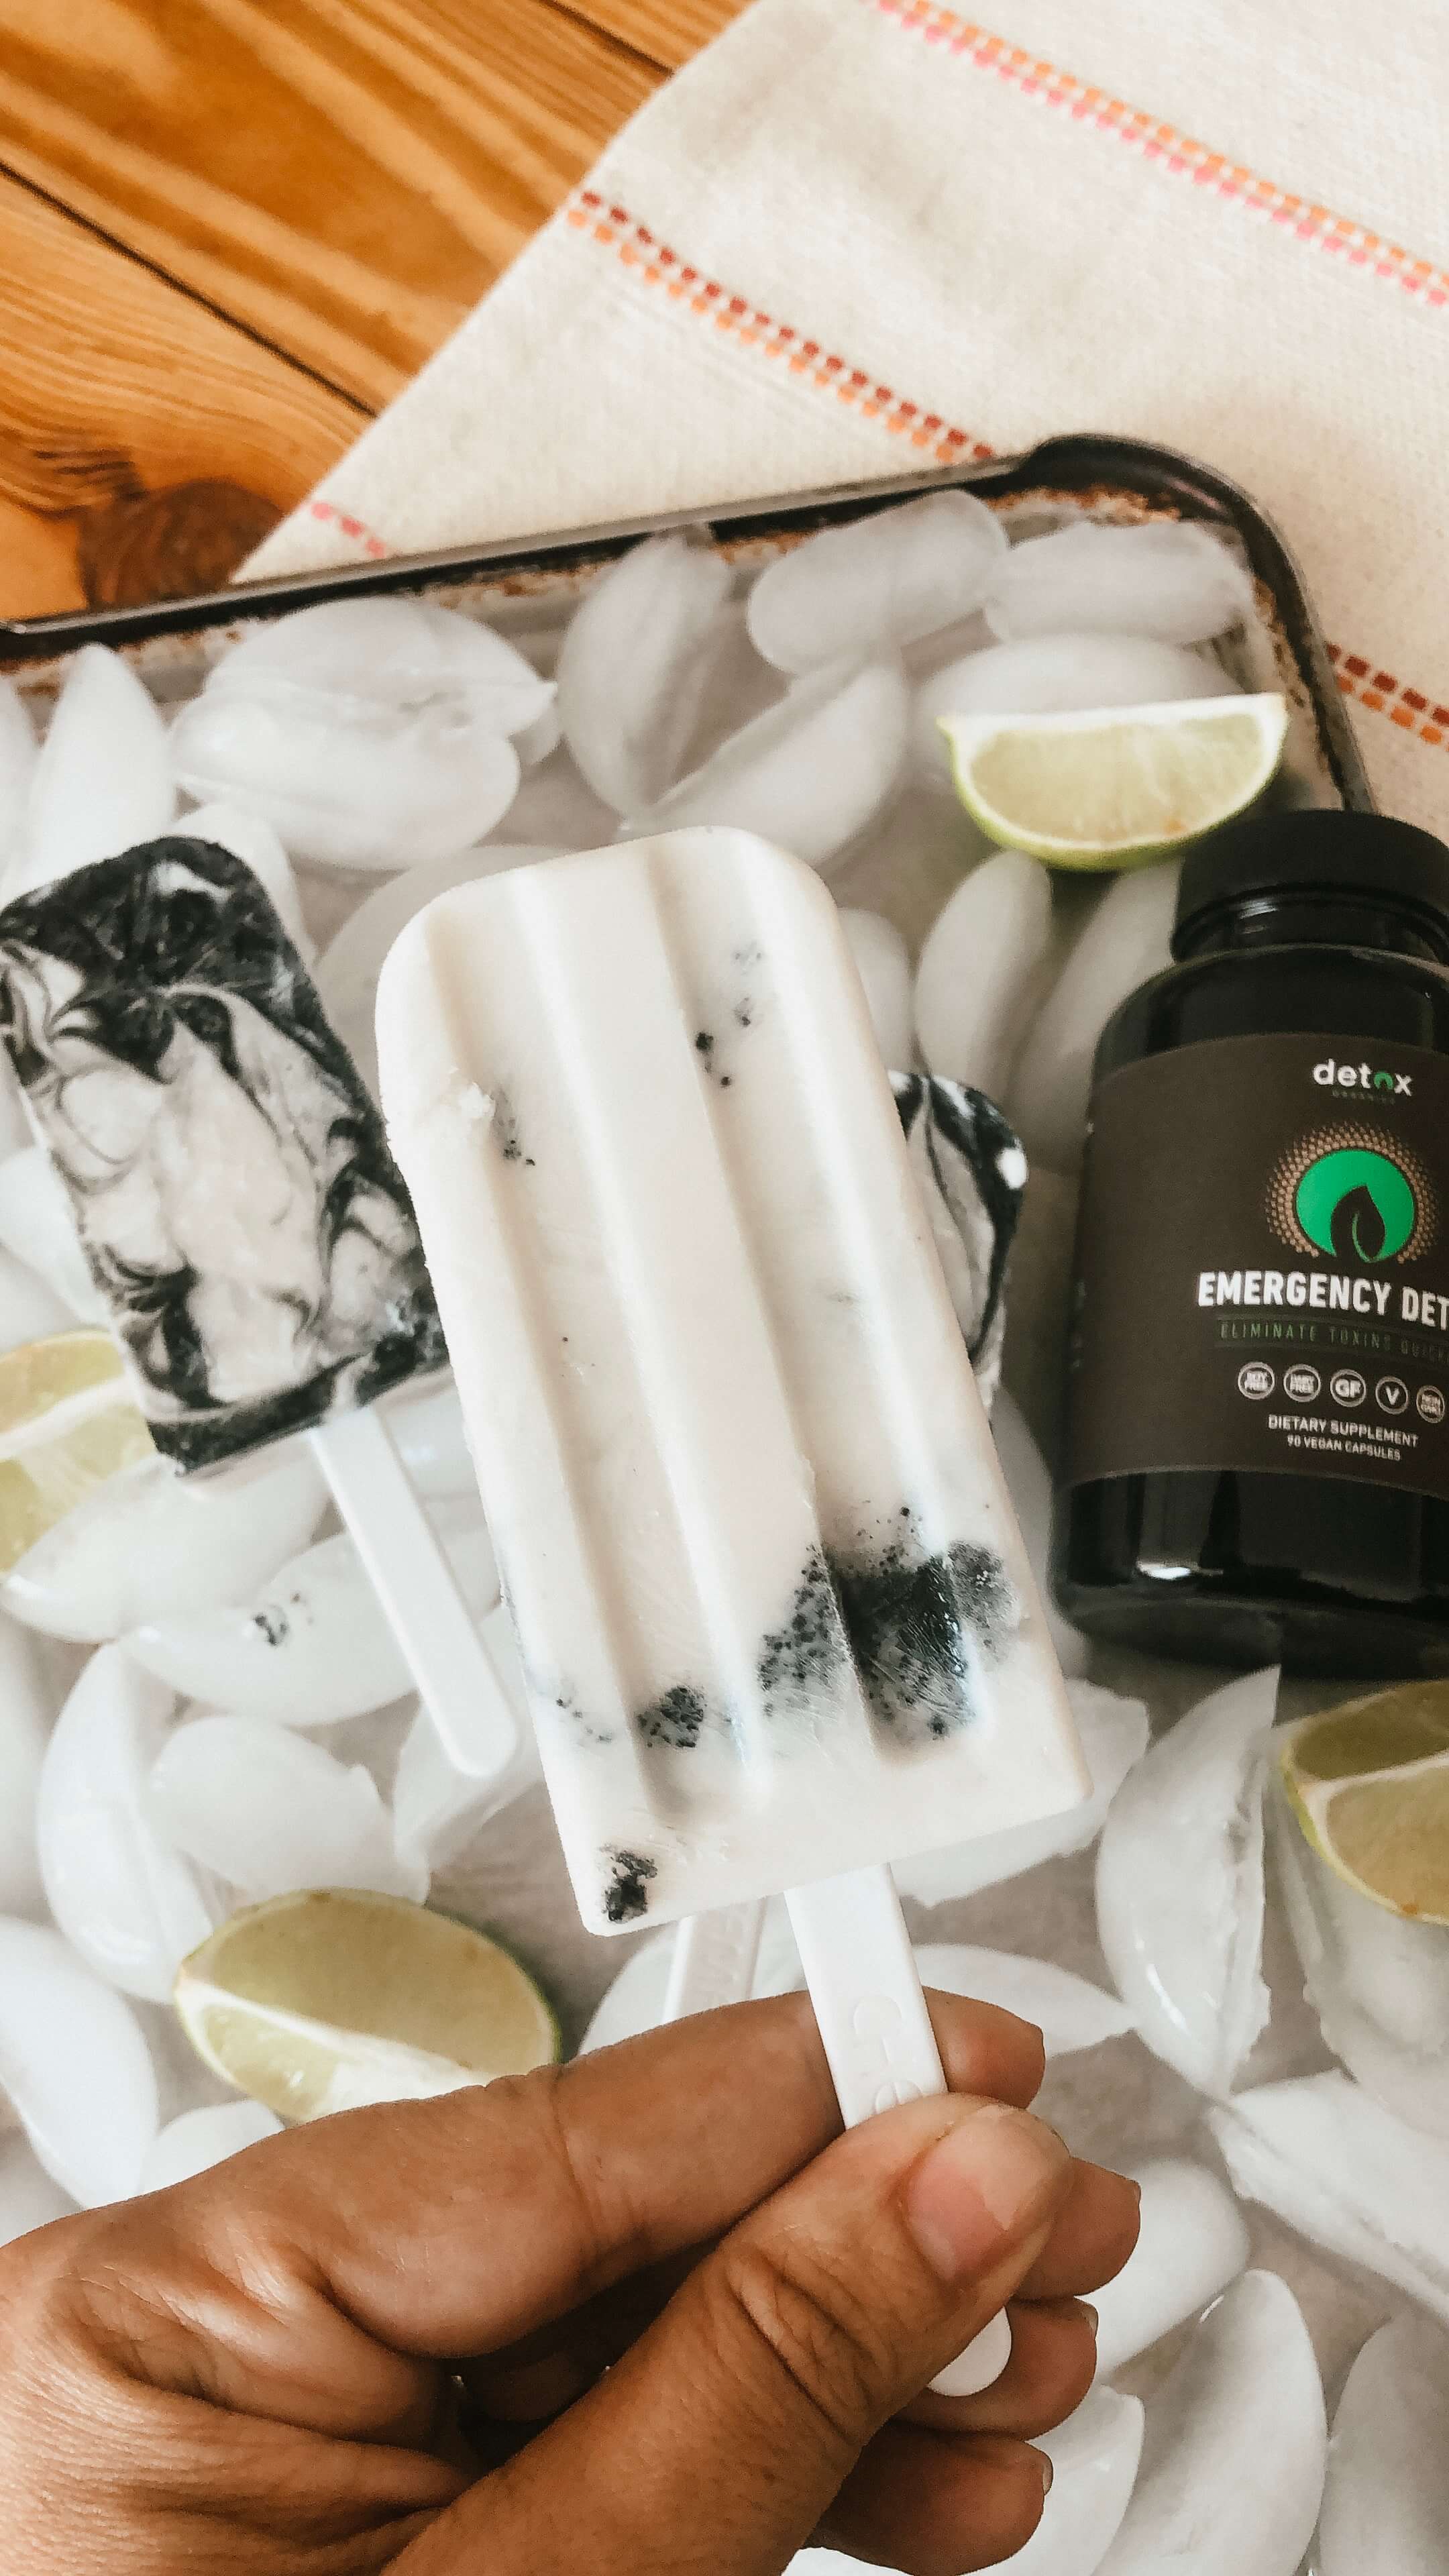
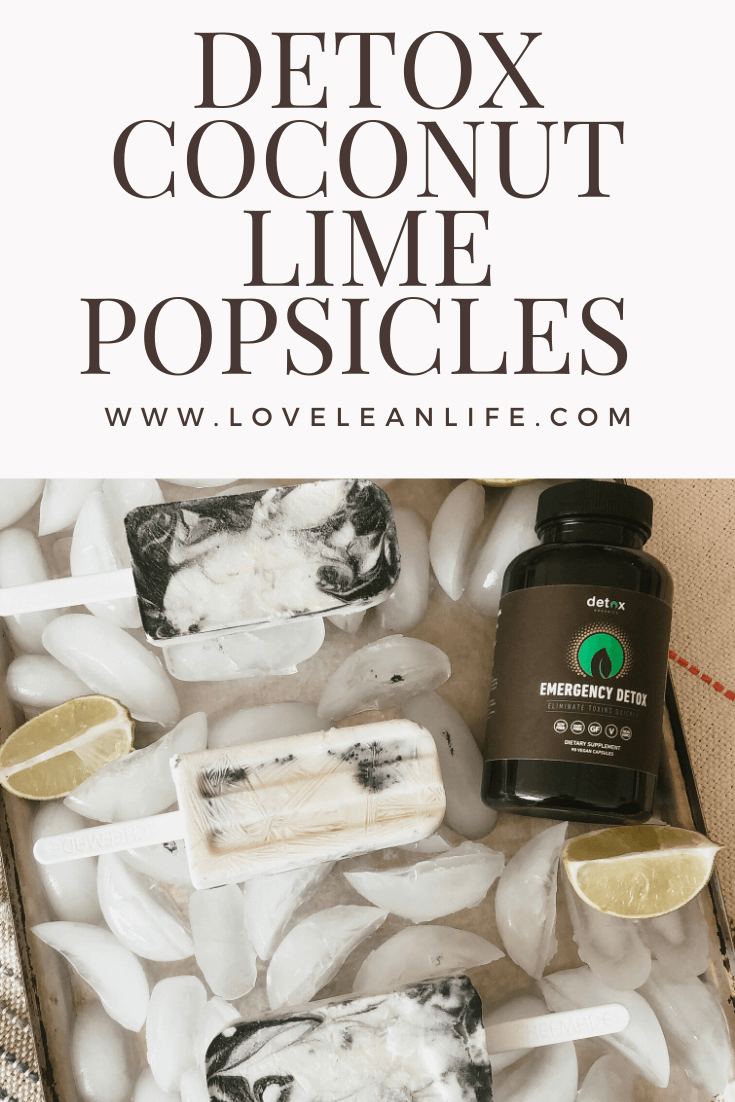
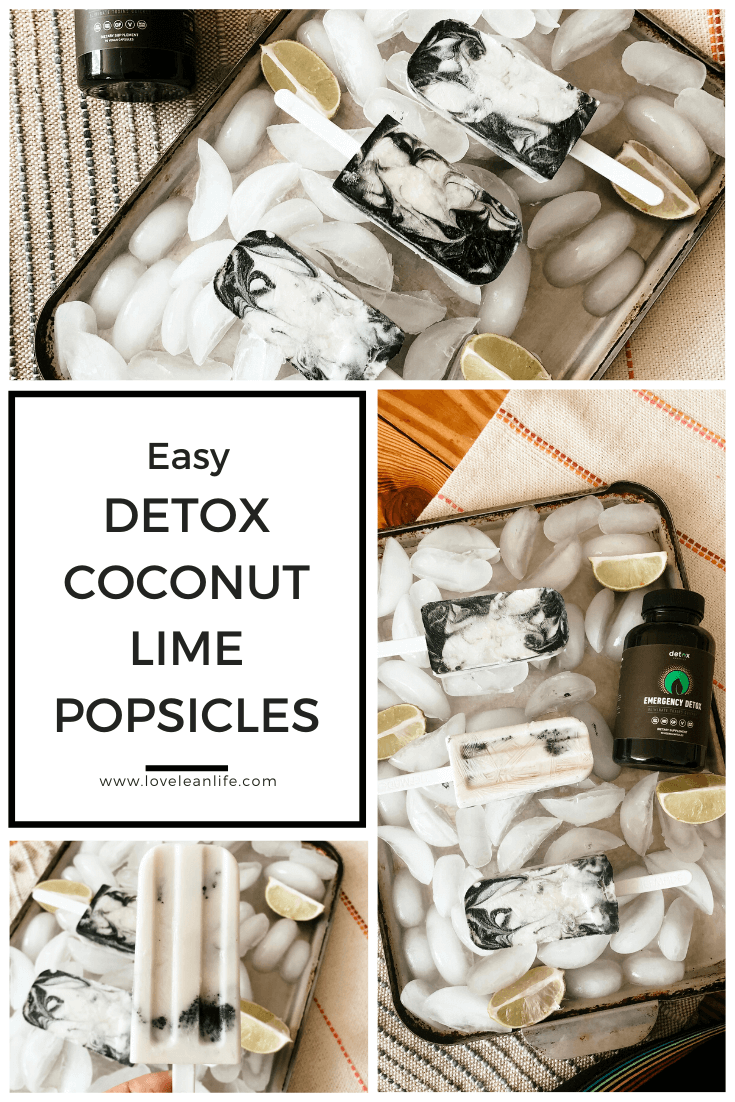
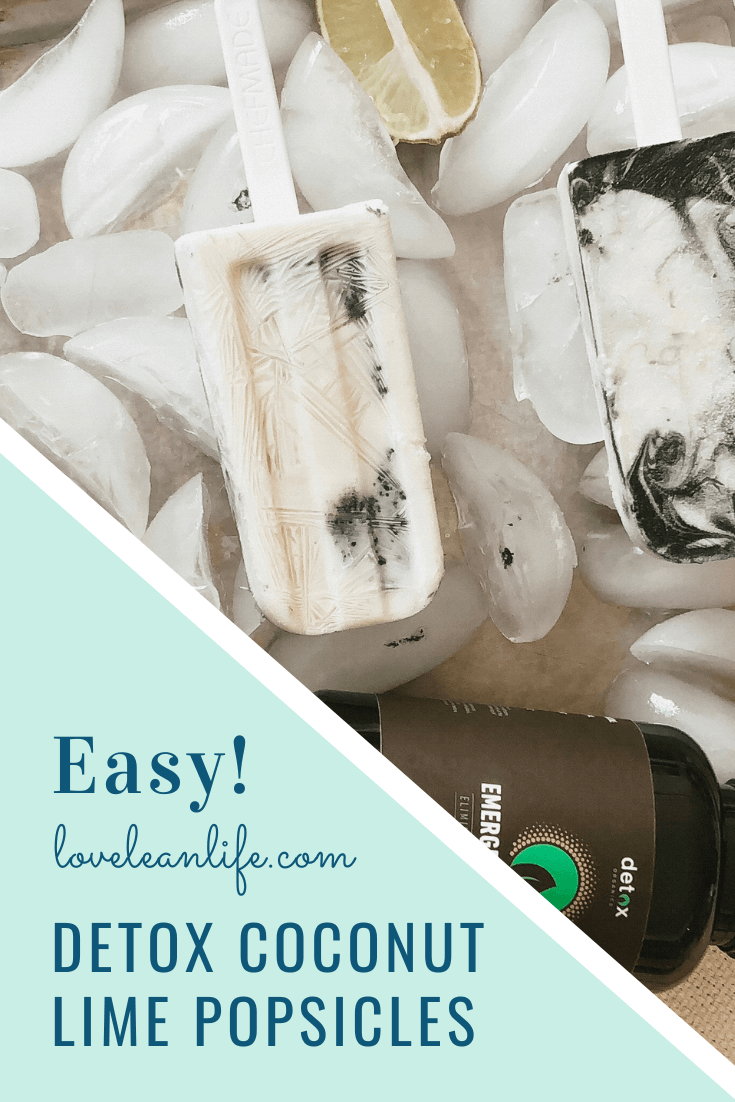
I found this recipe through Half Baked Harvest and adapted it to include my favorite superfood Detox Organics. Let me know how you enjoy these gooey Halloween bars!

Ingredients

1/2 cup honey

1/4 cup maple syrup

1/4 cup coconut sugar

1 cup creamy natural (no stir) peanut butter

6 cups organic corn flakes

12 oz mini chocolate chips (semi-sweet) melted (set aside 1 tbsp that won’t be melted)

1 scoop Detox Organics

2 tsp coconut oil

6 oz white chocolate chips melted

Instructions

  1. Using a 9X13 baking sheet, line with parchment paper. This recipe works best when have a slight lip around the edge to pack the mix into.
  2. In a large microwave-safe bowl add in honey, maple syrup, coconut sugar, and the peanut butter. Melt and mix together thoroughly.
  3. Pour corn flakes into the bowl and toss until they are completely coated and press into the baking sheet. Place in the freezer for 10 minutes.
  4. Melt chocolate chips and 1 tsp coconut oil for 10 seconds at a time until easily spreadable. Add in your scoop of Detox Organics and mix.
  5. Pour over cornflake pan and spread evenly.
  6. Melt white chocolate chips and 1 tsp coconut oil and stir 10 seconds at a time until fully melted together.
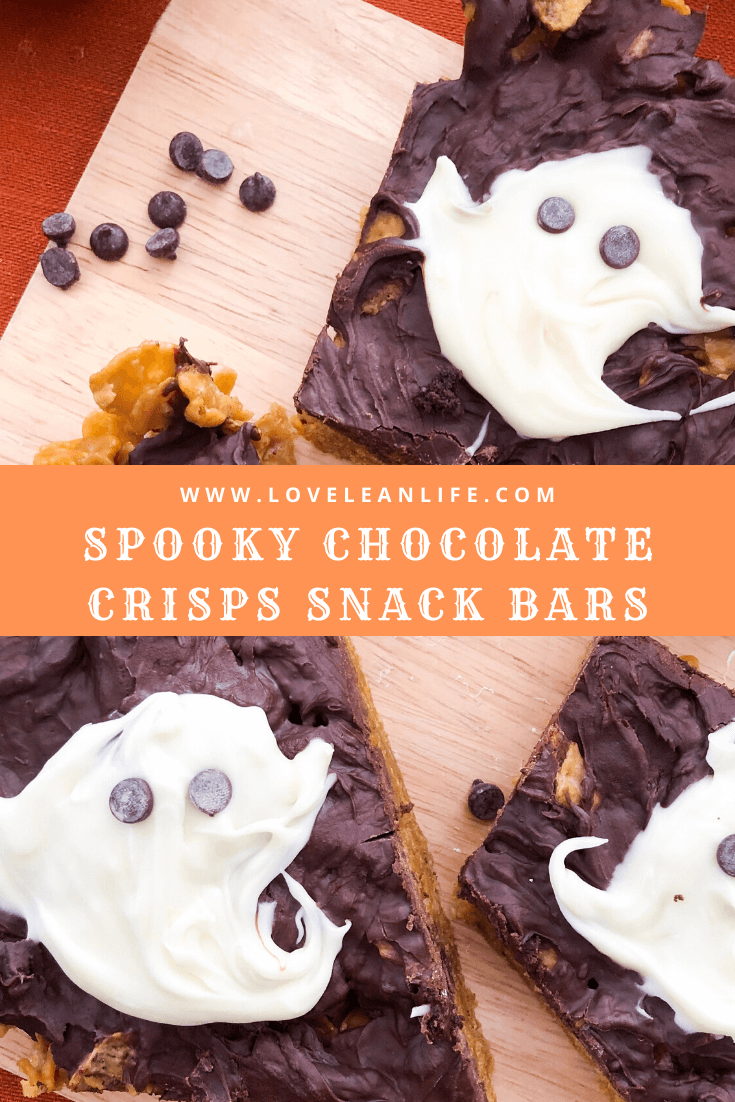
  7. Spoon a dollop of white chocolate onto the chocolate mixture to make your ghosts. Spread out far enough to leave room for their arms and tails.
  8. Using a toothpick, draw out arms and a tail for each ghost. Gently drag the white chocolate out to shape it.
  9. Use 2 mini chips from the tbsp that was set aside for eyes by placing them point down into the ghost.
  10. Refrigerate for 1 hour and then gently cut out big bars with a ghost on them with a large sharp knife. Keep refrigerated until ready to eat.
  11. Enjoy!

Sour Replenish Popsicles

Dessert, Recipes, Snack · October 25, 2019

I used to use BCAA’s to replenish during a workout. Then once I was not working out as much I used them to flavor my water and during pregnancy. They are hydrating and delicious to drink.

I have been on a popsicle kick lately and decided to make these as a great way to rehydrate when I was having a sweet craving.

These pack in the BCAA’s and electrolytes. It’s a nice treat for after the gym or just on a hot day when you’re tired of just drinking plain water. So add in this ice pop and enjoy!

Ingredients:

5oz water

2 scoops HIIT Max raspberry lemonade BCAA’s

1 lemon 1/2 juiced and 1/2 sliced

Tools:

Classic Popsicle Silicone Mold (3 pops)

Instructions:

  1. Cut the lemon in half and squeeze half into a shaker cup. Cut the other half into super-thin, see-through slices.
  2. Add 5oz of water to the shaker cup and 2 scoops of the BCAA powder. Shake until fully mixed.
  3. Assemble the popsicle mold with the popsicle sticks.
  4. Lay 1-2 slices of lemon in the bottom of the mold.
  5. Pour the contents of the shaker into the mold until almost full, leave a tiny bit of room for the popsicle to expand.
  6. Freeze for 6 hours or overnight for best results.
  7. Gently press popsicles out of the mold.
  8. Store separately in wax paper bags in the freezer.
  9. Enjoy!

Through the Mist Halloween Popsicles

Dessert, Recipes, Snack · October 25, 2019

Charcoal, Coconut-Lime Popsicles

I love popsicles as a late-night snack. I tend to only have a sweet tooth in the evening. Popsicles tend to cure my sweet with just once small pop!

I wanted to do something fun for Halloween and decided to add in the activated charcoal because I had seen other places using it in ice-cream and thought “why not?!”

So this is a fresh and funky take on a detox pop for Halloween. The front of the popsicle looks like the scary mists and the back has a beautiful swirly black spider web like feel.

If you make this popsicle let me know how it turns out and what you think of the fresh flavor. I got rave reviews from my friend, her 2-year-old daughter, and my husband!

Enjoy and have a spooky Halloween sharing these treats!

Ingredients:

1 Can of full-fat coconut milk (13.5oz)
1/4 cup of whole milk
3 tbsp unrefined honey
2 tbsp freshly squeezed lime juice (1 large size lime)
1 tsp vanilla
1/2 tsp Emergency Detox activated charcoal (6 capsules opened)
1/4 tsp Himalayan salt (or a pinch)

Tools:

Silicone Flat Classic Popsicle Molds

Frother


Instructions:

1. In a large mixing bowl combine coconut milk, whole milk, honey, lime juice, and salt. Whisk until blended and then Emergency Detox activated charcoal.
2. Measure out 3 tbsp of the mixture into a small bowl and add in charcoal powder. Use a whisk, or a small electric frother whisk to thoroughly blend it together.
3. Assemble your popsicle mold and sticks. In your popsicle mold, place a few large drops of the charcoal mix. Then layer over with the coconut mix. continue 2-3 more layers until the mold is almost full.
4. Using a toothpick swirl around the charcoal mix into the coconut mix to create your own design.
5. Freeze for 6 hours or overnight for best results.
6. Gently pop out the popsicles and store in individual bags and place them back in the freezer.
7. Enjoy!


Cheesy Chicken Rice and Broccoli Bake

Dinner, Recipes · October 2, 2019

I have always loved anything that started with cheesy and ended with bake. I felt pulled towards this recipe due to the rice and cheese and of course if there is any veggie that works with cheese, it’s broccoli. So this recipe is cooked all in one pan making it simple to prepare and quick to cook.

This also makes a lot of food and I ended up freezing half of it for later. This worked out well for when the babies are keeping us busy and we just need to warm up dinner quick! This is a perfect postpartum easy to make meal that we will make this again and again.

Cheesy Chicken Rice and Broccoli Bake

(All ingredients are organic when possible)


Ingredients:


1 tbsp extra virgin olive oil 

1 small onion chopped

8-12oz chicken chopped (depending on protein needs)

1 tbsp minced garlic in olive oil

3/4 cup sprouted rice uncooked

1 10oz can of cream of chicken soup

3 cups chicken broth 

2 cups frozen chopped broccoli

1 cup cheddar cheese 

Pinch of salt and pepper


Instructions:


  1. Heat the olive oil in a large skillet and add in the chopped chicken and onion. Brown the chicken over medium heat and season with salt and pepper. Add in garlic and stir for 30 seconds until it becomes aromatic. 
  2. Stir in rice, cream of chicken soup and the chicken broth into the skillet. Add the first 2 cups of broth in and then add more if needed as rice cooks fully in about 15 minutes. 
  3. Add in the frozen broccoli and 1/2 of the cheese and cook for 2 more minutes. Once broccoli is soft, sprinkle the remaining cheese over top of the skillet and place the skillet under a broiler for 2 minutes if you desire to brown the cheese. 
  4. Serve and enjoy!


Deconstructed Stuffed Pepper Bake

Dinner, Recipes · October 2, 2019

I love a good stuffed pepper recipe. With two tiny twins only a few weeks old, the time I have to cook or bake anything is very limited and stuffed peppers are very time-intensive when I make them. So when I came across a recipe for a bake that was quicker on the prep side and also all of the flavor of the real recipe, I was sold!

I hope you enjoy this bake. It’s also super simple to split up and freeze. I got a little extra cheese and use copious amounts of sour cream and indulged a bit. I also think some hot sauce would have been good but since I’m nursing, I figured it would be best to take it easy on spicy stuff for a while.

Deconstructed Stuffed Pepper Bake

(All ingredients are organic when possible)

Ingredients

1 tbsp olive oil

1 lb ground pork or turkey

1 lb grass fed ground beef

1 small onion chopped

1 large green bell pepper chopped

1/2 tsp garlic powder

1 tsp paprika

1/2 tsp red pepper flakes

1/2 cup sprouted rice

1 cup chicken stock

1 cup cheddar cheese

1 can 14/5 oz diced tomatoes

Pinch of salt and pepper

Serve with extra shredded cheese, sour cream, and hot sauce

Instructions

  1.  In a large cast-iron skillet warm olive oil over medium/high heat. Crumble both ground types of meat and cook for 5 minutes or until there is no pink left in the meat.
  2.  Add in onion, bell pepper, paprika, garlic powder, red pepper flakes, salt and pepper, and stir. Continue to cook for 5 minutes until the veggies start to get soft.
  3.  Add in the rice to the mix and stir in chicken broth and tomatoes with the juice. Turn the heat to medium and cook for 10-15 minutes until the rice is cooked and the liquid is absorbed.
  4.  Layer on the cheddar cheese and let it melt over the top of the dinner.
  5.  Serve and enjoy!

Chicken and Biscuits – Easy and Quick

Dinner, Recipes · October 1, 2019

When I got home from my twin birth I decided to try and meal prep since time is super limited and I have had a super appetite. I wanted to make sure I had easy to warm up meals that were also easy to make.

I also have been craving carbs and comfort foods. So what better dish than a one-pan chicken and biscuits dish! I added extra chicken for extra protein and it turned out amazing!


Chicken and Biscuits

Ingredients:

(all ingredients are organic when possible)

1 10.5oz can condensed cream of chicken soup

1/4 cup organic (Grassfed if possible) milk

3/4 cup shredded cheddar cheese

1/4 tsp ground pepper

1 16oz bag of frozen veggies (green beans, carrots, peas)

8oz chicken breast

1 can of Annies Homegrown organic biscuit dough or similar (7.5 oz or 8-10 biscuits)

Instructions:

1 Heat over to 400 degrees F.

2 Bring a large pot of water to boil. Place in chicken breasts and boil until fully cooked. Then chop chicken into small chunks.

3 In a 3-quart rectangular baking dish combine soup, milk, cheese and pepper, then stir. After combining then add in frozen veggies and chicken.

4 Bake mixture for 15 minutes, until the liquid is boiling. Remove from oven and stir.

5 Top the mixture with biscuits. To ensure they bake through pull each biscuit in half and place evenly over top of the dish.

6 Place back in the oven and bake until the biscuits are golden brown an cooked all the way through.

7 Serve and enjoy!

Twin Nursery Essentials Top 5

Twin Pregnancy, Twins · September 3, 2019

When planning for one baby I had everything all laid out. I envisioned this sweet nursery and lots of mats and interactive toys stationed around the room. When we found out we were having twins my big nursery seems to shrink in size before my eyes. Cribs are huge! Now put two in a small room with two rocking swings and there was no place to walk in our little nursery. 

I went on other blogs to see what moms found they could do to make twin life in their nursery the most effective. I found amazing options that saved room and also helped keep everything in twos more manageable. If my husband and I wanted to rock a baby, did we have to share one glider or make space and find the money for two? I answer all the questions below with the very simple yet effective solutions we found!

What we bought after advice from other twin parents:


Twin Pack and Play Bassinet

I wanted the twins to sleep in our room for at least the first 3-6 months. I had planned on the beautiful Moses basket that was long and could double as a lounger when taken off the wooden base. They even had a rocking version you could get. But after doing some measuring I realized I wouldn’t be exiting the bed on that side with the sheer length of two of those nestled up to the bed.

I found a Twin Pack and Play that originally I had not even considered for sleeping options for them. I knew pack and plays were great for having a diaper changing place and a little bassinet for one but didn’t even know they had a twin option! 

The twin option comes with two bassinets on top that the babies can sleep in. Each bassinet also pops out so it can be used in other places around the house and the set includes a diaper changing table that can be swapped in when needed. 

It’s much more compact than two separate bassinets and has the changing station combo. It will also be nice when the babies are sitting up to have a place for them to play in as well. All in all this one proved to be a multiuse, space saver that I’m glad we got on our registry!


2 Mini Cribs

Cribs are huge. I said that before but I’ll say it again because I had no idea how much space they took up. While we don’t have a tiny room for a nursery, we sure as heck don’t have a big space. So coming up with a configuration of cribs that also still allowed us to have floor space was not easy. 

A friend of mine told me she was friends with a mom of twins who used mini cribs. They are a bit smaller than the standard size cribs and can actually fit through most standard doorways when assembled. 

The one hesitation I had was how long they could sleep in the mini crib for compared to the regular cribs but that woman with twins sent over photos of her twins in the cribs at the ripe old age of two and they still had plenty of room to go. SOLD! 

So we ended up with a set of two white wooden mini cribs that are side by side along the wall with plenty of space for us to open the closet and still have the floor space we needed. 


Mamaroo and Swing and Rocker Combo

What will soothe your baby?! I have heard plenty of horror stories of people buying expensive Mamaroos and their babies hating them. What if we bought two and neither of the babies wanted anything to do with them?

So upon the advice of a lot of other parents we borrowed a Mamaroo from a friend to make sure the babies like it and registered for a rocker swing combo so we had options. If one baby likes each or they both like both options that would be perfect. In the chance that they both hate one, then we can just find someone else to love it and get a second of the options that they do like. 

We now have one Mamaroo and one Greco Swing and Rocker Combo for them to try out and *hopefully* love. 


Twin Z Nursing Pillow 

The boppy is by far the most popular nursing pillow I came across for nursing and baby lounging. I considered getting two since it was very versatile but also seemed like a lot of pillows to be carrying around. I liked that it made tandem feeding with a bottle easy but did not seem very helpful for tandem breastfeeding. 

Then I came across the Twin Z Nursing Pillow. This pillow is set up like two Boppys put together with a middle insert that you and lift up and use when nursing. The pillow doubles as a nursing wrap around pillow for twins as well as a double lounger if it’s just on the floor. 

While it was more expensive than the 2 Boppy’s I like that it doubles from a tandem breastfeeding pillow to a double lounger for the twins. So that convenience was worth a little more. Plus, just like the Boppy, you can change the covers on the pillow and swap them when they get dirty or if they get ruined. 


Double Rocker

The last piece of big furniture we got for the nursery was a rocker. I came across a double rocker in a photo and decided to check it out. It’s basically like a rocking chair plus a half. The other option I saw was a small love seat but due to size constrictions in the nursery, neither that or two separate rockers were going to fit. 

The double rocker was a good middle ground. It was still the traditional rocker I wanted but allowed enough room for me to sit on it with the giant Twin Z Nursing pillow to feel the twins in tandem in the chair. A traditional rocking chair could not accommodate both and I’m happy I went with this one!

Plus both my husband and I can sit on it if we want to although I don’t see that happening very often. I’m pretty sure we break the weight limit of the chair at that point anyway. 

Overall we got a few twin essentials that I was most worried about to help us save room and make everything easier with the two babies. I’m so happy I checked in with other twin moms and found what worked for their babies.

Why We are Cloth Diapering Our Twins

Twin Pregnancy, Twins · August 27, 2019


Before I was pregnant I found myself intrigued by people who were cloth diapering their babies. I followed a few moms who explained the process and the reason they did it. I felt very pulled to their values and found they aligned with mine too. I felt confident I would try cloth diapering once we had our first baby.


When we found out we were having twins I instantly started thinking about all the things we had planned for one baby and we asked ourselves did it still make sense for two. Childcare, diapering, who’s working and who’s staying home and for how long all came up. With the cloth diapering idea still burning in my head, I considered what it would mean to cloth diaper two babies at once. 


I am kind of an eco nut, so cloth diapering appeals to me on many levels. The facts about traditional plastic diapers were startling, especially since now we would be doubling the number of diapers needed. 


Tons of Plastic Diaper Waste


According to the EPA, Environmental Protection Agency, the number of disposable diapers that make their way into the landfill each year is close to 20 billion. That comes out to about 3.5 tons of plastic waste added each year. I also read that each baby can use up to 8,000 diapers from when they are born until they potty train. That’s up to 16,000 for us since we will have 2! 


Something else that is worrisome is that it can take up to 500 years for each diaper to decompose. The diapers go to a landfill to decompose, but that’s not the most conducive for them to break down. They require sunlight and air to breakdown and when dumped into a landfill they can end up under the massive tons of other garbage that comes in each year and won’t be exposed to the sun and air they need to break down.


Toxic Chemicals from Disposable Diapers


When these diapers are breaking down they can release toxic chemicals. The list of chemicals that has been shown to be released from breaking down plastic diapers are toluene, ethylbenzene, xylene, and dipentene. These chemicals were confirmed by the Environmental Health Association of Nova Scotia to be released once the diapers started breaking down and have adverse health effects to anyone who is exposed to them. 


The other chemical that concerns me with disposable diapers is the traces of dioxin that comes from chemical bleaching. It can leave traces in products like disposable diapers that use that process and it is a known carcinogen that is banned in other countries but is still allowed in the U.S. 


Material and Manufacturing


The last factor of disposable diapers that really made me not want to use them is that over the life of consuming these diapers they use about 20 times more raw material to make them. It also takes 3 times more energy to make and 2 times more water to make. I think one of the most beautiful things about cloth diapering, which still takes resources and energy to make them, is that they can be used again and again. I plan on giving away our cloth diapers once we don’t use them to another family to use. And my friend is currently prepping cloth diapers she was given by another mom for when her baby gets here! Talk about saving on resources!


We have also looked into compostable and biodegradable disposables and there are some great options out there. They are more expensive than regular plastic disposable diapers. I think those will be good options for us when we travel and when other people watch the twins. It might not always be easy to show someone the ins and outs of cloth diapering if they have never done them so we would still want an environmentally friendly option for them to have on hand.


Addressing the water concerns


One thing that was brought up was washing diapers and how environmentally friendly it is. I agree that doing more laundry contributes to more water usage. Having more humans is going to contribute to more laundry in general. We need to wash our clothes and cloth diapers are no different. Cloth diapers can be done in small loads and even done in high-efficiency machines that help save water. They can also be line dried or dried on a rack in your home so you don’t need to put them through the dryer. 


In our area, we are lucky to have a cloth diapering service which uses huge high-efficiency washers to save even more energy and water. Yes, I know they have to drive to me, but it is local. And any diaper you bought at the store was driven there as well and probably from much further away.

Diapers we have so far


We have started to stock up on cloth diapers from our registry and baby shower. I also bought a few at our local baby store, Zoolikins, at the cloth diapering class they offer. 


The brand off of Amazon I bought was Alva Baby and we registered for 2 sizes. The diapers we wanted were the pocket diaper where you can put the diaper prefold inside of the pocket of the diaper cover. It can also just be laid on top of the diaper cover like a non-pocket diaper cover can be. I will do a follow up on the types of cloth diapers so that it makes more sense on the types I’m going for. 


We did register for the infant size that is good for babies 6lbs to 12lbs since the twins will most likely be on the smaller size so we wanted a more fitted option. We also registered for the regular size diapers that cover sizes 12lbs up to 33lbs. So those are also snap-adjustable where you can use the snaps to make the diaper smaller or larger. 


Since we first received the snap diapers I have added a few velcro ones in the newborn size to our collection as well. I have heard that as babies get older they can more easily take off their velcro diapers but the ease of it when they are tiny seemed worth investing in. 


Cloth Diapering Class


I was introduced to the velcro ones at the cloth diapering class I went to with my friend who will also be cloth diapering. 


If you are in Arizona, the best resource for learning about the tools and tricks of cloth diapering is at Zoolikins in Scottsdale. Their cloth diapering classes are free and you can register for the monthly classes if you’re curious about how it works and what each type of diaper does and is best for. 


The class was held on a Saturday and after taking it, I felt really comfortable with knowing which type of diaper is best for us and which kinds wouldn’t work as well with the twins. I’ll link their page here.


They also know cloth diapers because they are run by the makers of the Bumkins brand and they have been making cloth diapers for decades! Zoolikins is their local Arizona boutique and I really love that the woman who runs it started cloth diapering her babies due to sensitivity problems she has with disposable diapers in the 80s and 90s. 


They have changed and innovated with the cloth diapering movement over time to make sure modern moms have all the best options. The store carries plenty of U.S. made brands of cloth diapers as well as some companies that are imported. So if that’s important to you too, then you have a large variety of options there, including their own brand. 


I’m so excited to share how all of the cloth diaper options we have end up working out. I am also going to be doing a cloth diaper blog on the types and options that you have on the market so you can decide which type could work for you and your baby!


[video_page_section type=”youtube” position=”default” image=”https://loveleanlife.com/wp-content/uploads/2019/08/Cloth-Diapering-our-twins.png” btn=”light” heading=”” subheading=”” cta=”” video_width=”1080″ hide_related=”false” hide_logo=”false” hide_controls=”false” hide_title=”false” hide_fullscreen=”false”]https://youtu.be/3efFpIjLcFg[/video_page_section]

Cloth Diaper Information Resources: 


https://www.scientificamerican.com/article/the-green-renewal-of-the-cloth/


https://oureverydaylife.com/environmental-impact-of-disposable-diapers-5088905.html


https://zoolikins.com/pages/cloth-diaper-tips-tricks


Free Cloth Diapering Classes (Local to Arizona): https://zoolikins.com/pages/classes-events


Twin Pregnancy Survival Guide

Twin Pregnancy, Twins · August 20, 2019

My Survival Guide So Far…


Once we found out we were having twins I knew that my growth would start to take off and exceed normal pregnancy size at some point. It started happening around the 24-week mark when I was measuring about 32 weeks. 


At my 27 week appointment, I was measuring 36-37 weeks. It’s starting to get a little uncomfortable with growing pains but I know that even early on I had to start making adjustments early. 


I spent a lot of time on twin blogs reading about what helped with comfort in other moms’ twin pregnancies and I have to say, all of the recommendations were spot on. I’m so happy that I started early to get the stuff I needed because the discomfort is real!


Here are my top picks of all the things that I have gotten, and how they have helped me. I really swear by these. If I find anything else through the third trimester, I’ll add to this as I go!


Twin Pregnancy Book

This was my very first purchase after finding out that we were having twins. I was at first just stunned. I felt overwhelmed by the unknown. I had known so many people who were close to me that had a baby but no one that I had watched personally go through a twin pregnancy. I, however, did know some friends from high school who had twins although I had never asked them about what it was like because I never thought I would need to know.


I also found that hearing the words high risk and specialist, when we were at our first visit, sent me into a tailspin. While not all multiple births are complicated, a lot are and still require a lot of monitoring even when no complications are present. So I felt lost, scared and didn’t know what to expect. 


P.S. Don’t start asking Google. However, I did Google twin mom blogs and found so many that were dedicated to twin pregnancy and child-rearing from moms who had recently or in the last 5 years had twins. Quite a few recommended starting to read up on what you were in for from a medical standpoint so you didn’t fear all the doctor’s visits and knew how you would be handled. 


The book is When You’re Expecting Twins, Triplets or Quads 4th Edition: Proven Guidelines for a Healthy Multiple Birth and it changed my whole mindset. I realized it’s classified as high risk for a reason, why getting to the right people early makes a difference and to appreciate all the extra doctor’s visits and monitoring as a blessing, not a burden.


Body Oils


Knowing how much my skin would be changing based on even the lowest spectrum of healthy weight gain made me realize I need to be conscious of taking care of my skin. First, twin skin is a thing and I’ve said this many times but I will repeat it again because I think it’s worth saying. Just because I am trying to prevent stretch marks doesn’t mean I’ll be angry if I get them, don’t appreciate the miracle of this pregnancy or even will be able to in the first place. But this is what I’m doing to take care of my skin. 


My skin, in general, was very dry right from the beginning. I have always had dryer skin everywhere but my face which is combination oily and dry. But as soon as I was a few weeks pregnant my skin was just so dry that even lotioning a few times a day wasn’t doing enough for me. So I started using oils on my belly, elbows and knees in the first trimester. I made my own oil mixture as well as got a 100% organic oil from Mambino Organics. 


The oil they make is 100% organic which I was having trouble finding in the pregnancy belly care. The Oh Baby! Anti-Stretch Body Oil is my favorite so far and they also have a very convenient belly butter called Oh Baby! Anti-Stretch Belly Butter that can be taken in a purse or left at work. It’s very low mess compared to toting around a bottle of oil.


But let me tell you, when your skin starts to stretch and get itchy, you’re going to love this oil. It’s so soothing and I started it very early.


Loose Cute Dresses

From about week 4-5 I was very bloated and clothes started to fit snug even though I didn’t gain any weight right away. In fact, even when I was experiencing extreme morning sickness and lost a few pounds I was still having trouble buttoning my pants. I immediately invested in a few dresses. 


At first, some loose shorter dresses worked perfectly when I had a very small bump. But once the bump popped out more the shorter dress was just asking for a flashing incident. 


While stores like Motherhood, small boutiques and even the Goodwill stores by me had a great selection of long dresses, I actually found my two favorite dresses on Amazon. They were not even maternity, but almost all the photos of people wearing them were pregnant women raving about how much they loved these dresses. There was an empire waist style dress and a spaghetti strap style dress as well. 


Plus, both styles came in so many prints. The empire waist dress was also great to dress up for events or work and the spaghetti strap dress can be dressed up with a cardigan or down for the pool or a night out. 


These were a great investment because I know I can wear them even after I’m not pregnant and really use them for going out places and dressing up or just everyday dresses since they will be flattering on my post-baby body.


Body Pillow


One of my friends got me a maternity pillow within the first 2 months I was pregnant and I can truly say, this was a lifesaver from the beginning. Growing pains and trouble sleeping has been on and off this whole pregnancy. 


The body pillow I ended up with is the Boppy Total Body Pregnancy Pillow and I love it. It’s like two specially shaped pillows connected into one long body pillow. The top part is a little thicker and meant so you can lay your head on it and hug it for shoulder support. The middle is thinner for your growing belly to lay on, and the bottom is fitted for keeping between your knees and supporting the hips. 


This has helped me so much. I didn’t even think about shoulder pain but as my bump grew, laying on my side pulled my top shoulder down and caused my back and arm to ache after a long night. The big pillow between my arms to hug really helped keep my shoulders open.


The portion for between your knees is a lifesaver for when your hips are growing as well. Round ligament pain can be throughout the pregnancy as you hit growth spurts and this helped with relieving the pain of my legs dropping over one another. My pillow came from Target but is also available on Amazon!


Ice Packs


I have never been so swollen in my life. I laugh because in the morning most of my body is normal size but as I walk around a lot I tend to have ankles that swell up quite a bit. On super active days my hands swell up, too. Ice packs feel amazing on swollen limbs. 


I also love the gel beads ice packs because they are soft and great for placing behind my back and on my hips when they hurt. Because they are flexible they don’t feel hard if you lay on them which is a huge bonus. 


I also will be investing in the mini round gel ice packs for when I’m breastfeeding because so many moms said these were amazing lifesavers for their tender breasts.


Belly Support Strap

I may have needed this before more people due to the fact that my belly grew significantly large quite quickly. This strap is made of soft breathable material that stretches around your belly and Velcros behind your back. 


The belly sling it creates helps lift your belly from the bottom and uses your lower back to help take some stress off the pelvis. It’s been such a nice thing for me to throw on under a dress or a shirt if I know I have to walk around a bit. I wore it while traveling and even put it on to walk the dog and get groceries. 


I got this maternity belt on Amazon and it still fits with my belly measuring 38 weeks. So I’m guessing it should fit through the remainder of the pregnancy as well!


Tums/Rolaids


These are the most underrated thing I carry in my purse. I am taking a heartburn pill my doctor recommended to control the amount of stomach acid so my esophagus does not get burned. When I was just trying to control my heartburn with Tums it wasn’t working well. But even the script sometimes does not help 100%. 


So now I use Tums when I’m out and about and need to control stomach acid so I can get more water in. For those of you who don’t have horrible heartburn, one of the biggest struggles is getting enough water in and when you even have a little bit of heartburn, drinking a bunch of water actually can create an inferno in your stomach. 


I have needed to drink water around the clock to keep up with the fluid needs of the twins. So Tums have been allowing me to chug water when I need it and my stomach is still acting up.


Finding Comfort in Twin Pregnancy


While I can’t promise these will solve or even ease all of your ailments, I know they have greatly contributed to helping me. I have days where it seems everything put together cannot comfort the massive growing pains and discomfort but I am thankful for the times they do help. 


Pregnancy is hard on the body, even if we are built for it. It doesn’t hurt to do the most to keep yourself comfortable so you can enjoy your pregnancy to the max.

[video_page_section type=”youtube” position=”default” image=”https://loveleanlife.com/wp-content/uploads/2019/08/Twin-Pregnancy-Survival-Guide.png” btn=”light” heading=”” subheading=”” cta=”” video_width=”1080″ hide_related=”false” hide_logo=”false” hide_controls=”false” hide_title=”false” hide_fullscreen=”false”]https://youtu.be/uq8FvPs1Dec[/video_page_section]

Twin Pregnancy Exercises by Trimester

Lifestyle, Twin Pregnancy, Twins · August 13, 2019

Before we found out that we were pregnant with twins I had such grand plans for staying on the workout regimen that I had established in the past year. That was about two Zumba classes a week, a body toning class which incorporated HIIT and weights, and then swimming or hiking on the weekends. But I ended up being so sick right away that working out felt almost impossible.

When we found out we were pregnant with twins I knew that not only would the morning sickness I was already experiencing slow me down, but there was a lot of conflicting information out there on what you should be doing with a twin pregnancy and exercise because it is considered high risk.

I want to say that looking up stuff online is not a great idea. It’s natural to want to know and I did spend some time reading about other people’s journeys. I will say that for the most part almost everyone who talked about working out greatly decreased their workouts and some decided they did not want to work out at all during the pregnancy due to being high risk.

The best thing to do always is to ask your doctor. They should be the only people who are clearing you for what type of exercise, if any, you should be doing. All the exercise I have been doing is on the recommendation of my doctor and I have only made the decisions based on their recommendations and listening to my body.


First Trimester

I was so sick the first trimester that I did not do much exercise. In the first few weeks, before the terrible morning sickness hit, I was able to go to a few classes I had been taking at studios. I had a few Zumba classes that I really loved and got in a little bit of cardio. I also took a few yoga classes but ended up not using the rest of my month of unlimited classes due to feeling very sick. 

By our first ultrasound I was not working out and had lost 4 pounds from not being able to keep much food down. Constantly throwing up takes a toll on your body and I was also hit with the stomach flu.

At the appointment, my doctor encouraged me to just focus on eating what I could, resting as much as possible and walking my dog for my exercise. I walked my dog at this point 2 times a day, around a half a mile each walk. The doctor also encouraged me to lightly stretch in order to keep my body limber as it was going through a lot of growth changes. 

I made a point to stretch using the positions she gave me when I was feeling up to it. Often with long bouts of nausea, I would avoid bending over or squeezing my stomach as much as possible. But during the hours that I did feel good, I made sure to stretch and that felt great!

First Trimester Twin Pregnancy Exercises: 

  1. Walking 1-2 times a day (total 1-1.5 miles)
  2. Gentle pregnancy approved stretches


Second Trimester

During the beginning of the second trimester, I was able to work my way back up to more regular exercise. I didn’t magically feel better at the beginning of the second trimester like I hoped but I started to feel a tiny bit better. Every time I felt a small improvement I would add what I could back in. 

At one point my husband took over one of my walks with the dog because I was just too tired some days. As I felt a little better, I was able to join in on the second walk of the day and get myself back up to about 1.5 miles a day of walking. 

About halfway into the second trimester, I was feeling good enough to actively stretch every single day. It helps tremendously with growing pains as the twins stretch my abdomen and make room for themselves in there. 

My doctor gave me 4 or 5 exercises I could do at home to really keep my pelvis open and flexible and I did those. It’s made a big difference in how I’ve felt with mobility and being able to still touch my toes even as my belly has become quite cumbersome when trying to reach my feet.

I recommend that you ask your OB or family doctor what stretches you can incorporate to keep growing pains and tightness at bay. Even the original exercises I have modified toward the end of the second trimester because of my growing belly and use the side of the bed for balance and assistance.

It’s also summertime now and I have been able to add in swimming. Swimming has been amazing and my belly feels very lightweight and buoyant in the water. I get to move around and get some cardio in without feeling like I’m going to pass out or that my joints are going to snap under the new weight. It’s also great because it really cools me down and this summer has been hot. 

When swimming I choose to go after the sun is behind the building so that I’m not cooking or dehydrating myself. I have felt more sensitive to the sun than I did before and try stay out of direct sunlight while I’m swimming around. So after dinner is a great time for me to take a cool dip and get in some exercise. It’s also a great place to get some stretches in. 


Second Trimester Twin Pregnancy Exercises: 

  1. Walking 2 times a day (total 1.5 miles)
  2. Active stretching every day
  3. Swimming
  4. Zumba (no jumping) 


Third Trimester

I’m now in my third trimester and have changed up what I do for exercise quite a bit. First, I have cut way back on walking. I was putting in around 6-8K steps a day total in the second trimester but now that amount has me in tears and hobbling at the end of the day. 

The round ligament pains have been raging for the past two weeks and I’ve been forced to slow way down. Under the advice of the doctor I’m using the pool for any exercise I want to get. I have been feeling very cabin feverish because I’m only walking about a half-mile a day now with my dog. Even though exercise isn’t comfortable, I feel restless.

So the pool is where I am spending all my time! I have moved stretching to the pool or a warm bath with Epsom salts at the end of the night. It’s much more comfortable to do stretching in water for me now and allows me to stretch without the worry of hurting myself. 

I have also just taken up leisurely swimming laps and floating around and feel great. I still get some exercise but also get some relief from the growing pains that have been restricting my range of motion. 


Third Trimester Twin Pregnancy Exercises: 

  1. Walking (.5 miles)
  2. Swimming (stretching and leisurely laps)


I feel lucky that I have a pool to keep moving around otherwise there would be very few exercises I would be doing day to day outside of light weights for my arms or short walks around my house. 

If I didn’t have a pool I would either go to a friend’s house or pay for a gym membership to one that had a lap pool. I’m sure that it would be worth it to me at this point. 

No matter how I’m exercising during this twin pregnancy I have stuck to a few rules: 

  1. Always consult a doctor before starting any exercise during a twin pregnancy
  2. Keep hydrated – if you’re thirsty, you’re already dehydrated
  3. Take it slow and work up to your healthy limits
  4. List to your body – if you’re tired and have no energy, consider holding off on your workout


I always love to hear from you! If you’ve had a twin pregnancy, what exercises were you cleared to do and what made you feel good? Or if you’ve just enjoyed exercising in any pregnancy what did you do to keep active? Leave a comment below!

[video_page_section type=”youtube” position=”default” image=”https://loveleanlife.com/wp-content/uploads/2019/07/Workouts-for-twin-pregnancy.png” btn=”light” heading=”” subheading=”” cta=”” video_width=”1080″ hide_related=”false” hide_logo=”false” hide_controls=”false” hide_title=”false” hide_fullscreen=”false”]https://www.youtube.com/watch?v=ZMKo39mLJiA&feature=youtu.be[/video_page_section]

  • « Previous Page
  • 1
  • …
  • 4
  • 5
  • 6
  • 7
  • 8
  • …
  • 17
  • Next Page »

Explore

  • Breakfast
  • Breastfeeding
  • Dessert
  • Dinner
  • Drinks
  • Education
  • Exclusive Pumping
  • Lifestyle
  • Lunch
  • Money-Saving Tips
  • Parenting
  • Pumping
  • Raising Twins
  • Recipes
  • Restaurant Guide
  • Sides and Sauces
  • Smoothies
  • Snack
  • Twin Pregnancy
  • Twins
  • Uncategorized
Design by SkyandStars.co

Copyright © 2025 · LovePeace Theme by SkyandStars on Genesis Framework · WordPress · Log in