• Lifestyle
    • Blog
  • Twins
    • Twin Pregnancy
  • Recipes
    • Smoothies
    • Lunch
    • Dinner
    • Dessert
    • Snack
  • Guides
  • About
  • Free 3-Day Detox PDF

Love. Lean. Life.

Hello, Simple Living

Tips for Exclusively Pumping

Breastfeeding, Exclusive Pumping, Lifestyle, Pumping, Raising Twins, Twin Pregnancy, Twins, Uncategorized · May 16, 2020

Today I’m going to go over a few success tips for those who are exclusively pumping. Even though these tips can work for anyone on their breastfeeding journey, these are especially helpful for the unique journey of exclusively pumping. 

There’s a difference between pumping while breastfeeding and exclusively pumping. When you are also breastfeeding while pumping, you are dealing with a different way of regulating the amount of milk that is being made and the amount of time spent on the pump.

How My Breastfeeding Journey Changed

When I first had my twins in September, I came home and was breastfeeding part-time and then pumping the rest of the time. 

My pregnancy ended with me developing HELLP Syndrome and so I couldn’t pump for the first eight days of the boy’s life. That made my breastfeeding and my pumping journey a little bit more difficult as well as me feeling I had a low supply right from the beginning. 

Why We Stopped Breastfeeding

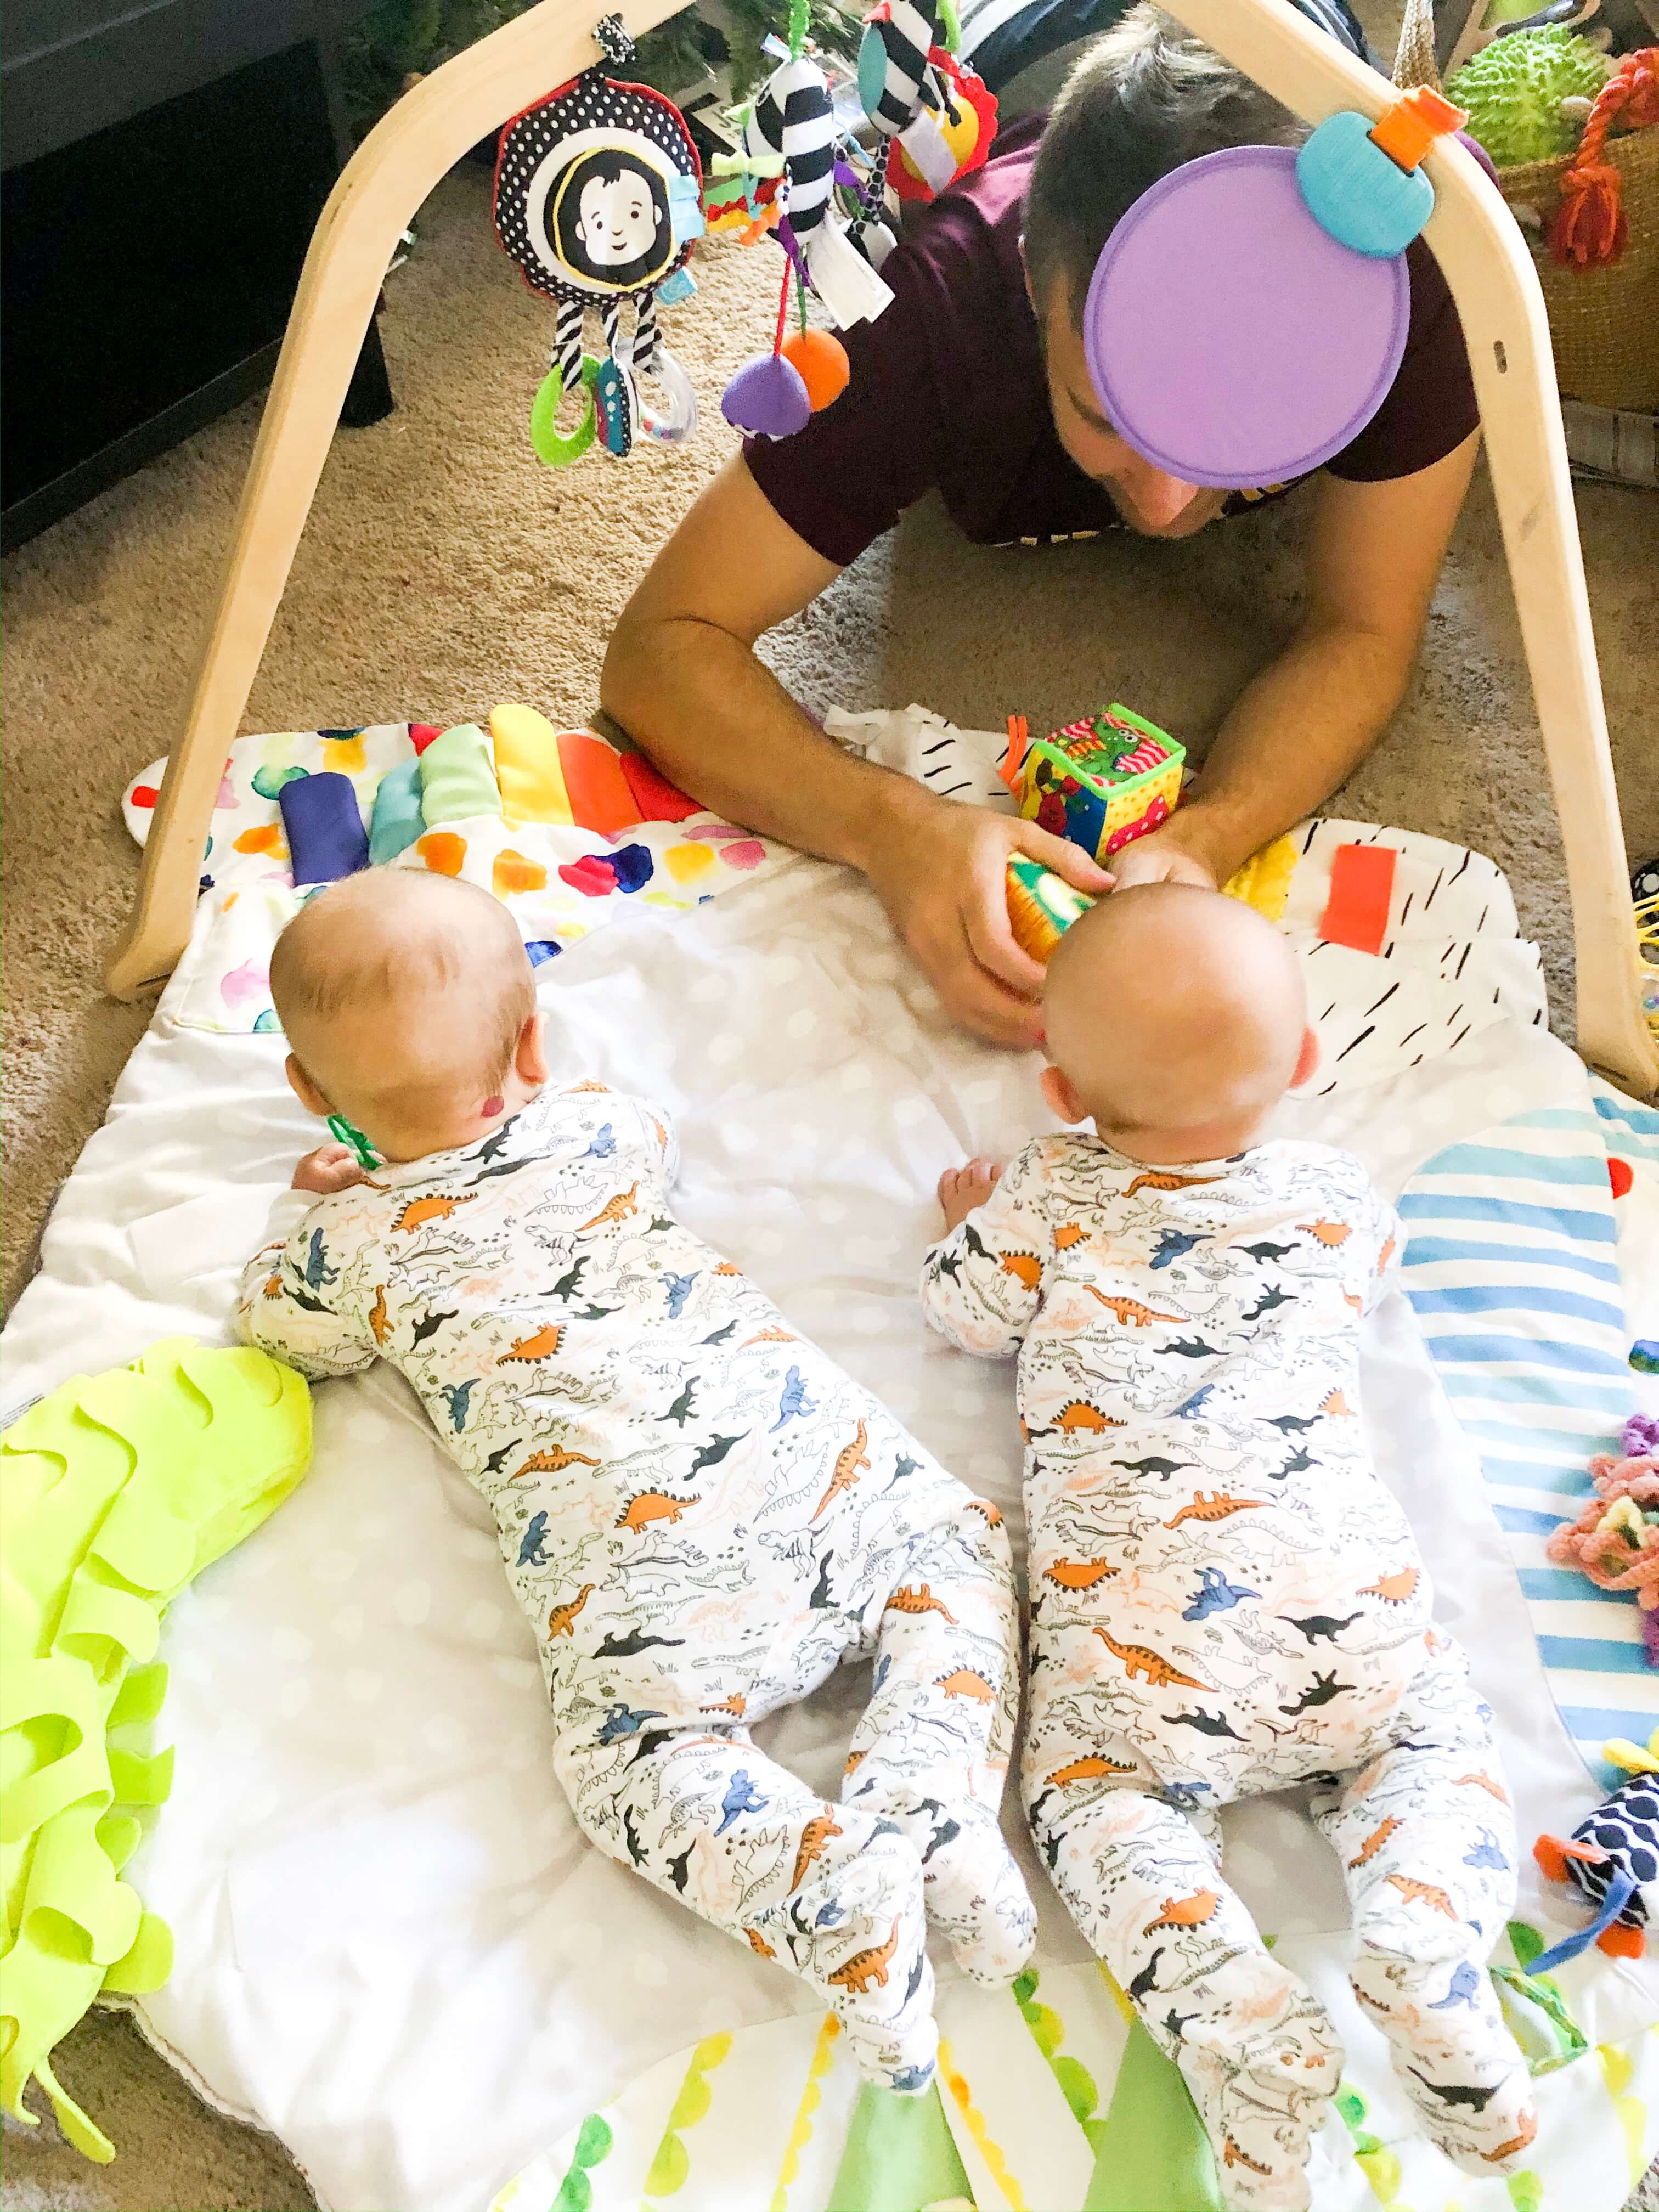
When they were really little, tandem breastfeeding worked really well. As they got bigger and heavier, my husband would have to help me hold them up to the breast even with a twin breastfeeding pillow below them. 

Another big change was that the boys were getting older and they were getting a little more playful and starting to interact with each other while breastfeeding. They were touching each other on the head and then pulling away from the breast. Feeding them both at the same time became really hard. 

Breastfeeding just became playtime for them and sometimes lasted for over 40 minutes before they were both done.

After a while, we would breastfeed them one at a time if they were fussy in the middle of the night, but as they got to be better sleepers they didn’t breastfeed at night as much anymore, either. During the day when I was working, I was pumping, so it just turned into me exclusively pumping around the 3 ½ month mark.

We are at seven months now and I am really proud of how long I have stuck with it because I had to go through a lot to get my supply up. It was discouraging in the beginning when I was really sick.

So that is how I went from breastfeeding and pumping to exclusively pumping. 

What Does Exclusively Pumping Look Like?

Exclusively pumping means that you’re pumping full time and not feeding the baby from the breast any longer. The baby is still, however, considered breastfed because they are getting milk from the breast. You may be giving your baby breast milk, or as in our case, breast milk and supplementing with formula, as well.

I did not produce enough for two babies to be fuully fed all day long. We still work with a lactation consultant because both breastfeeding and exclusively pumping can be hard and we needed support. That support has been wonderful for us and for our journey. 

Hopefully, if you’re an exclusively pumping mama, you take to heart that there’s a lot of people doing this now and this isn’t weird. People think that no one’s doing this or that they’re alone doing this and I really feel like more and more people are exclusively pumping than you think. 

I now belong to a couple of Facebook support groups. I also follow a couple of people on Instagram who exclusively pumped. I didn’t even really know people exclusively pumped when I started.  

I started looking for options when the boys were not doing as well nursing and it was taking anywhere from 20-40 minutes to feed them at the breast and we still needed to bottle feed them after as well. I questioned who just pumps?! But then I found this great community and a lot of support from it.

There are a lot of people who have helped me through their advice and their expertise because they’ve been doing it for a long time as well. For some, it may be that this is their second or third time exclusively pumping for a baby. They are veterans who have all these tips and tricks, and I’m so happy to have found that community. I want to share some of the stuff that they’ve told me, plus advice from my lactation consultant, and then just what works for me. 

Exclusively Pumping Tips

Time Your Pumps to Your Baby’s Feeds

You will want to time your pumps with the number of times your baby is eating over the course of a day. In the beginning, when the boys were first feeding, it was between 8 and 12 times in a day. It was really closer to 12 in the earliest days. 

Basically anytime that we were up feeding them, I was up pumping. In the beginning, your supply is based on hormones and also the amount of milk that you take from your body so your body knows to replenish and then replenish again. Then as you go on, your hormones regulate and settle down and your supply is based on demand. 

There are a lot of things that affect supply but one of the biggest things that affect it is how frequently you empty the breast and how much you empty it. 

If you’re emptying your breasts 8 to 12 times, you’re going to ramp up in production. If you go down in pumps your body is going to adjust the amount of milk down because you’re telling it you don’t need that much. 

The best thing for us was to just keep a tally of how often the boys were eating. If it wasn’t convenient for me to pump while they were eating, I would just match the number of times that they ate with how many times I pumped a day. Some days I would just pump every single time we fed them for 10 minutes or 15 minutes but if I couldn’t pump right then, I’d pump later to keep the number matching. That’s how I kept up in the beginning. 

Match Cluster Feeding with Pumps 

One of the things I did not do because I just got into a routine at first was that I didn’t account for cluster feeding and I didn’t account for growth spurts. Cluster feeding adds sometimes two or three extra sessions a day. 

For example, the boys normally went about 1.5 hours to 2 hours between feedings. But during cluster feedings the boys were eating only 10 minutes apart, and then another 30 minutes went by, and they ate again, another 15 minutes went by, and they’re still screaming for food. We would feed them but I wasn’t timing my pumps with those small spurts of rapid feeds. 

What it should have been telling me if we were breast breastfeeding is that the boys needed more food and so I should have been pumping more to match that. The same thing with the growth spurt where they might have been eating the same number of times, but they were eating more ounces per session. I didn’t think to account for that in the first couple of months. 

Once I met with my lactation consultant they told me to just basically be aware of cluster feeding and growth spurts, and then to add in extra pumps to account for that, and you only do it for as long as the baby is doing that. 

So if they cluster feed for two or three days, I would only add two or three sessions extra into those days, I wasn’t doing it from there on out, it was just to match their demand. 

Keep up With Growth Spurts

They had a growth spurt in January and that time I knew that as they were eating more, I was supposed to be pumping more. I added an extra two pumps for around three or four days. I can’t remember the exact time but I do remember feeling like they were eating so much and I knew to add a couple additional pumps per day. 

Once they normalized the feeds again, we upped the ounces that they were getting. And once that happened, I was also just producing a little bit more at that point. So it just worked out. It makes sense when you think about it as supply and demand. If your baby is cluster feeding or going through a growth spurt, it would be putting more demand on your body.

In the Beginning Pump at Night

I learned this the hard way. In the beginning, you need to pump at night. We don’t really want to go more than five hours between pumps in the very beginning. The maximum you want to go when building your milk supply is probably more like 3 or 4 hours. I pushed it because I was just exhausted and running on fumes. 

So a couple of days I would sleep a little bit longer and my husband would get up and do the feeds. But you want to get up in the night and pump when the baby is getting up and eating. When the twins were getting up around every 2.5 hours I was just getting out the pumps too. 

But when they started sleeping a little bit longer – five and six hours in the middle of the night, I was not pumping as often. If I went to bed and for some reason, the babies slept longer than anticipated, I wasn’t pumping every three to four hours. This dipped my supply in the early weeks. As they got a bit older it didn’t affect it as much.

I would then set an alarm, and this was something that someone had told me to do, and wake up to pump. I can’t even tell you how stressful that was, hearing that alarm in the middle of the night when you really need sleep. I wouldn’t suggest that. Instead, you can use a trick I’ll cover to make sure you’re still getting up even if your baby isn’t waking you up. 

Pay Attention to Your Cycle

One thing that can cause your milk production to dip is the return of your cycle. And throughout the month, whether you’re ovulating or you have a period, it can drop your milk supply. A lot of people find that they can combat that by adding a couple pumps on those days. 

If you add pumps and you don’t feel like it helps combat the dip, you can always take a little from your freezer stash you hopefully have built up by then.  

A milk stash is good for more than just cycle fluctuations. If you get sick or your body is just not feeling well, you’ll still produce milk, it just may not be as much. 

I got the stomach flu and was throwing up for hours and hours and it caused me to pump a lot further apart. For two days, I just didn’t pump as much as normal. So it was really good to have milk to fall back on.

Get Extra Pump Parts

Get extra parts if you can if you plan on pumping for a long time. One of the things that I ordered were a couple extra shields (for my Spectra Breast Pump) and an extra pumping bra and pumping top. I ordered the ones that were my favorite and that were really comfortable. I could have one in the laundry and one that I was wearing. You’re going to spend a lot of time with your pumps on, so it’s really stressful to have no clean pumping bras and to have no clean pumping parts. 

If you can get a couple of extra and look at it as an investment for something that you’re going to be doing for months down the line, then it can be really helpful and it can take a little bit of the pressure of always doing laundry and dishes. 

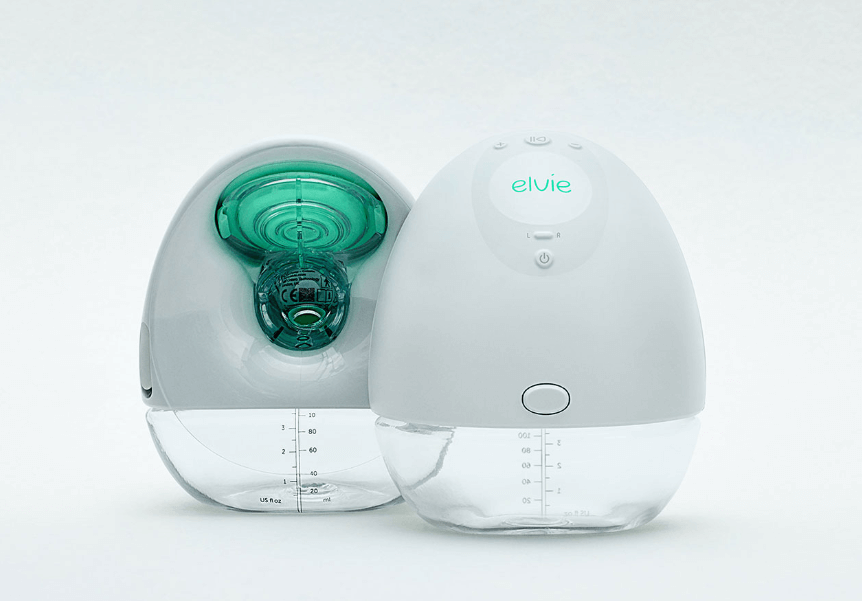
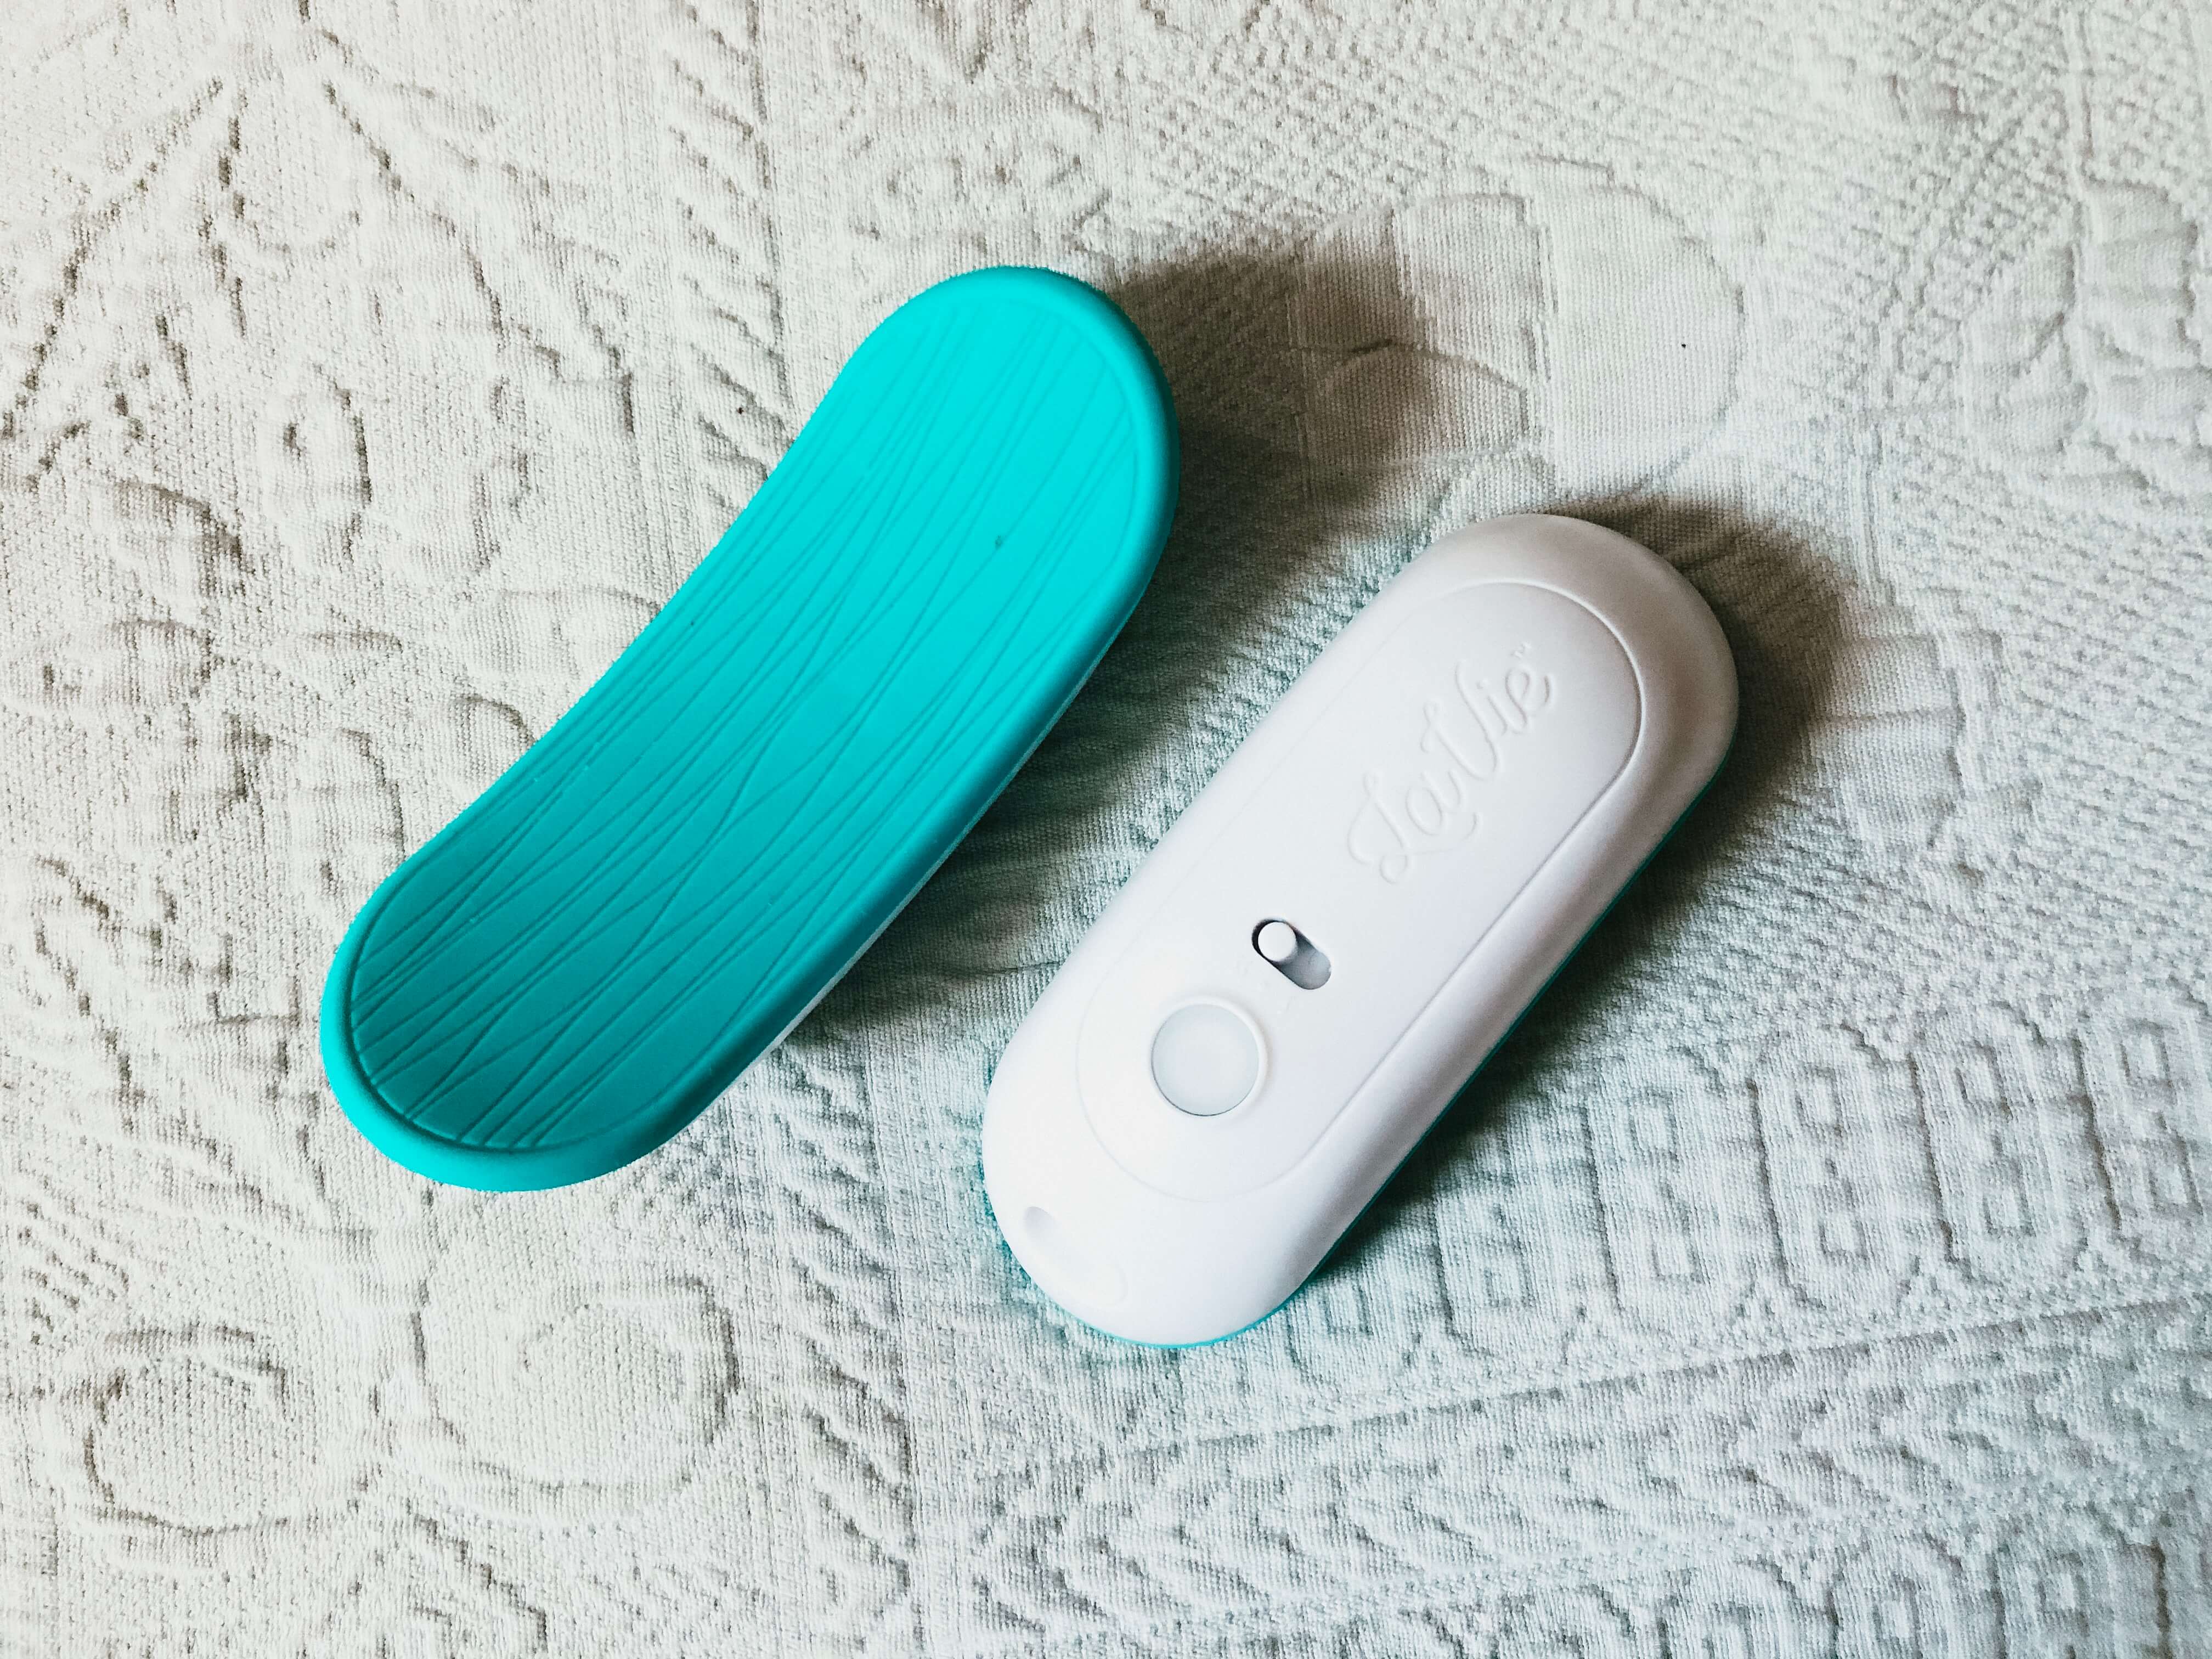
I also got extra breast shields for my Elvie Breast Pump. So when they were dirty and when I was tired and I didn’t want to wash them I’d have an extra clean pair and that really helped save time. 

Put Your Pump Parts in the Fridge Between Pumps

Speaking of cleaning your pump, when you’re exclusively pumping you can be pumping from six to 12 times a day. On average most people I talked to long term pumped 7-8 times a day. 

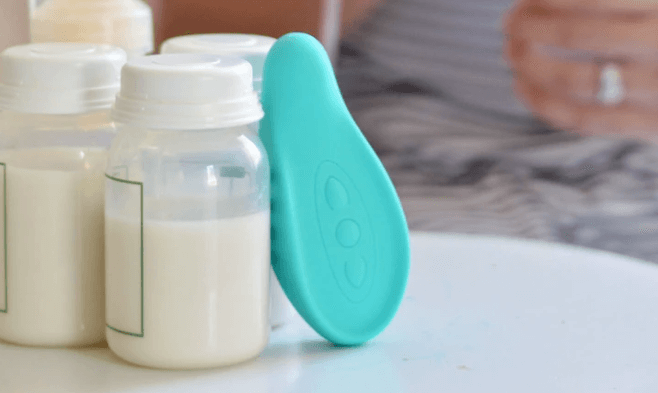
That’s a lot of times to clean pump parts. The most beautiful thing that someone shared with me was to put your pump parts in a Ziploc bag. After you are done pumping just empty the parts, give it a rinse, and throw it into a Ziploc bag and place in the refrigerator. 

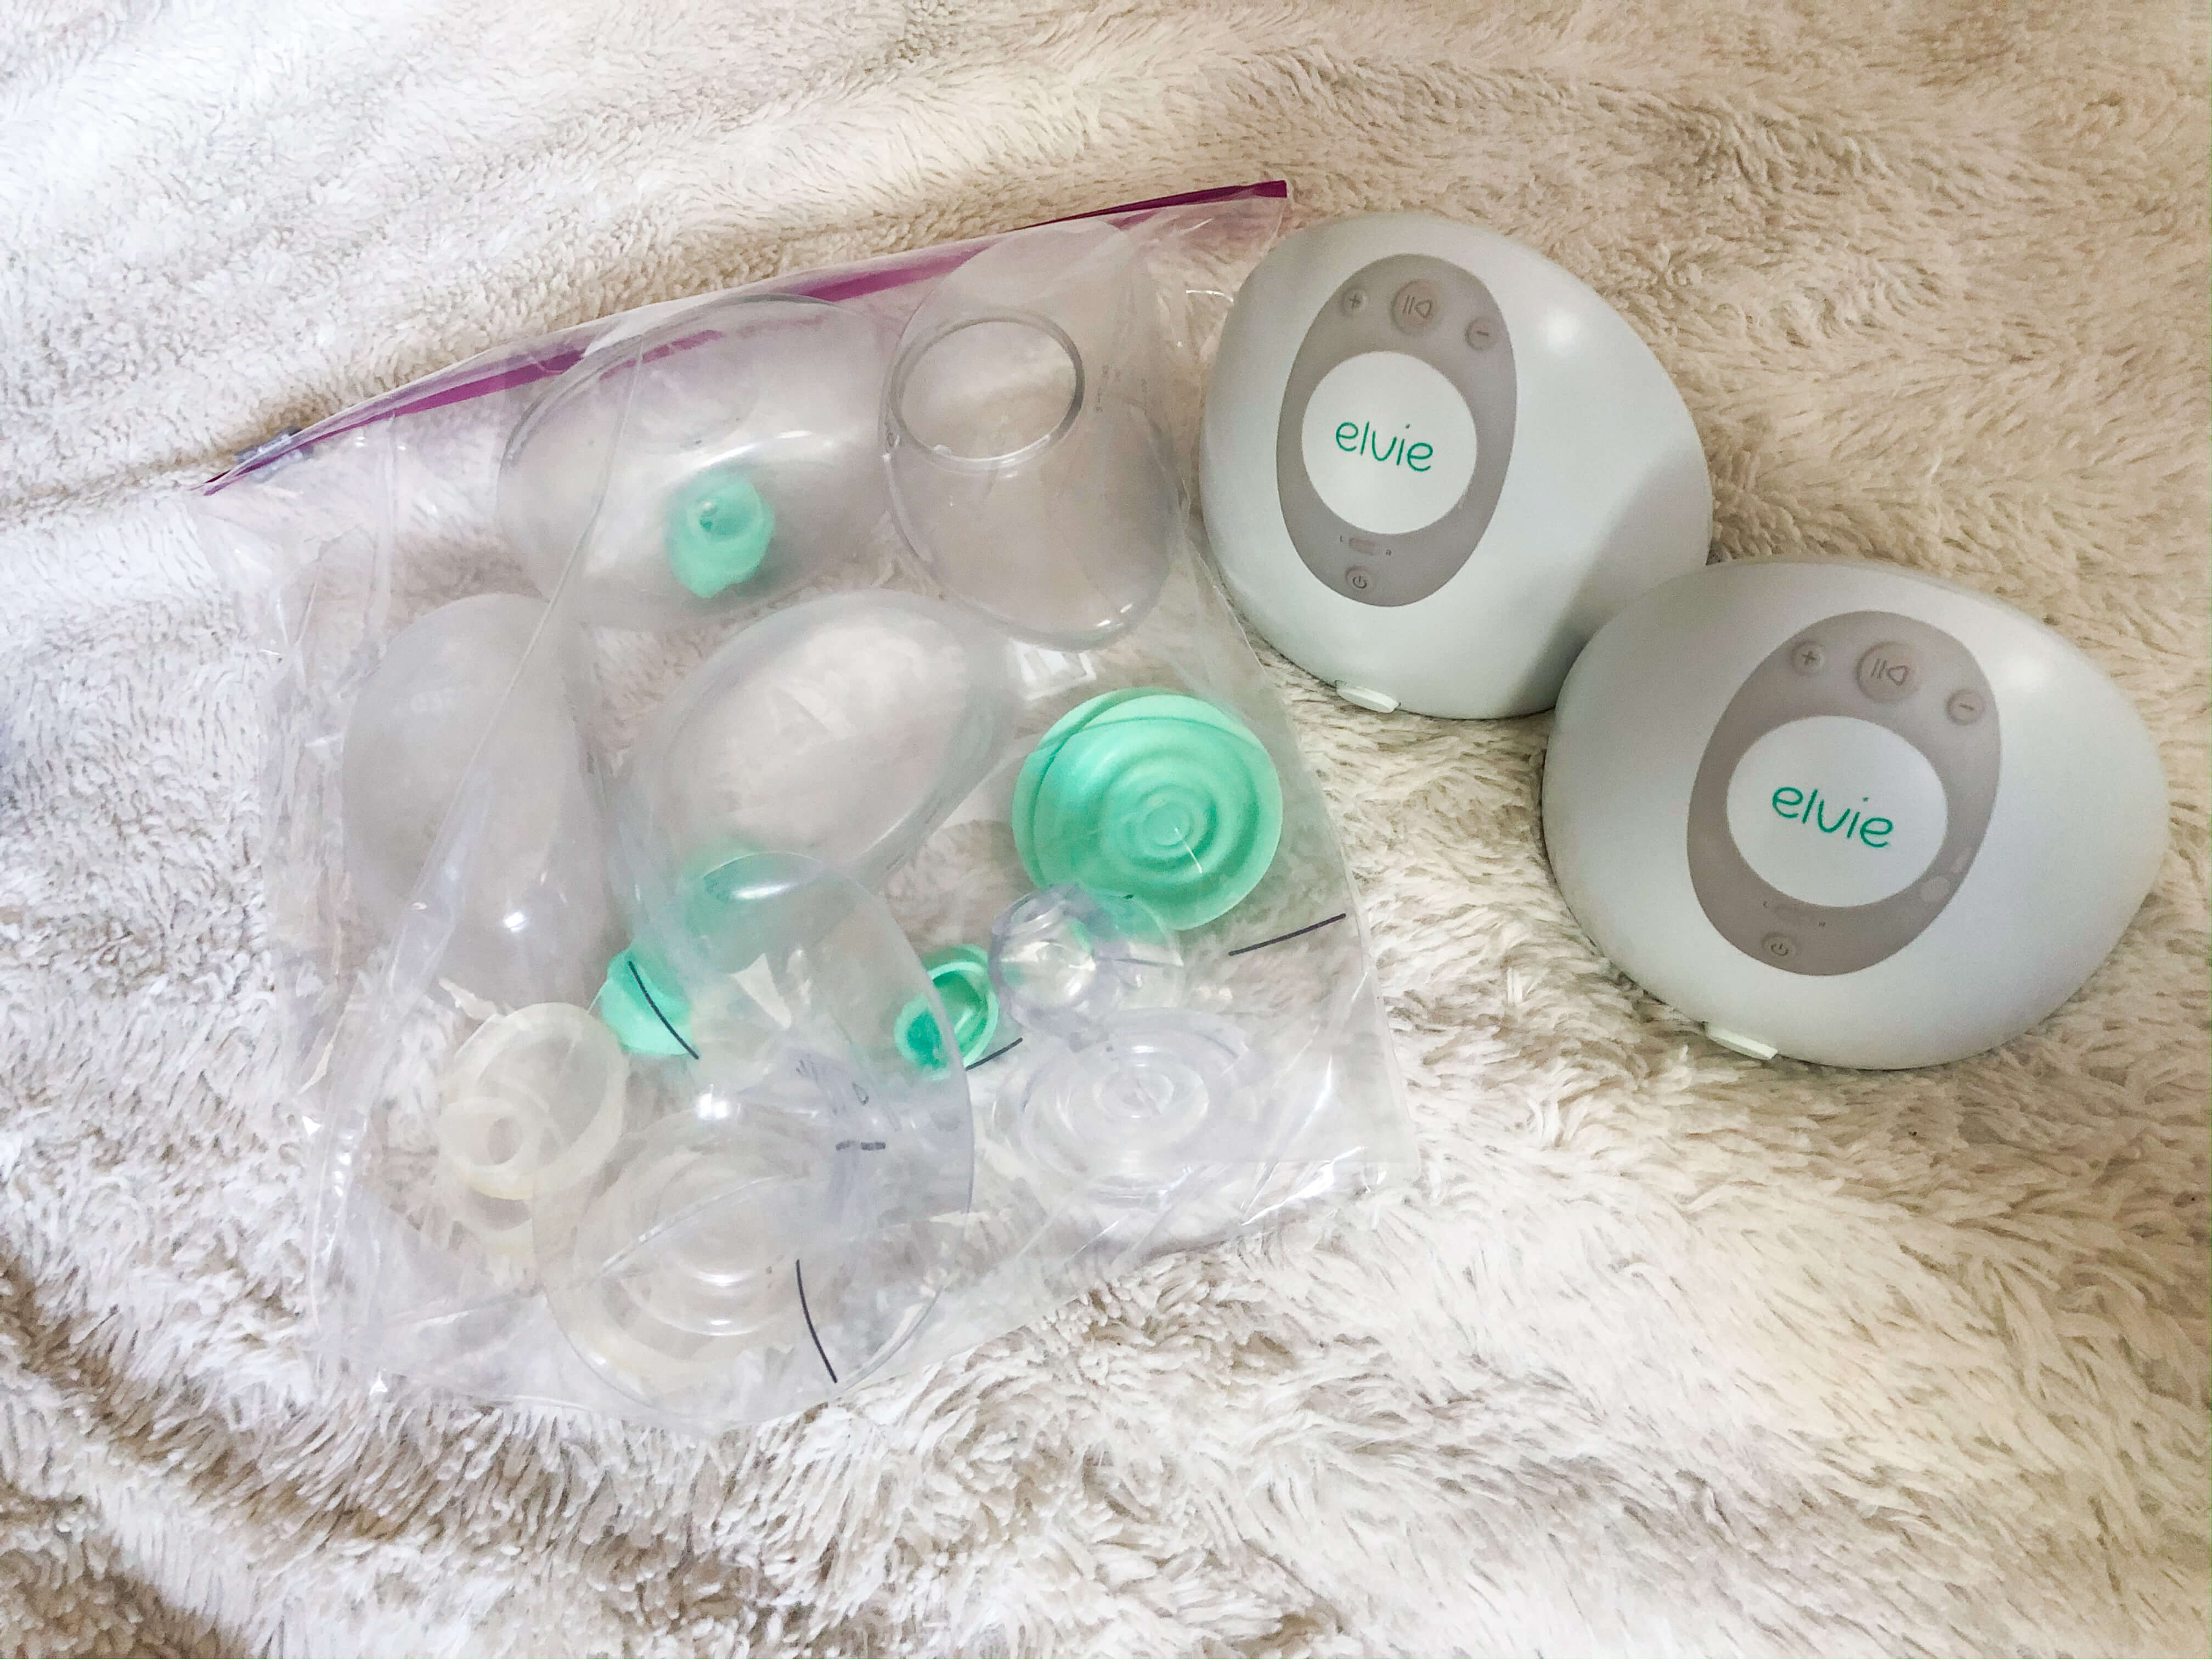
This will keep the parts and the milk, anything that is remaining in there, at a safe temperature. You can just put the parts back together to pump again, empty into your bag, put it all back into a Ziploc bag, and put it in the refrigerator over and over. You can do this for an entire day. 

Instead of pumping and cleaning it every single time with soap and water and drying it out, you can let it sit in the refrigerator between sessions so that you’re only doing one really deep clean a day. 

That really saved my sanity. I had days where I felt like all I did was clean pump parts. When I found the Ziploc bag trick, it saved me so much time. I don’t do it every day but it helps on days I want to save time. 

Now I’ve gotten really good at rotating with an extra set of containers. So I just wash one and if one is dirty I have an extra one, which is why I say if you can get a couple of extra parts, it is super helpful.

But if you don’t have extra parts and you need to clean them in between each and it’s driving you crazy because you feel like all you do is watch wash pump parts, just get yourself a Ziploc bag and put it in the refrigerator. 

Get The Support of a Lactation Consultant 

My lactation consultant has been amazing. I saw one originally who helped us diagnose the boys with lip and tongue ties. Then when I was breastfeeding, they were able to latch and nurse a lot better. I met with a second lactation consultant when I switched to be exclusively pumping because she spoke a lot about that and had a lot of great support for that transition. I just really felt like we were on the same page. 

I have seen her a total of two times in person, and then I did a telecall with her this past month, and I can’t tell you the peace of mind I get even if I’m not learning anything new. I think sometimes just having someone sit there and say you’re doing a good job can help you. 

I have asked myself if I can really do this so many times, but she always reminds me that I can do it. She’s also helped me navigate any issues like clogged ducts, supplementation, and supporting what is a low supply that I started with.

So how did we find her? We had a list of people covered with our health insurance and then I got a chance to read through their websites and see what they were all about, and how they talked about breastfeeding and pumping. Once I got to her site I really fell in love with how she talked about breastfeeding and pumping. I knew that it was going to be a good match for me. 

All insurance companies are different. They differ in how much they cover and what’s included but I really encourage you to check it out if you have the ability to. I know that some lactation consultants don’t take insurance and you can pay for it upfront. They work with you on that, too. 

So if you can see a lactation consultant and you want to have that support – that extra encouragement and expertise that reminds you that little changes make big differences – I really encourage you to go see one.

Meet with one or two of them and see who is the best fit for you. But it really has changed how I feel about how I’m doing right on this breastfeeding journey. When you’re at home pumping and things are getting frustrating and you’re looking for answers on the internet, it’s good to actually have someone to reach out to. 

When I talk to her I’m brought back and reminded why I’m doing this, the importance of what I’m doing for my family, and how grateful I am that I can even do this in the first place. Seeing that we had a really rough start, it regrounds me and reminds me that while breastfeeding isn’t easy, and exclusively pumping isn’t easy, and raising babies isn’t easy, it’s so worth it. 

I think that just having somebody who is there to be your biggest cheerleader while you navigate breastfeeding and pumping is powerful. 

Consider Your Mental Health

My Lactation consultant reminds me that there is no right way to do this. You don’t win for having more milk. You win for doing what you can do and being as good of a mom as you can be at the end of the day. 

That means that maybe you don’t breastfeed, maybe you don’t pump, maybe this is the end of your journey, or maybe you do it all or some combination.  

It looks different for everyone. We talk about things I never considered like my own mental health when breastfeeding and pumping. We’ve talked about if the stressors outweigh the benefit of me pumping. I haven’t gotten to the point where it has, so that’s why I’m still doing this, but it’s wonderful to have someone to ask you those questions. 

You need to ask yourself: 

Am I more stressed out?

Am I getting too stressed to make this worth doing? 

Is there something I can do to make this journey continue working for me?

I really encourage you guys to just seek out some support. 

Supplement Carefully

After meeting with a lactation consultant you realize they work with doctors and know your case very personally. They aren’t just giving you advice on a wild guess. I really suggest that you choose supplements for yourself carefully and only with the supervision of a lactation consultant. 

There are so many products that are out on the market that are labeled “breastfeeding support,” “herbal support,” and breastfeeding “magic potions.”

I think the best advice I’ve gotten off of the internet about what to take for breastfeeding was someone saying, “Look, if this journey is so important to you, and you really want to know what’s best for your body, talk to someone who knows what they’re talking about.” 

Just because something worked for someone else doesn’t mean it’s going to work for you. What some else takes for breastfeeding may not work for your body. And these herbs that people are taking are sometimes really concentrated and high dosage. You shouldn’t just be just dumping those into your body because it worked for someone else. 

The same thing with these “magic lactation elixirs.” They are all different and work for different reasons. They address different deficiencies in your body, or different things that your body is struggling with, but to know exactly what you’re struggling with, you should be seeing a doctor and you should be talking to a lactation consultant. 

I would never recommend that someone look at what I’m taking for breastfeeding and match it just because it worked for me. If you cannot see a lactation consultant, I would recommend going on to reputable lactation websites like LaLeche League and going over their advice. I would also say to take it very slowly and one at a time if you do it on your own. 

Give yourself a couple of days to a week to see if things are working for you. Even with my lactation consultant, we only added one herb at a time to make sure that I was going to add to my life and add to my supply. 

We didn’t want to just add in five things and not know which ones actually helped. So supplement carefully. Different people respond to herbs differently. If you can get someone’s helping guidance, you can make the most of the herbs that will really work for you. Herbal support can help you keep your supply up if that’s something you struggle with. 

Use Pumping Tools to Empty the Breast Better

There are a lot of tools out there to help you empty the breast better at each pump. I have a hand pump, lactation massagers, and a heating pad. 

Those three things allow me to empty the breast better at each pump. When I was just using the pump, I wasn’t emptying the breast as efficiently as I was when I was breastfeeding and I saw a dramatic dip in my supply when I first started to exclusively pump.

I use a heating pad before I pump for just a minute to warm up the breast. This allows for better duct flow and comfort. I use the lactation massager or do hand massage while the pumps are on. This stimulates and helps release the milk from the ducts. I use the hand pump or hand expression after the pump is over for a minute to make sure I was able to better empty the breast and there is almost nothing left in there. 

These tools allowed me to bring the supply back up. While it felt like a lot of fuss, once I got into a routine it only added a few minutes to each pump. The goal is to have comfortable, efficient pumping sessions and sometimes that means adding a heating pad or adding in lactation massagers. Maybe it’s hand expressing at the end for you. No matter what combination works for you, just empty the breast as best as you possibly can so your body knows to produce more milk and your supply stays strong. 

I know that was a really long blog and thank you for reading it! I hope you enjoy these tips. Let me know if you’re an exclusive pumper! What are things that help you keep your supply up and keep you going on this crazy journey? Where do you find support? And what are the things that have helped you the most? Leave me a comment below. 

How to Travel with Breast Milk and Pump

Breastfeeding, Exclusive Pumping, Lifestyle, Parenting, Pumping · May 15, 2020

What do you do when you have to go on vacation or a work trip, or you’re just going to be away from home for an extended amount of time and you’re pumping? One thing I was really worried about on my breastfeeding journey/pumping journey was what I was going to do if I was away from home. It’s a little bit daunting to think about how you’re going to fly with breast milk. I kept wondering how I would pump on a schedule. 

I ended up following the advice of several moms who were exclusively pumping and also had work trips coming. I was able to take ideas from each one of them and made it work for myself.

The biggest thing I’m going to share with you is the actual tools I took because I think it made a big difference to be prepared. The thing I thought would be the hardest, which was flying with breast milk, was actually one of the easiest. 

Start Pumping a Month in Advance

I’m going to start by what I did ahead of time, and that was to pump extra. Every single day I pumped a little bit extra. I added one extra pump for the 30 days leading up to my trip. The trip was four days and I had to fly. 

At that point, I was pumping six to seven times a day, I changed my pump schedule to seven to eight times a day, and froze the milk from the last pump of the day and put it in the freezer. That way I had 30 packets of milk that were frozen. Because it was only the last pump of the day it tended to be a very low amount. And so it wasn’t these big bags of milk but with 30 of them, there was enough for four days for the twins.

Even though they were not giant bags of milk because the last pump of the day for me is lower in ounces than the normal pumps, I wasn’t stressed out with trying to fill these big bags of milk in a short week before I left. 

And so I’m really happy that I started way ahead of time with freezing it because if there was a day that I didn’t get that extra pump in, I wasn’t freaking out and it took the pressure off. So I froze a ton of milk and then I made sure to pack everything I needed for the trip to pump while I was gone. 

What to Pack

Pack Your Breast Pump, Including Battery Packs and Chargers

One of the things that I’m extremely grateful for are these Elvie Wearable Breast Pumps. These are rechargeable and they go right into your shirt and into your bra to pump without tubes. I have a full review on these that you can check out here. They fit in my purse and I can pump as I’m walking around. 

Since I was going to a conference, I knew that this would be the only pump I was taking. I didn’t bring my plug-in pump. Sometimes at conferences, I don’t go back to my room more than every four to five hours and that’s only if I’m just running and grabbing something. So I knew that I wanted the most portable option. 

If I didn’t have this pump, I would have had to schedule time to go back to my room three to four times a day. At least three times during the actual conference meeting times and four to five if I count from the minute I left for breakfast in the hotel to when I went back to bed. 

Lactation Warming Massagers

The second thing I took with me on this trip were LaVie lactation warming massagers. I’ve talked in the past about being comfortable while pumping in order to get the best output. When I’m traveling, I tend to be stressed. I knew I was going to feel stressed being away from the boys too, since they were only four and a half months old.

It was my first time being away from them besides my initial hospital stay where I was held back and the boys went home before me. It was a little bit stressful because it made me feel like I did back then when I was separated from them. Knowing that my stress levels would be up, I worried that my output wouldn’t be as great. 

Flying also can be a stressful way to travel. This conference was luckily in the same timezone so the flight wasn’t too long. But sleeping in a different place than you usually sleep, being on a really weird schedule, and not eating the foods you usually eat can really throw you off. 

I didn’t want to get into a situation where I got a clogged milk duct or I wasn’t getting as good of output with pumping because of stress. The massagers are really small and they use the same chargers as my Elvie pumps so I brought just one set of chargers for these two things. 

These hold the charge pretty long and I only ended up using them at the end of the night when I was feeling more stressed from a long day. I just popped these on and turned on the warmer to help me relax while I was pumping and get the maximum output at the end of the day. 

Hand Breast Pump

The last tool that I brought with me was my hand pump. I brought this because when I’m rushing and walking around a lot (like I knew I would be at the conference) and I’m not sitting still while pumping, I don’t always get the best pumps. Especially if I’m power walking, which I was doing a lot at the conference between each of the sessions. 

So I brought the hand pump just to make sure that several times a day I was doing a really good empty after a pump to make sure the breasts were really emptied out. I only ended up using this at night too, right before I went to bed. 

The morning before I flew, I used this as well just to make sure my breasts were super drained because the flight and airport wait is long and I was unsure about how I wanted to clean out my pump if I pumped on the plane in the little plane bathroom. 

I just made sure the breasts were really empty before I got on the flight. I didn’t have to pump again until after I was off of the flight. 

These were my pumping supplies and all of that actually fit into a bag smaller than what my Spectra pump would have fit into. Even though it seems like a lot of stuff, I just put it in one bag together with the charger and was able to travel with this pretty compactly. 

Request a Refrigerator 

I also brought a bunch of milk bags and a sharpie so that I could write the dates and times that I pumped on all the bags as I was going along. I knew that bringing them with me on the plane, it was possible they were going to get jumbled up and so I just made sure to label these really well.

Our hotel room had a refrigerator in it for me to store all the pumped milk. It didn’t have a freezer but the front desk said if I needed it they could store it in their big freezer in the kitchen. But I only used the refrigerator in our room and was able to store all my milk there easily. 

I also brought a freezer bag lunch box. It has freezable material in the base and on the sides of it. You can put it in a freezer and the bag will freeze solid and it will keep whatever you have in there very cold for a long time. 

Even though I didn’t freeze the bag, I did put it in the refrigerator before I traveled. It stayed really cold when I did this and then I took a little bag of ice from the icemaker in the hall, sealed the Ziploc bag, and added it in there with my breast milk. 

Prep Your Stash for the Plane Ride 

The plane ride was only an hour but I think if it had been longer I would have asked the hotel to freeze the bag and the milk. I brought my freezable bag around with me in my work bag for when I was walking around pumping. I would go to the bathroom, wipe the pumps out, fill the milk bags and then pop it right into the cooler bag so that the breast milk stayed cold until I could run upstairs to the refrigerator. 

The cooler bag is big enough to be able to just put everything that I needed right into the cooler and keep it all in one place. That is how I pumped while I was out of the hotel room and walking around. 

Bringing the Breast Milk on the Plane

Now comes the part where I get my breast milk onto the airplane. I made sure all the milk bags were really well sealed. I had the bag of ice that I traveled to the airport with and right before we went through security, I dumped it out so that the ziplock was empty and dried out well and the only thing in the cooler was the breast milk. 

When I went through security I let them know that I had breast milk, so they pulled it to the side.

They didn’t have to scan them through the regular x-ray machine. I can’t be sure but it seemed like there was a certain allowance. The agent was measuring them and it seemed like they only paid attention to the really full bags above six ounces.

Then with clean hands and gloves on they had me open the bags and they waved a sensor strip over each bag. I had a chance to wash my hands so that I could help them. Everything stayed sterile. The test strips never touch the bag or milk either. 

The whole thing took only a few minutes and they let me pack it back up and sent me on my way. But one awesome piece of advice she did let me know was that if it had been frozen milk that they wouldn’t have actually had to open it and test it at all. 

Next time I will probably take most of the breast milk down to the hotel concierge and have them freeze it in the cooler bag. That way, when it goes through security, I will only have one or two bags of milk that I had  just pumped from that morning that they would have to check out. 

So it might have been a little quicker, but really no hassle the way I did it either. They were super kind about it, really sympathetic, and wanted to make sure that I knew that they cared about the cleanliness of the milk that I was taking home. It was a better experience than I thought I was going to have. 

I had heard some horror stories about people who they felt that security wasn’t careful with the milk as they were testing it or they gave them a hard time about it. But that was not my experience. I’m really appreciative of the people who helped take care of me on the trip. 

As soon as I got through security, I went straight to a Starbucks and I got myself a coffee, and a bag of ice. Then I just popped a bag of ice back into the cooler, zipped it up and the breast milk stayed really cold until I got home. When I got home, I put it in the refrigerator and used it the next few days for the boys. 

Bring Your Water Bottle 

The last thing that I will say on top of bringing the things that you need to pump comfortably and something to tote it around and get it home with, is to bring a water bottle to wherever you’ve traveled. At the conference, they had little water stations here and there, but I’ve found that I tend to get dehydrated when I’m on vacation or traveling. 

Drinking water is the last thing that I think about and add that on top of the fact that I hate using public bathrooms, I am not just chugging water and having to pee every five minutes if I can avoid it. However, when you’re breastfeeding, that’s just not a great idea to let yourself get dehydrated. You don’t want your body to have to pull from its reserves because you’re not meeting its needs. 

I carried a large water bottle with me throughout the conference and that helped me stay hydrated. The first day I wasn’t as hydrated as I should have been. 

The second day I was super dehydrated and I felt parched when I woke up. Maybe it was from flying or being busy throughout the day and not drinking as much. For the rest of the conference I made sure to drink a lot of water. 

Also, if you’re going to be drinking alcohol when traveling just remember to time your pumps accordingly. Try to pump right before you have a drink or two. And then give yourself that three to four hour window before you pump again. If you have to pump sooner for comfort, you obviously will have to dump the breast milk. 

But if you’ve only had one drink and it’s been two hours since you finished that drink, you should be good. They say if you are good enough to drive you can pump, but basically this means you haven’t had more than one drink in an hour. And that you allowed enough time to pass for it to get out of your system. So stay hydrated, take a water bottle with you or make sure that there’s a place that you can drink plenty of water. I think that really helped. 

Sleeping Longer When Traveling

I definitely realized that me waking up every three to four hours with the boys at night does affect my supply because one of the nights I slept five hours in a row and my output that morning was really, really high. I’m talking exponentially higher compared to just the extra hour that I hadn’t pumped so that was kind of cool. 

I think as the boys get older and I sleep better, I should have a better time pumping. Obviously not getting sleep is stress on your body and so I definitely think it affects how much milk you produce. 

Milk Stork Breast Milk Shipping

One last thing I wanted to talk about that I didn’t use but other people recommended, is Milk Stork. I think if you produce more breast milk than can fit into a small carry-on container or if you’re gone for multiple days and don’t want the milk to go bad if it’s not frozen – this is a good service to use. 

Milk Stork actually sends a shipping box to your hotel and you pump and pack the milk into a prepaid postage box. It has a cold pack that breaks apart to activate and you put it on top of your milk and overnight the package back to your house from any Fedex drop off. If you’re traveling and you have a lot of milk to ship back, you don’t have to worry about it spoiling if you have a really long plane ride. You don’t have to worry about struggling through security with it either. 

It was more on the expensive side, I think for the small box to ship it back to you the whole thing was between $80 and $120, and I think it’s closer to $150 for the larger box if you pump a lot of milk. 

It can get a little expensive, but I think it’s really good for people who have long plane rides and don’t want to hassle with dragging the milk around. This is also good for anyone who will be gone for a longer amount of time and want that milk to get back home for their baby. That’s something to look into if you think it could help you have peace of mind while traveling with breast milk. 

This is a link to their website and I think it’s important to just have options. If you can do what I did and bring yourself a quality cooler, you can save some money. But if you want the convenience or you’ll be traveling with a lot of milk there are always other options. 

My biggest suggestion is to start prepping for pumping for vacation earlier than later. That helped me the most with the whole process. You don’t want to feel rushed and you don’t want to feel stressed. Stress is not your friend when you’re trying to breastfeed and when you’re trying to pump. 

If you guys are planning on traveling and being away from your baby I hope this helps you prepare and travel easier. Comment below and let me know what you do when you travel and have to pump and share your experience and tips for doing so!


Best High Chair Roundup

Lifestyle, Parenting, Raising Twins, Twins · May 2, 2020

When choosing high chairs for your baby, there are so many options that it can be overwhelming. It’s even more so when you have twins and need to consider storage and space for two high chairs.

Below are all the high chairs we considered as well as the main pros and cons from reviews left by customers. This really helped us make our decision. There were many considerations but most of it came down to space, how easy it was to break down, and if it was eco-friendly. Depending on your needs you can see which of these options would be the best for you. 


Summer Infant Pop and Sit Portable High Chair 

BEST FOR: Traveling

Features:

  • 3-point safety harness 
  • Removable, machine-washable fabric
  • Collapsible

Pros:

  • Price < $50 
  • Portable, weight of chair (5 lbs), maximum weight 40 pounds 
  • Can easily take on trips – comes with a bag for easy transport 
  • Sturdy

Cons:

  • Leg holes determine how long child can use (customers report cutting or altering leg holes) 
  • Small tray


Ingenuity Trio 3-in-1 High Chair 

BEST FOR: Growing With Your Child

Features:

  • Convertible (becomes booster and toddler seat) 
  • 3-point and 5-point harness, accommodates toddlers up to 50 pounds 
  • Removable, machine-washable fabric 
  • Removable dishwasher-safe tray

Pros:

  • Price < $75 
  • 3-chairs-in-1 (can be used as a high chair, toddler chair, or booster seat)

Cons:

  • Crevice where crotch strap is anchored allows food and liquid to get in and 10 screws must be taken out to access this space to clean it (reviews have reported mold, maggots BUT people report using tape or other items to seal the hole)
  • Chair weight 20 pounds
  • Tray can be difficult to adjust
  • Not collapsible
  • Wheels can have issues rolling


Evenflo Symmetry Flat Fold High Chair 

BEST FOR: Folding for Storage

Features:

  • Folds flat 
  • Machine-washable seat pad 
  • Dishwasher-safe tray liner
  • 3 tray positions
  • 3- or 5-point harness
  • Supports up to 40 pounds

Pros:

  • Large tray 
  • Folds easily 
  • Easy assembly 
  • Storage pocket in back 
  • Price $65

Cons:

  • Two hands required to remove tray
  • Difficult to maneuver baby’s legs in and out of seat due to T-bar
  • Tray slightly tilted so items roll toward the baby


Abiie Beyond Wooden High Chair With Tray 

BEST FOR: Eco-Conscious Households

Features:

  • Suitable for age 6 months to 250 pounds 
  • 3- or 5-point harness
  • Anti-Microbial Heat Sterilization – the wood went through a state-of-the art pressure-assisted high-temperature sterilization process which ensures a hygienic environment
  • One-hand removable tray cover is dishwasher safe 
  • Waterproof cushion

Pros:

  • Wood harvested using sustainable forestry practices
  • Chair is recyclable and biodegradable
  • Blends with furniture 
  • Smaller footprint
  • Recommended by occupational therapists and speech therapists for children with disabilities

Cons:

  • Higher price tag $195
  • Smaller tray size does not accommodate most silicone baby plates


4moms High Chair 

BEST FOR: One-Hand Breakdown

Features:

  • One-handed magnetic tray attachment
  • 3 height positions
  • 2 tray positions
  • Dishwasher safe tray liner
  • Max weight 60 pounds

Pros:

  • No fabric to clean 
  • Smaller footprint
  • Sleek design 
  • Magnetic feeding accessories available

Cons:

  • Price $300
  • Kiddos can accidentally or intentionally kick the tray off 
  • Crotch strap is not adjustable making it unusable for bigger kids


JOOVY Nook High Chair  

BEST FOR: Pediatrician Recommended

Features:

  • Folds just like a beach chair
  • Removable and adjustable swing open tray
  • Max weight 50 pounds
  • 5-point harness

Pros:

  • Larger tray with dishwasher safe insert
  • Leatherette seat cover wipes clean
  • Chair is 15 pounds

Cons:

  • Larger footprint
  • Straps and crevices difficult to clean
  • Recline is not adjustable and some find that it causes children to slouch


IKEA Antilop 

BEST FOR: Best for Twins

Features:

  • Stackable
  • Breaks down completely for portability

Pros:

  • Padding comes out easily 
  • No crevices to clean
  • Price $20  
  • Footrest and other accessories made to fit available on Etsy

Cons:

  • Tray can be harder to get off without knowing the trick of pulling it off on side at a time

Artisan Bread in a Dutch Oven: Vegan and Only 3 Ingredients

Recipes, Sides and Sauces · April 30, 2020

While trying to eat through our pantry stock I came across lots of small bags of flour. I had everything from cassava to almond but the one thing I realized, is that for as much flour I stocked, I have never made bread. 


After doing a little bit of research I came across 2 things. If you have a bread maker, it’s pretty easy and if you have lots of types of non-traditonal flour – don’t start with that. So when I was out at the store I grabbed some unbleached whole wheat and white flour. I also started with the simplest recipe I could. 


Because I don’t have a bread maker I decided that I would need to find an alternative since I don’t have a traditional large loaf pan either. Luckily with a small amount of digging, I quickly discovered that using a cast iron dutch oven can bake up a delicious loaf of bread. 


So I’m now on my 4th loaf of bread and loving it. The whole wheat version I used 1 cup white flour and 2 cups wheat flour. It was very rich in taste and much grainier. 

Artisan Bread in a Dutch Oven: Vegan and Only 3 Ingredients

Ingredients: 

3 cups flour (not gluten-free)

1 ½ tsp Himalayan pink salt 

½ tsp yeast 

1 ½ cup of warm water


Instructions: 

To prep: 

In a large bowl mix together flour, salt, and yeast. 

Add in warm water and mix thoroughly. 


To bake:

Place a towel over the bowl and let sit for 24 hours.

Preheat over to 400 F

Place your empty dutch oven and lid into the oven for 30 minutes.

While the dutch oven is heating up lightly flour on a cutting board and roll the dough into a large ball.

Using oven mitts, remove the dutch oven from the oven, drizzle some olive oil into the bottom and carefully place the bread dough into the bottom. 

Place lid on the dutch oven and bake in the oven for 30 minutes. 

Carefully take off the lid (it will be extremely hot so place on a heat-safe surface) and bake for another 15 minutes uncovered. 

Take out and let cool. Slice, enjoy and refrigerate!

4 Month Twin Update – Seeing a Neurosurgeon: Helmets or Surgery

Lifestyle, Parenting, Raising Twins, Twin Pregnancy, Twins · April 25, 2020

The boys are officially four months old as of a couple days ago and it’s time for an update.  I had an amazing 2 weeks off from work to spend with the boys and my husband and I even got to crochet and blog. 

I’m feeling refreshed and right before the holidays I was feeling down about just how much I had to do. Then I had two weeks off and really got a chance to spend it with the babies and so that was wonderful for me. 

So basically, in the last two months a lot has changed and a lot has not changed. So I’ll break down some milestones and stuff that’s happening.


Twin Sleep

The boys are sleeping anywhere from 2 hour stretches to 2 ½ hours now. Before December they were sleeping 1 to 1 ½ hours. Now it’s 2 between the time they go down and the time they wake up. Occasionally they’d sleep two hours solid before but it was very scattered. 

Now they’re more likely to sleep 2.5 hours and even 3 hour stretches once in a while. It’s not like it’s something that we can plan on every night, but it’s happening more and more and it gives me hope that they’re starting to stretch out their sleep a little bit longer. 


Tummy Time 

They are enjoying tummy time. They’re laughing at us and chatting with us. They like making noises in response to sounds and noises we’re making which is amazing to see. They’re trying to roll over, which is just mind boggling to me. They’re throwing their legs and their butts over and then trying to roll their bodies. They can’t quite get their torsos over yet, so it’s just them throwing their legs over and trying to roll.  

They’re grasping things, they’re picking toys up and putting them in their mouths, and picking up blankets and putting them in their mouths. If I’m holding a blanket on my lap and the babies are on my lap, they’ll just grab it and pull it into their mouths. It’s really cool to see them making all these amazing strides on par with the development month and that always makes me feel better.

I know preemies are often adjusted and so they’re feeding and sleeping schedule is more like a month back but they’re motor skills and communication are right on par with babies who are turning four months.

Twin Weight and Height Update

Our one baby is 14 pounds 10 ounces. Our other baby is 14 pounds 8.5 ounces. So they’re closing the gap in their weight discrepancy. Before it was about five ounces. Now it’s less than two. 

They’re both exactly the same length and my twins are fraternal. I always assumed that they would start really changing in size from each other but they’re actually becoming closer in weight and height. So now they both are exactly 24 ¾  inches. As they start filling out with weight, they are also starting to look even more similar which is kind of cool. 


The Holiday Sniffles 

The boys had a cold and Matt and I got sick over the holidays probably from visiting a lot of friends and family. During this time of year you’re just going to come in contact with a lot of germs. The boys had a little bit of a cold, they were congested and sneezing, but had no fever or anything like that. They just were a little bit congested which made them not feel great and needed a ton more snuggles which we were happy to provide. 

I did take them to the pediatrician because you know I’m a new mom and everything’s scary. And when we went one of the things that the doctor had mentioned was that babies’ heads may need helmets. 


Baby Helmets 

I want to make a side note that we knew this might be something we would come across because it’s very common with twins to have babies in helmets. This is because in the womb, they don’t really have all the room they need to stretch out and oftentimes their heads are pressed against places they normally wouldn’t be. They can get into very weird positions that don’t normally happen when there’s just one baby in there. So we knew that that could be a possibility. 

Obviously, that’s not a really scary thing. You can decorate them and most kids are only in them a couple of months if you catch it early, like our doctor did. 

But the one concerning thing that we were told is that one of the twins they believe could have early fusion between two of the plates and so that his skull is not moving correctly. We actually have to go see a neurosurgeon about it. 

And I don’t want to assume that it’s going to be the worst case scenario. I am trying not to read too much into it. I want to just go talk to the doctor and see what they say. But our pediatrician did say that if they found that there had been some fusion, we would be looking at surgery. And so while I understand they just have to tell you all the options and reasons they are sending you, obviously, as a mom, you never want to hear that. 


The Neurosurgeon and the Twins

I’ve been doing my best not to worry about it. We scheduled with the neurosurgeon today and we’ll see what their next appointment is and go get his head looked at. They’re going to scan his head and then they will be able to tell us whether or not they can go right into helmets or if he’ll need surgery before he goes into a helmet. 

I have been deeply considering reaching out to other people who have had cranial surgery, but I feel like I might be getting a little bit too ahead of myself. 

We don’t even know if we’re going to have it. Right now it’s just that the pediatrician said from the looks of it that it might be a possibility. He’s seen it happen before. There were telltale signs like on his head and in his jaw line that a plate could be fused. They’re just kind of telling us everything that could happen. And again, as a new mom or a mom in general, you’re just going to freak out when you hear surgery. At least I do. 

For the first day, I was really upset and then the next day I was like: You know what? I need to stop – I need to not reach out right now. If it happens, then I’ll reach out to people who have the surgery. Until we know for sure, there’s no reason for me to sit here and dwell on it, even though it’s really hard not to. So I’m just keeping our hopes up that these are just simple issues that a  helmet can fix with their head shape. 


Why Do Babies Get Helmets

There are a lot of reasons that babies go into helmets. It can be for cosmetic reasons when your skull is misshapen or serious developmental reasons like the bones of the skull not moving right. That can actually cause developmental problems later on in life. So it’s not just that you have a weird head shape. Your bones are meant to fit together in a very particular way to protect your brain, to protect your spine, to protect your jaw, your nasal cavities and everything around that area. 

It isn’t something to take lightly if he does need it. We would choose to go forward with it to make sure he’s developing correctly.

If he requires surgery, it would be to ensure he has the right bone structure and development for a well protected brain and that his nasal cavities and jaw are aligned correctly. That’s the biggest thing that’s been weighing on my mind. That happened only about a week ago. So like I said, I’m doing my best not to stress.

I will obviously keep you updated on what the neurosurgeon says and then obviously I’ll be recording the boys getting helmets. I’m really glad that I have seen and followed other twin moms that have their boys or girls in helmets because it really makes me realize that it’s very common. It’s also a lot easier than I thought it would be. I have seen moms record themselves putting helmets on their kids and the kids playing in them, so it’s much less intimidating. I thought they’d be heavy for the babies and they would have a hard time holding their heads up. In fact, the helmets are super light and one of the girls that has twins actually decorated her kids helmets and it’s really, really cute with their initials on them. 

So knowing that if we’re going to have to have them, I think that something cute that we can look forward to is decorating the boys’ helmets and I will keep you updated. 

But other than that the boys are obviously growing big and strong. We are getting a little bit more sleep and their development is going great. Now it’s just waiting on the helmet decision and the neurosurgeon. 

I hope that you guys enjoyed the twin update. They are doing amazing. They’re so smiley, so cute. And I just love being able to actually share them on video now that they’re a little more awake. I can’t wait to update you on how all of this goes! 


Do you have a baby in a helmet or have you ever had any of your babies in helmets? Leave me a comment below about your experience!

Our First Easter with the Twins

Lifestyle, Parenting, Twins · April 18, 2020

I wanted to share a peek into our first Easter with our twins. This Easter was different for a lot of reasons. First, we now have two beautiful baby boys to love and enjoy it with. They are officially 7 months old. But it’s also the first Easter that I can remember not going somewhere to celebrate with other family members. With our state under stay at home guidelines in an effort to social distance, we did not go to Matt’s parent’s houses or visit friends. Instead, we enjoyed the babies and Easter at home and it was still wonderful.

I had debated back and forth on getting a traditional Easter ham for dinner but the store I went to for groceries (that week it was Target – much less packed than the regular grocery store) did not have any hams in stock. I also debated on the babies getting special outfits but in the end, I did buy them the outfits and soft blankets as their gifts which is allowed on my spend fast. And if you don’t think a soft blanket is a good gift, ask the boys, they love their snugly blankets.

So what did we do? I packed this soft woven basket with a few gifts my friend and my cousin sent us and a crocheted Easter chick my Aunt crocheted. Then we dressed up the boys and let them explore in the basket. They are getting to that stage where they find it fun to pull stuff out of things. It was a hit. And not so surprising, so was the basket. My basket that used to live in the bathroom cabinet now is in the living room in the boy’s play area cause they just love the soft thick cloth basket.

We also took a lot of pictures and took a walk outside in the sunshine. We also ate leftovers and made baby food for the week. We got to facetime and chat with some of our family too. It was a really memorable and precious first Easter for us with the babies.


Grain-Free Protein Cookies

Dessert, Recipes, Snack · April 18, 2020

Protein cookies are a great way to add some extra cookies to your day. And protein. But I dug this recipe back out and made a few adjustments from the original one I made years ago. My first recipe used whey isolate protein but I have since switched to a vegan protein because it’s easy on my stomach. I also adjusted the peanut butter down to make denser cookies and tried this for the first time with creamy almond butter and it was amazing!

So what made me want to incorporate some protein cookies into my day? Well, we are home on self-quarantine and of course, snacking has been (as it always has) my biggest struggle. I find myself snacking when I’m not even hungry. I have also been craving cookies and almond milk and instead of continuing a very unhealthy love affair with Oreos, I decided to create a healthier cookie I could snack on.


Grain-Free Protein Cookies 

Ingredients:

¾  cup creamy peanut butter

¾ cup coconut sugar

1 egg

2 scoops Detox Organics Vanilla Protein


Instructions:

  1. Preheat oven to 350 degrees F and line a baking sheet with parchment paper.
  2. In a large bowl combine coconut sugar and vanilla protein powder and mix together completely. 
  3. Add egg and peanut butter and mix thoroughly. 
  4. Roll into 9 cookies (or 12 smaller ones) into balls and place them on the cookie sheet. Press gently down on cookies to flatten them in a cross pattern with a fork.
  5. Bake for 10-12 minutes until golden brown.
  6. Let them cool for 15 minutes on the cookie sheet before moving.


Notes for better cookies: 

I originally used 1 cup of peanut butter for bigger cookies but cut it down to make denser cookies when baked. If you like lighter cookies use a full cup of peanut butter.

Creamy almond butter works well in these too. Be sure to use creamy and no stir to make the recipe work. 

When mixing the ingredients all together I like to use clean hands because it really gets all the ingredients combined as best as possible. 

These cookies do not spread almost at all so they will be as flat and large as they are when you put them in. Be sure to size them according to how big you want them. 

Pressing them with a fork helps keep them a good depth for cooking all the way through.

Letting the cookies cool for a full 15 minutes helps keep them together so they don’t break apart when you move them.

Shamrock Shake the Healthy Way

Dessert, Recipes, Smoothies · March 24, 2020

The Shamrock Shake has been a St Patty’s Day staple for years. This was originally made popular by McDonald’s with their seasonal shake that brought milkshake fans out in droves. And when it’s gone, people are disappointed and have to wait a whole year for the shake to make it’s way back on the menu.


But I decided that there had to be a way to make this fun dessert a little healthier. This was made with all the regular ingredients I have in my house. 


Now you may ask why I have mint chlorophyll drops just sitting on top of my refrigerator and I’ll explain so you don’t think I’ve lost my mind. 


Years ago I was introduced to a refreshing drink at a local juice bar. It a large mint green water with fresh lime in it. The ingredients were only water, chlorophyll, and lime juice. I had seen people taking chlorophyll supplements to help with minimizing body odor as they stopped using traditional deodorant as well as a way to support the bodies natural detoxification process overall. The drink was delicious, but it was also over $10 per bottle. 


While I have no problem supporting local business and got one each time I went and enjoyed time in their shop, I knew I couldn’t justify spending that amount of money on a bottle of enhanced water every single day. So after a little research, I found a small supplement company on Amazon who sold chlorophyll in dropper form with a subtle mint extract in it for flavor. 


So when it came in the mail and I mixed it into some freshly squeezed lime water, it tasted exactly the same and was just as energizing and refreshing as the original drink I love. I have kept it stocked in my house ever since so that it’s another way to flavor water and helps me drink more of it throughout the day. 


I also keep a stash of cashew ice cream because regular ice cream does not make me feel well when I eat it. Of all the nondairy choices of ice cream, cashew is my favorite. I have tried almond milk ice cream but it doesn’t have the consistency I like. And to make this recipe even creamier I used my everyday go-to vanilla vegan protein by Detox Organics.  


Feel free to add more of the chlorophyll drops to your recipe if you like a stronger mint taste, the recipe I post below has a light mint flavor. It also has a light green color. If you double the chlorophyll in the recipe the color will be deep green and a strong mint flavor will show through. 

Ingredients:


½ cup vanilla cashew ice cream or ½ frozen banana 

1 scoop Detox Organic Vanilla Protein 

½ cup unsweetened vanilla almond milk 

1 full dropper of mint chlorophyll drops

1 cup ice

Top with enough water to match ice levels


Instructions: 

  1. Add all of these ingredients into a blender and blend on high until a smooth, thick shake consistency. 
  2. Enjoy!


Share this recipe with a friend who loves the shamrock shakes or share how you’ve made your own version in the comments!

How to Get Better Milk Output When You Are Exclusively Pumping

Breastfeeding, Exclusive Pumping, Pumping, Twin Pregnancy, Twins · February 16, 2020

When you’re exclusively pumping, the amount of milk you get each time is dependent on how well you empty the breast. One of the biggest things when trying to get as much milk as possible is that you need to follow a few tips to empty the breast completely and keep your output up.

One of these is pumping more often. When you’re exclusively pumping, you have to pump in a way that mimics the way a baby would be eating. So that’s every two to three hours for very small babies if you’re trying to keep your supply up. 

The other part of it is emptying the breast fully every time that you pump, but it can be hard to do this. When babies nurse, they’re very effective and efficient at emptying the breast. The pump however, is not, so there are some tricks that you can use to get more milk out of the breast every time that you pump.

Destressing

Exclusively pumping can be very stressful, but the number one thing when getting more milk out of the breast is to destress. Be as unstressed as possible when you’re pumping. I know this sounds ridiculous because you probably have a newborn and if you’re exclusively pumping, you’re probably very, very busy, but the less stress that you can bring to a pumping session, the better. 

If that means finding a quiet spot to do it away from crying, screaming, or even the hustle and bustle of your house, do that. If that’s not an option, there are a couple of things that you can do. Studies show that listening to relaxing music and being guided through meditation while pumping actually can double the output versus moms who are not listening to music and guided meditation. There are so many free apps on your phone now that have music and guided meditation.

There are also entire YouTube channels dedicated to relaxation and guided meditation. This would be someone guiding you through a 10 minute meditation, or 15 minutes, however long you plan on pumping, to help you relax and get into a meditative state. If this is possible, throw on a pair of headphones and find a YouTube video or an app that has music and guided meditation. This can often bring down your cortisol levels and let your milk ducts relax enough to really empty out to their full capacity. 

Heat

Another thing you can do to help empty the breast better is to apply heat. Heat opens up milk ducts and helps milk flow more freely. If you have a heating pad, one of the easiest ways to do this is to place it on your chest for about five minutes before you pump.

If you’re not using a pumping bra, you can also use a heating pad during, but I find that it’s harder when you have a pumping bra on and you’re using the hands-free style pump. If you have a smaller heating pad though or a microwaveable heating pad that’s a little bit smaller than a traditional one, then it might be a really good idea to heat them up in the microwave and then put them inside your pumping bra once your pump is going and well adhered to the breast.

Vibration

Another way which requires you to purchase something, but is really effective and compact, is the LaVie Lactation Massager. This small, oval-shaped device not only warms up, but also vibrates. And both of those in combination are known and proven to help empty the breast better and more efficiently.

This massager ranges anywhere from about $50 to $70 depending on where you buy it. But I think it’s really worth it if you’re exclusively pumping and you really need the most efficient emptying of the breast each time. 

Similarly, you can use devices that only use vibration. There are a lot of lactation massagers on the market and these are actually covered by health savings accounts (HSAs) where you can use pre-tax dollars to purchase medical equipment. Because a lactation massager is medically proven to help with clogged milk ducts and better emptying of the breast, these are actually covered by an HSA card. So if you have one, you can use your HSA money for it. If not, these range anywhere from $20 to $40.

Again, you can get one that also warms up so it does double duty or you can get one that just vibrates. If you already have a heating pad and you’re okay with just holding the heating pad on it, these little lactation massagers can go inside of the bra that you’re using or you can manually massage the breast with the lactation massager.

Hand Massage

That leads into the next thing that you can do to get more milk while pumping. That is hand massage. While vibration is a really good and a little bit quicker way to do it, instead of buying a lactation massager, you can just manually massage your breasts to help loosen up the ducts and get the milk flowing. One trick is to do it for about a minute to two minutes before you put on the breast pump and then gently massage around the breast while pumping.

It’s easiest to do this before you put on a pumping bra that holds the pump. But if you’re not wearing a pumping bra while pumping, then you can manually massage your chest while the pump is on you. I do think the best thing to do is to massage your breasts for one to two minutes before you put your bra on, and then you can also use your hand to massage while pumping. But I think just a little bit before helps if you can’t massage your breast while the bra is on. 

These are all really great ways to get the milk to flow better and I think that practicing relaxation is the best, but at the end of the day, what really helps to keep the milk supply up is to make sure the breast is completely empty. So while a lot of these things help empty the breast, the best thing to do at the end of every pumping session is just 30 seconds to a minute of hand expression.

Hand Expression

You can find an excellent video tutorial of hand expressing here, but basically it’s just getting the last couple drops of milk out of the breast. This is done by applying very gentle pressure, and that doesn’t mean hurting yourself. You don’t want to squeeze and make the nipples or the breasts sore. So what you’ll do is cup your hand into a “C” and place it around the areola. Then you’re going to push the breasts back gently so that you’re compressing your breasts to your body and squeeze inward gently once the breast is pushed in towards the body. 

You don’t want to squeeze them hard. You want to apply just enough pressure to get milk from the breast, and this will help get any excess amount of milk that’s leftover from the pump that the pump wasn’t able to get out and it basically empties the breasts.

The breast is constantly making milk. It will never be 100% empty, but when you’re only getting little little tiny drops from it, you know you’ve pretty much gotten the majority out. It won’t be flowing freely if you have emptied the breast efficiently. 

One Last Note

I think that people have this misconception that if the pump that you’re using is turned on higher or a stronger suction, it will get more milk out. But this is just not true. You can actually get just as much milk pumping on a lower setting if you’re more comfortable, because it goes back to the stress thing. Any amount of discomfort or pain or agitation to the breasts while pumping is going to cause the milk ducts not to flow as freely.

I encourage people to pump on the setting that is comfortable for them, not what they think they need to get more milk. Being uncomfortable and having a harder suction might actually backfire and be more stressful on the body and obviously rougher on the breast, and both of those are counter productive when you’re trying to relax and get more milk out of the breast. Instead of using higher suction, try using some of these techniques to empty the breast more efficiently and get more milk per pump.

I hope this helps you on your pumping journey.

Apple Pie Milkshake

Breakfast, Dessert, Recipes, Smoothies, Snack · February 15, 2020

This protein-packed milkshake is a healthy way to satisfy a sweet tooth without sacrificing nutrition. It can serve as a meal, a snack, or a healthy dessert. Plus, the protein will actually help you feel fuller longer.

I am also a big fan of making this in the fall. Come autumn, apple pie is everywhere and we found a way to make it a breakfast food. It’s also a great dessert smoothie to enjoy.

With the protein, feel free to subsitute any of your favorite vanilla protein brands. You’ll want to just make sure you are picking a vanilla flavor and not an unflavored protein becuase it will throw the taste way off without it.

One note on the banana, it’s always best to get the ripest banana beacuse the flavor will be more robust in this recipe!

Ingredients:

2 Scoops Detox Organics Vanilla Protein

1 banana (ripe)

1 cup of ice

1/2 cup applesauce unsweetened

1 tsp ceylon cinnamon

1/2 cup unsweetened vanilla almond milk

1/2 cup of water

Instructions:

Blend all of these ingredients together. Top with a dusting of cinnamon on top once poured into your cup!

  • « Previous Page
  • 1
  • 2
  • 3
  • 4
  • 5
  • 6
  • …
  • 18
  • Next Page »

Explore

  • Breakfast
  • Breastfeeding
  • Dessert
  • Dinner
  • Drinks
  • Education
  • Exclusive Pumping
  • Lifestyle
  • Lunch
  • Money-Saving Tips
  • Parenting
  • Pumping
  • Raising Twins
  • Recipes
  • Restaurant Guide
  • Sides and Sauces
  • Smoothies
  • Snack
  • Twin Pregnancy
  • Twins
  • Uncategorized
Design by SkyandStars.co

Copyright © 2026 · LovePeace Theme by SkyandStars on Genesis Framework · WordPress · Log in